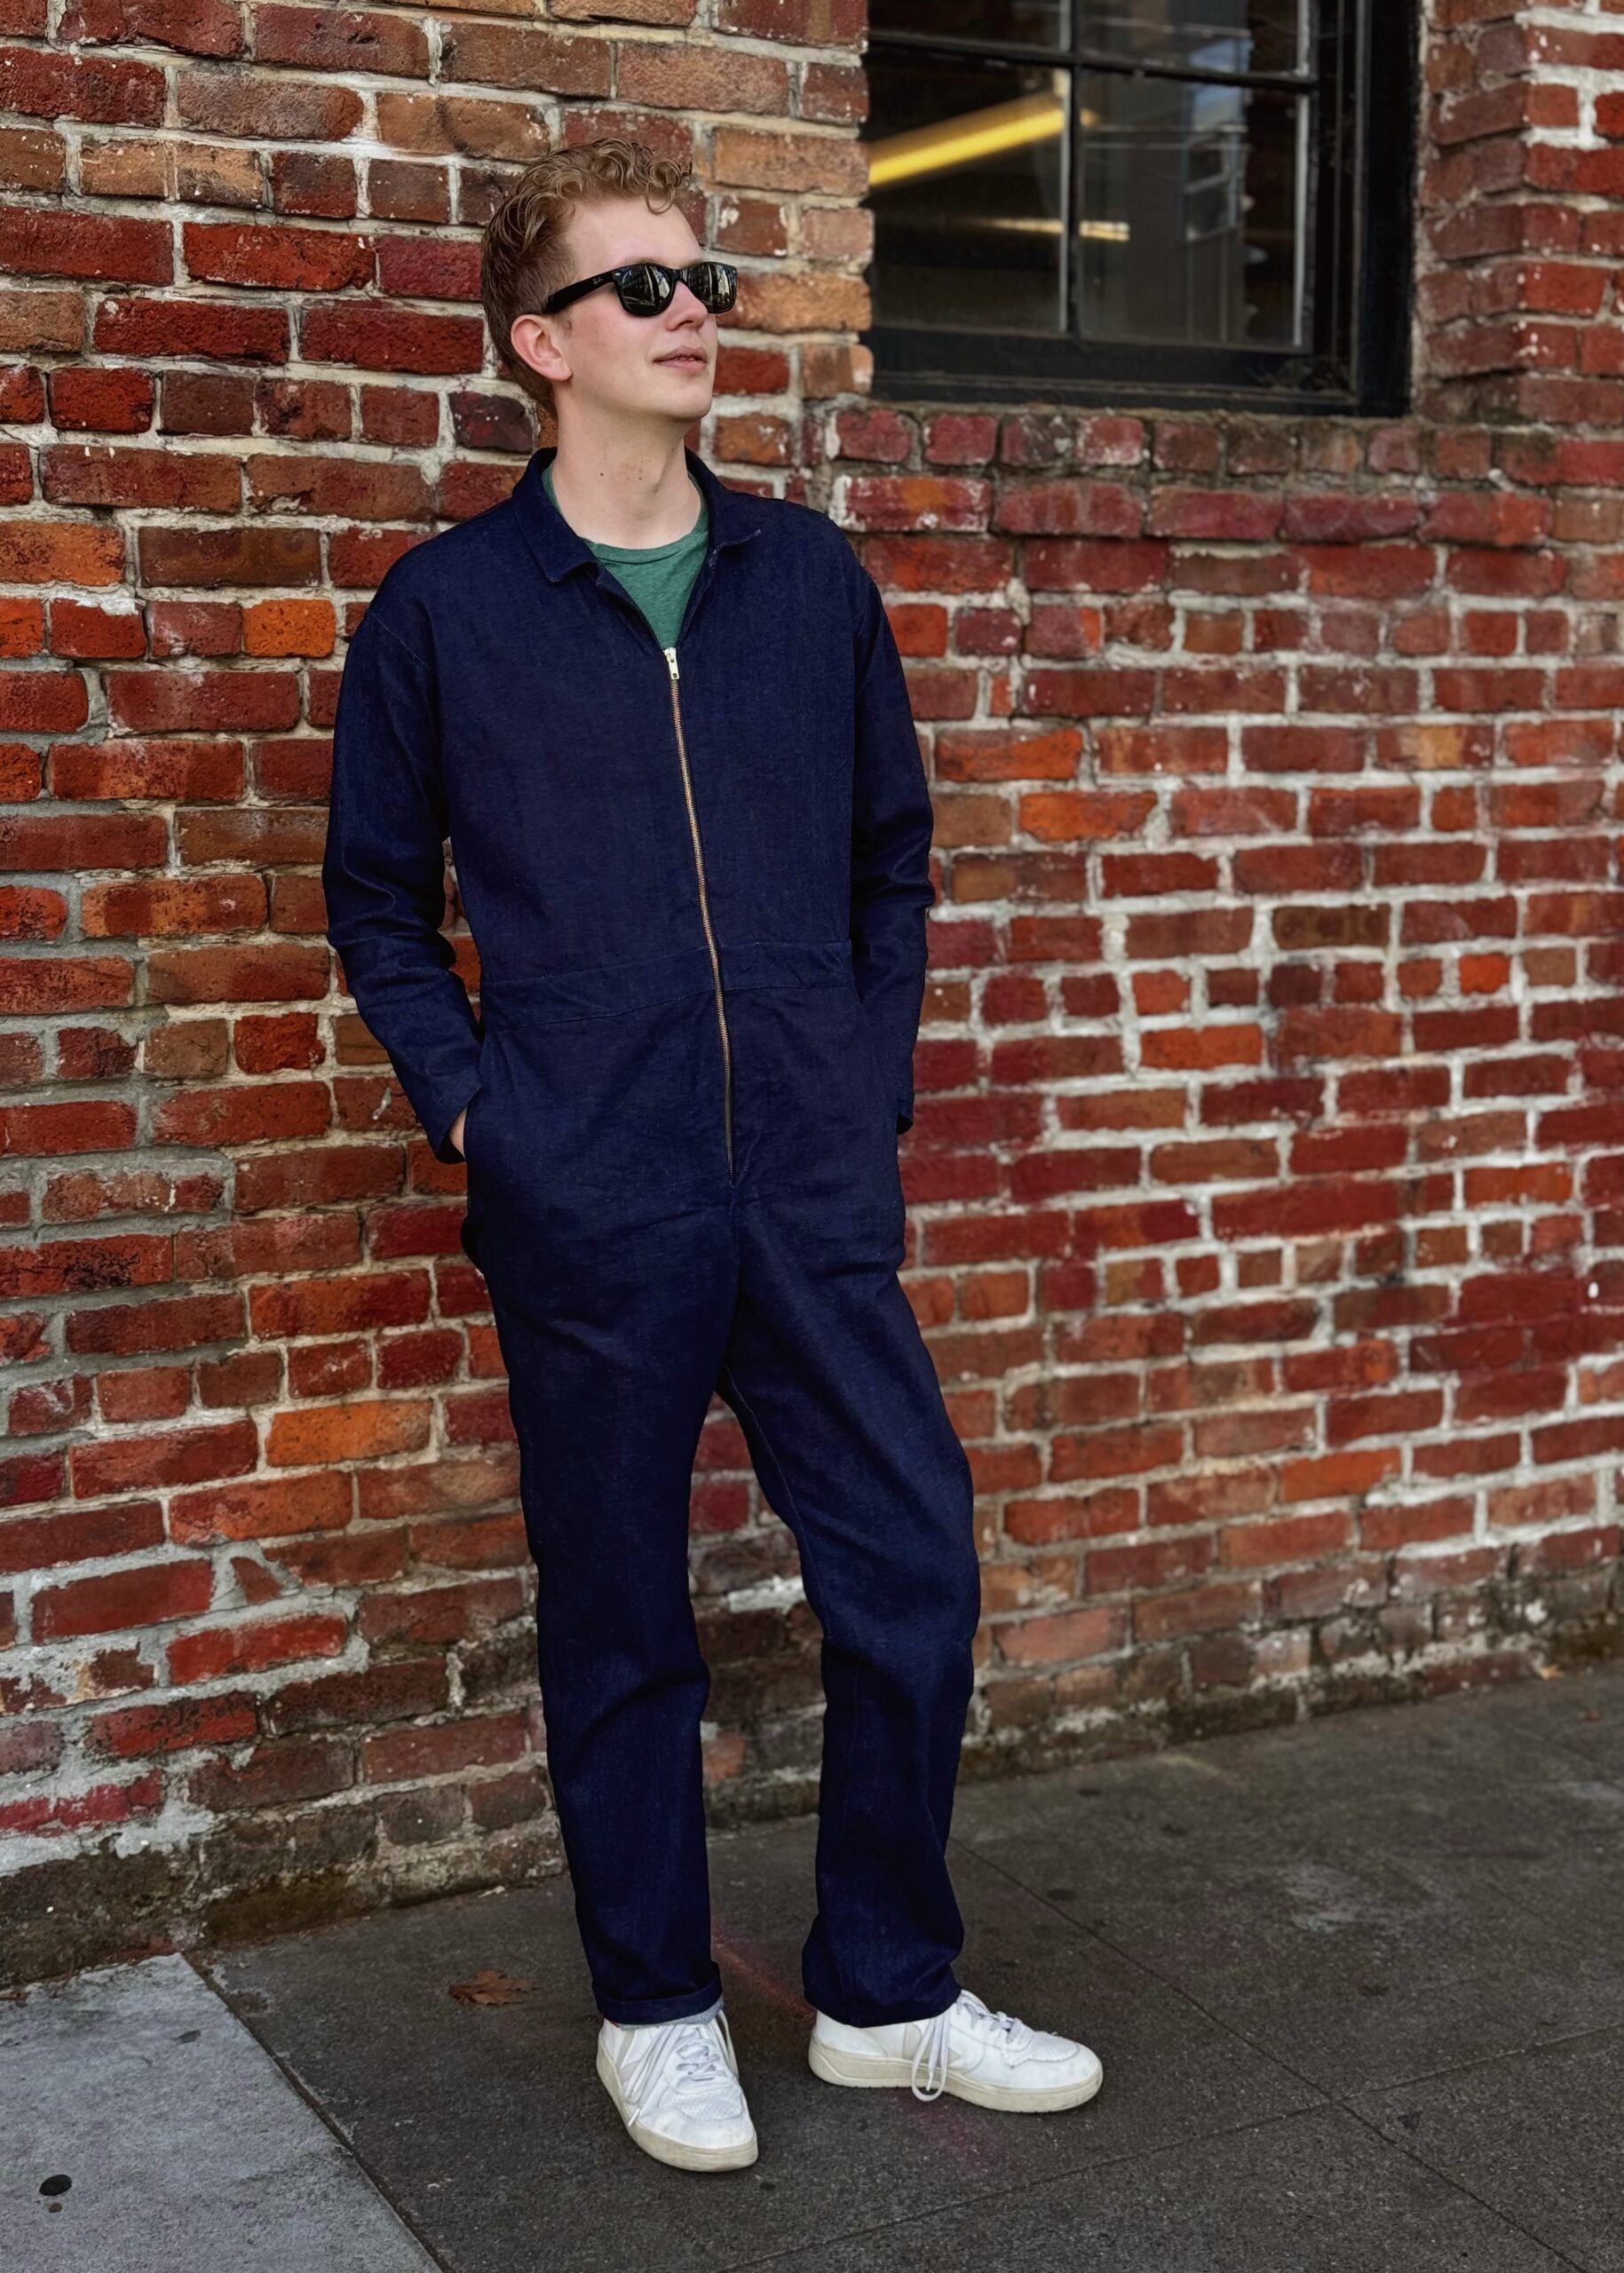
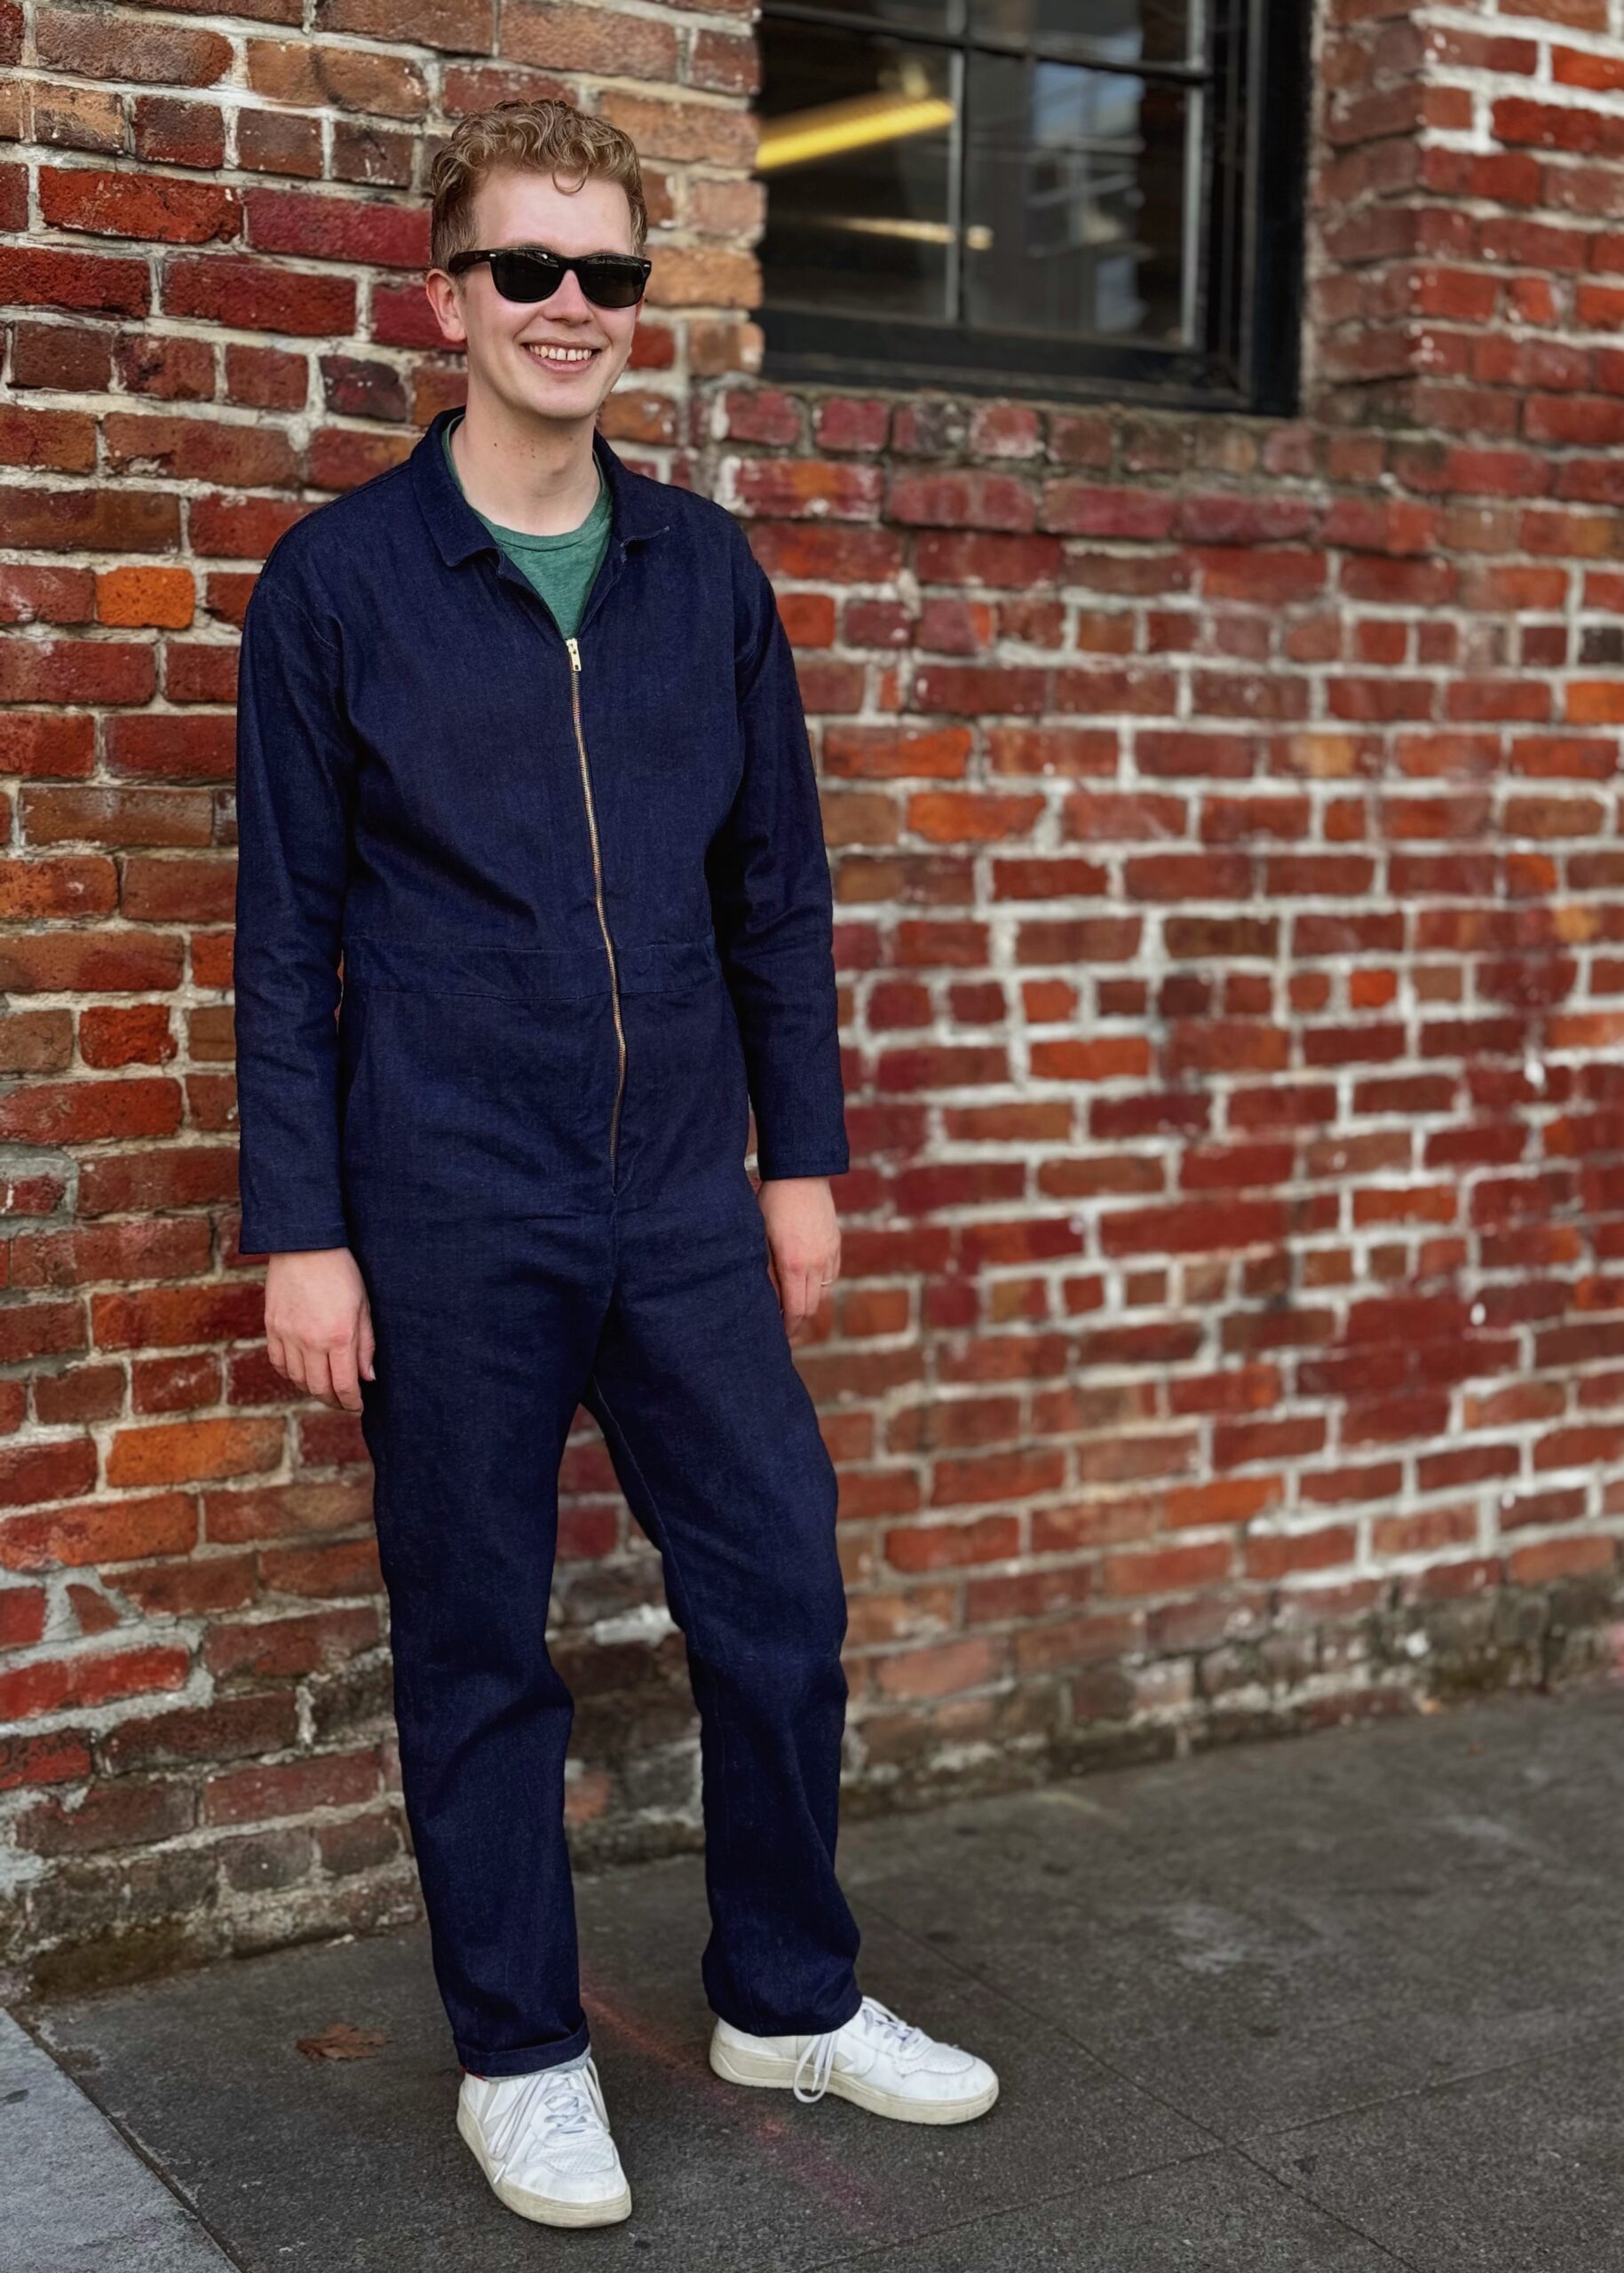
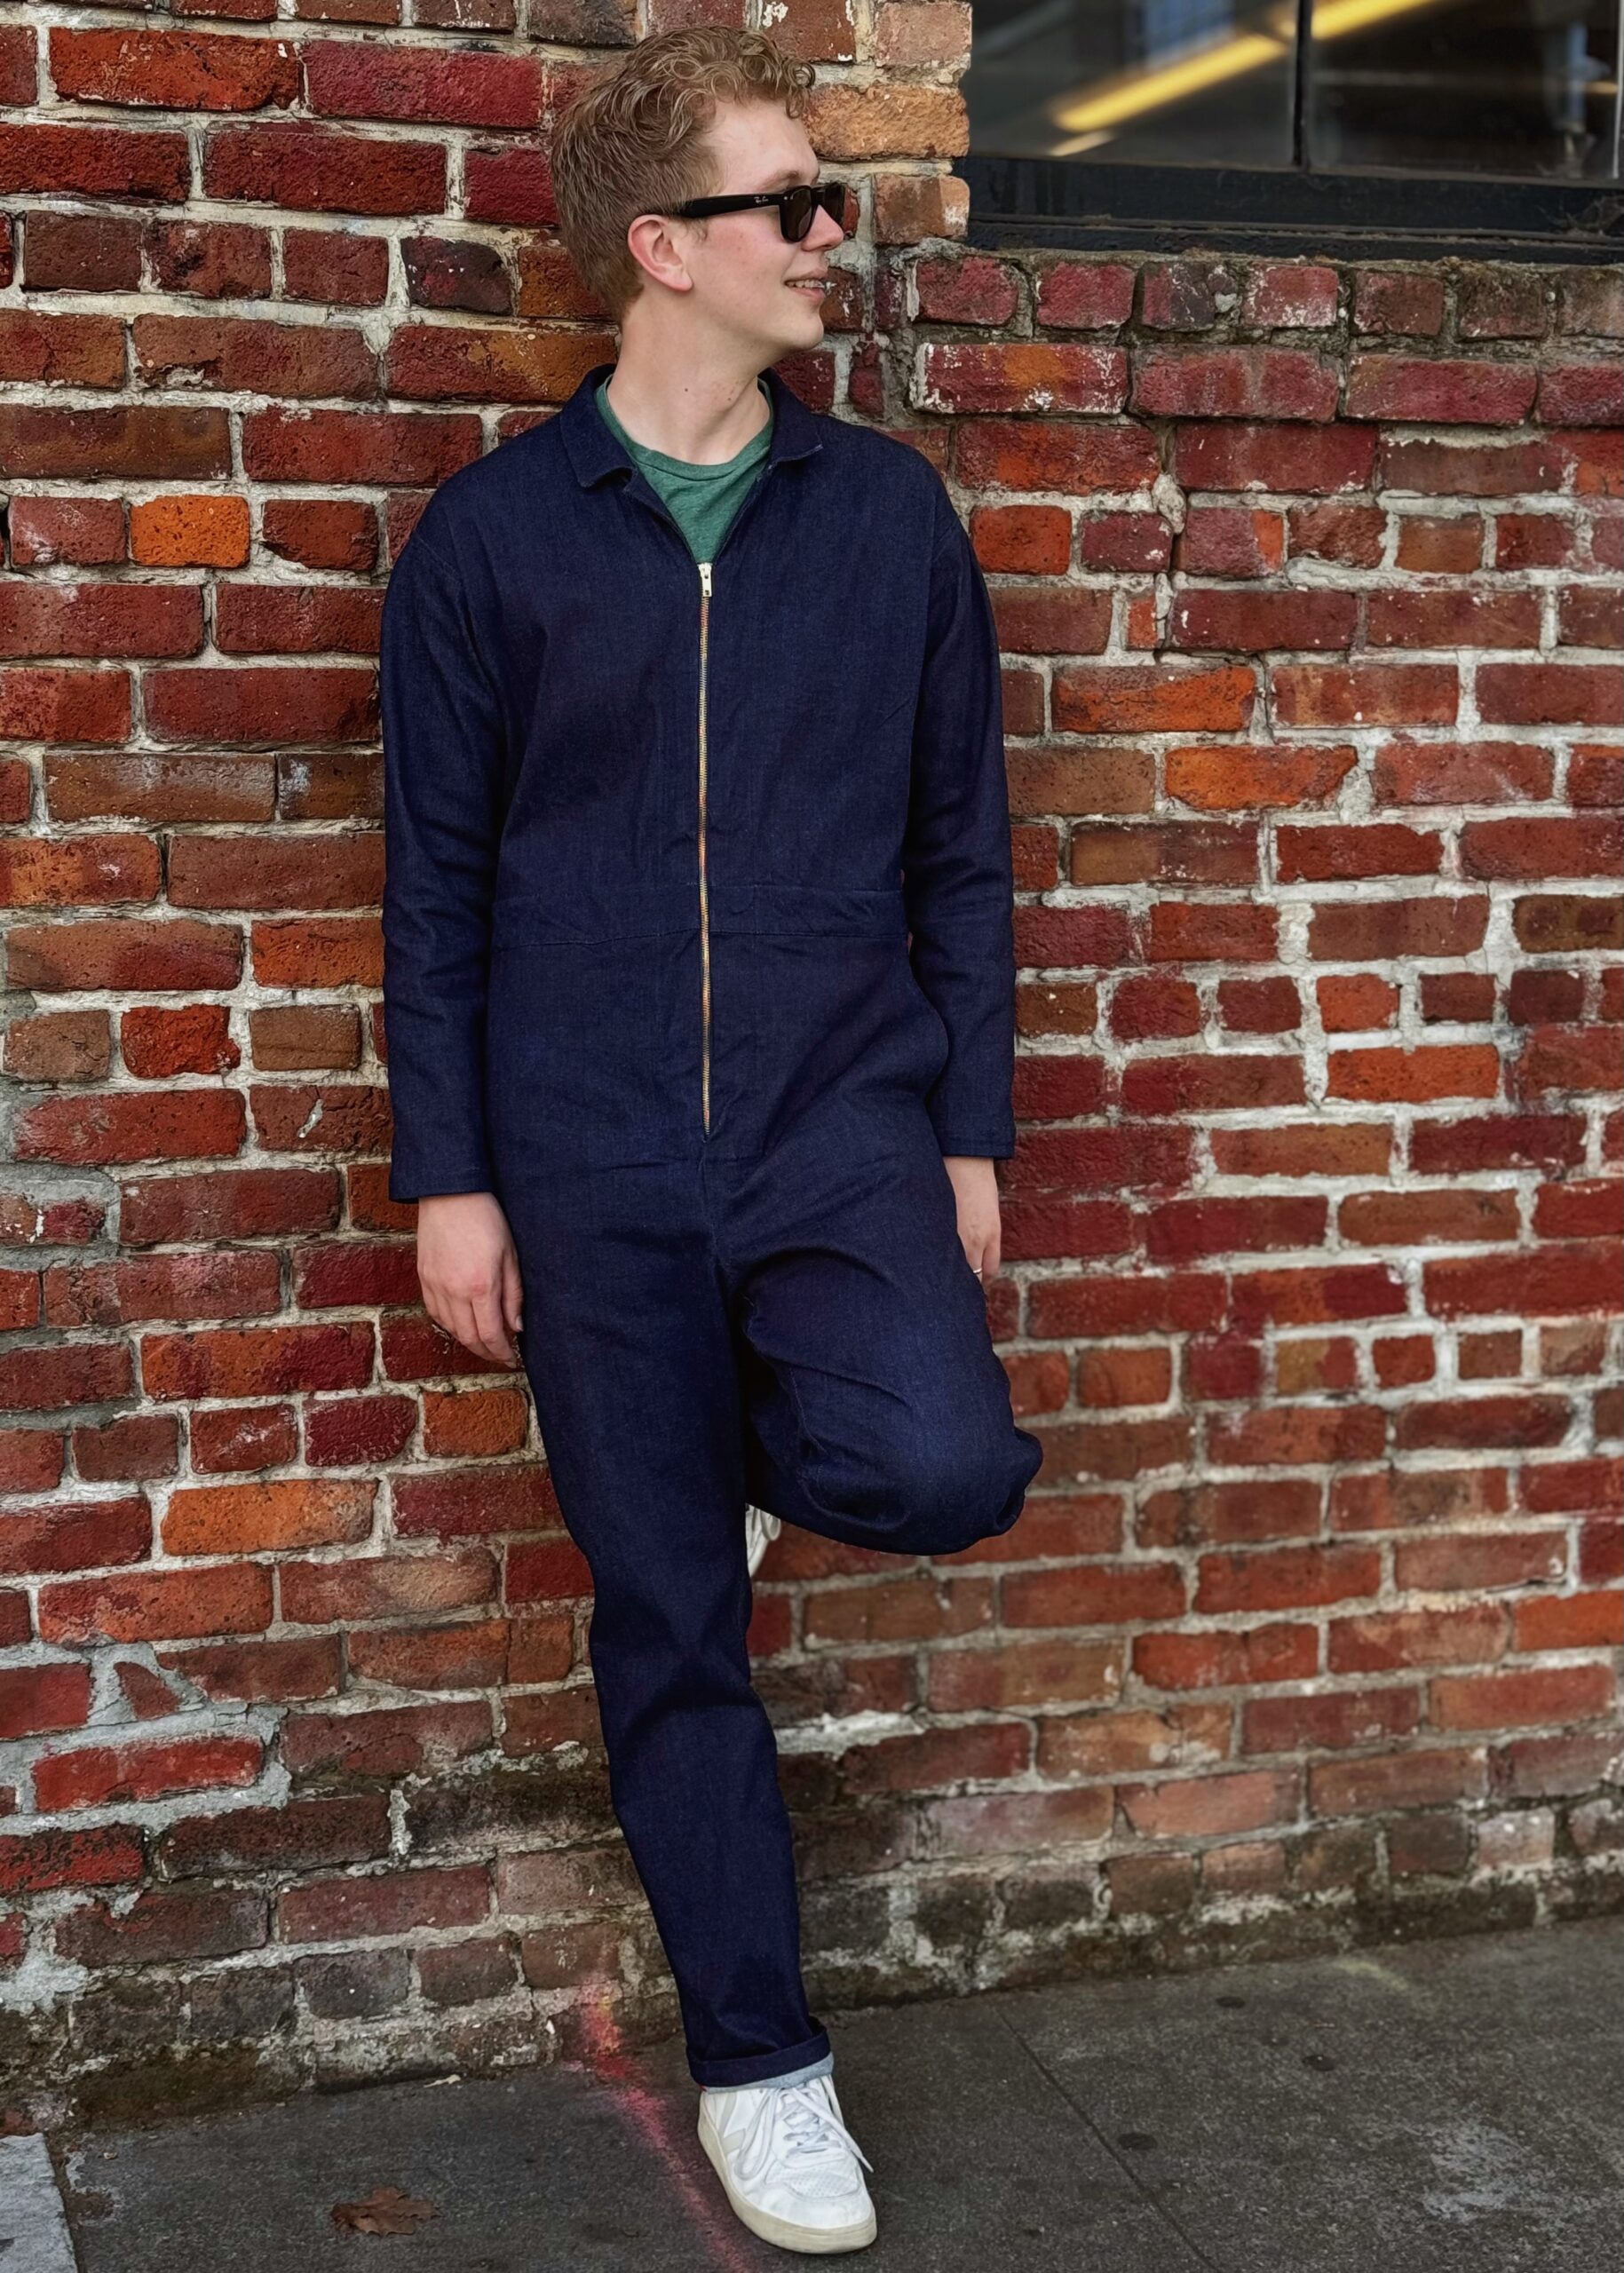
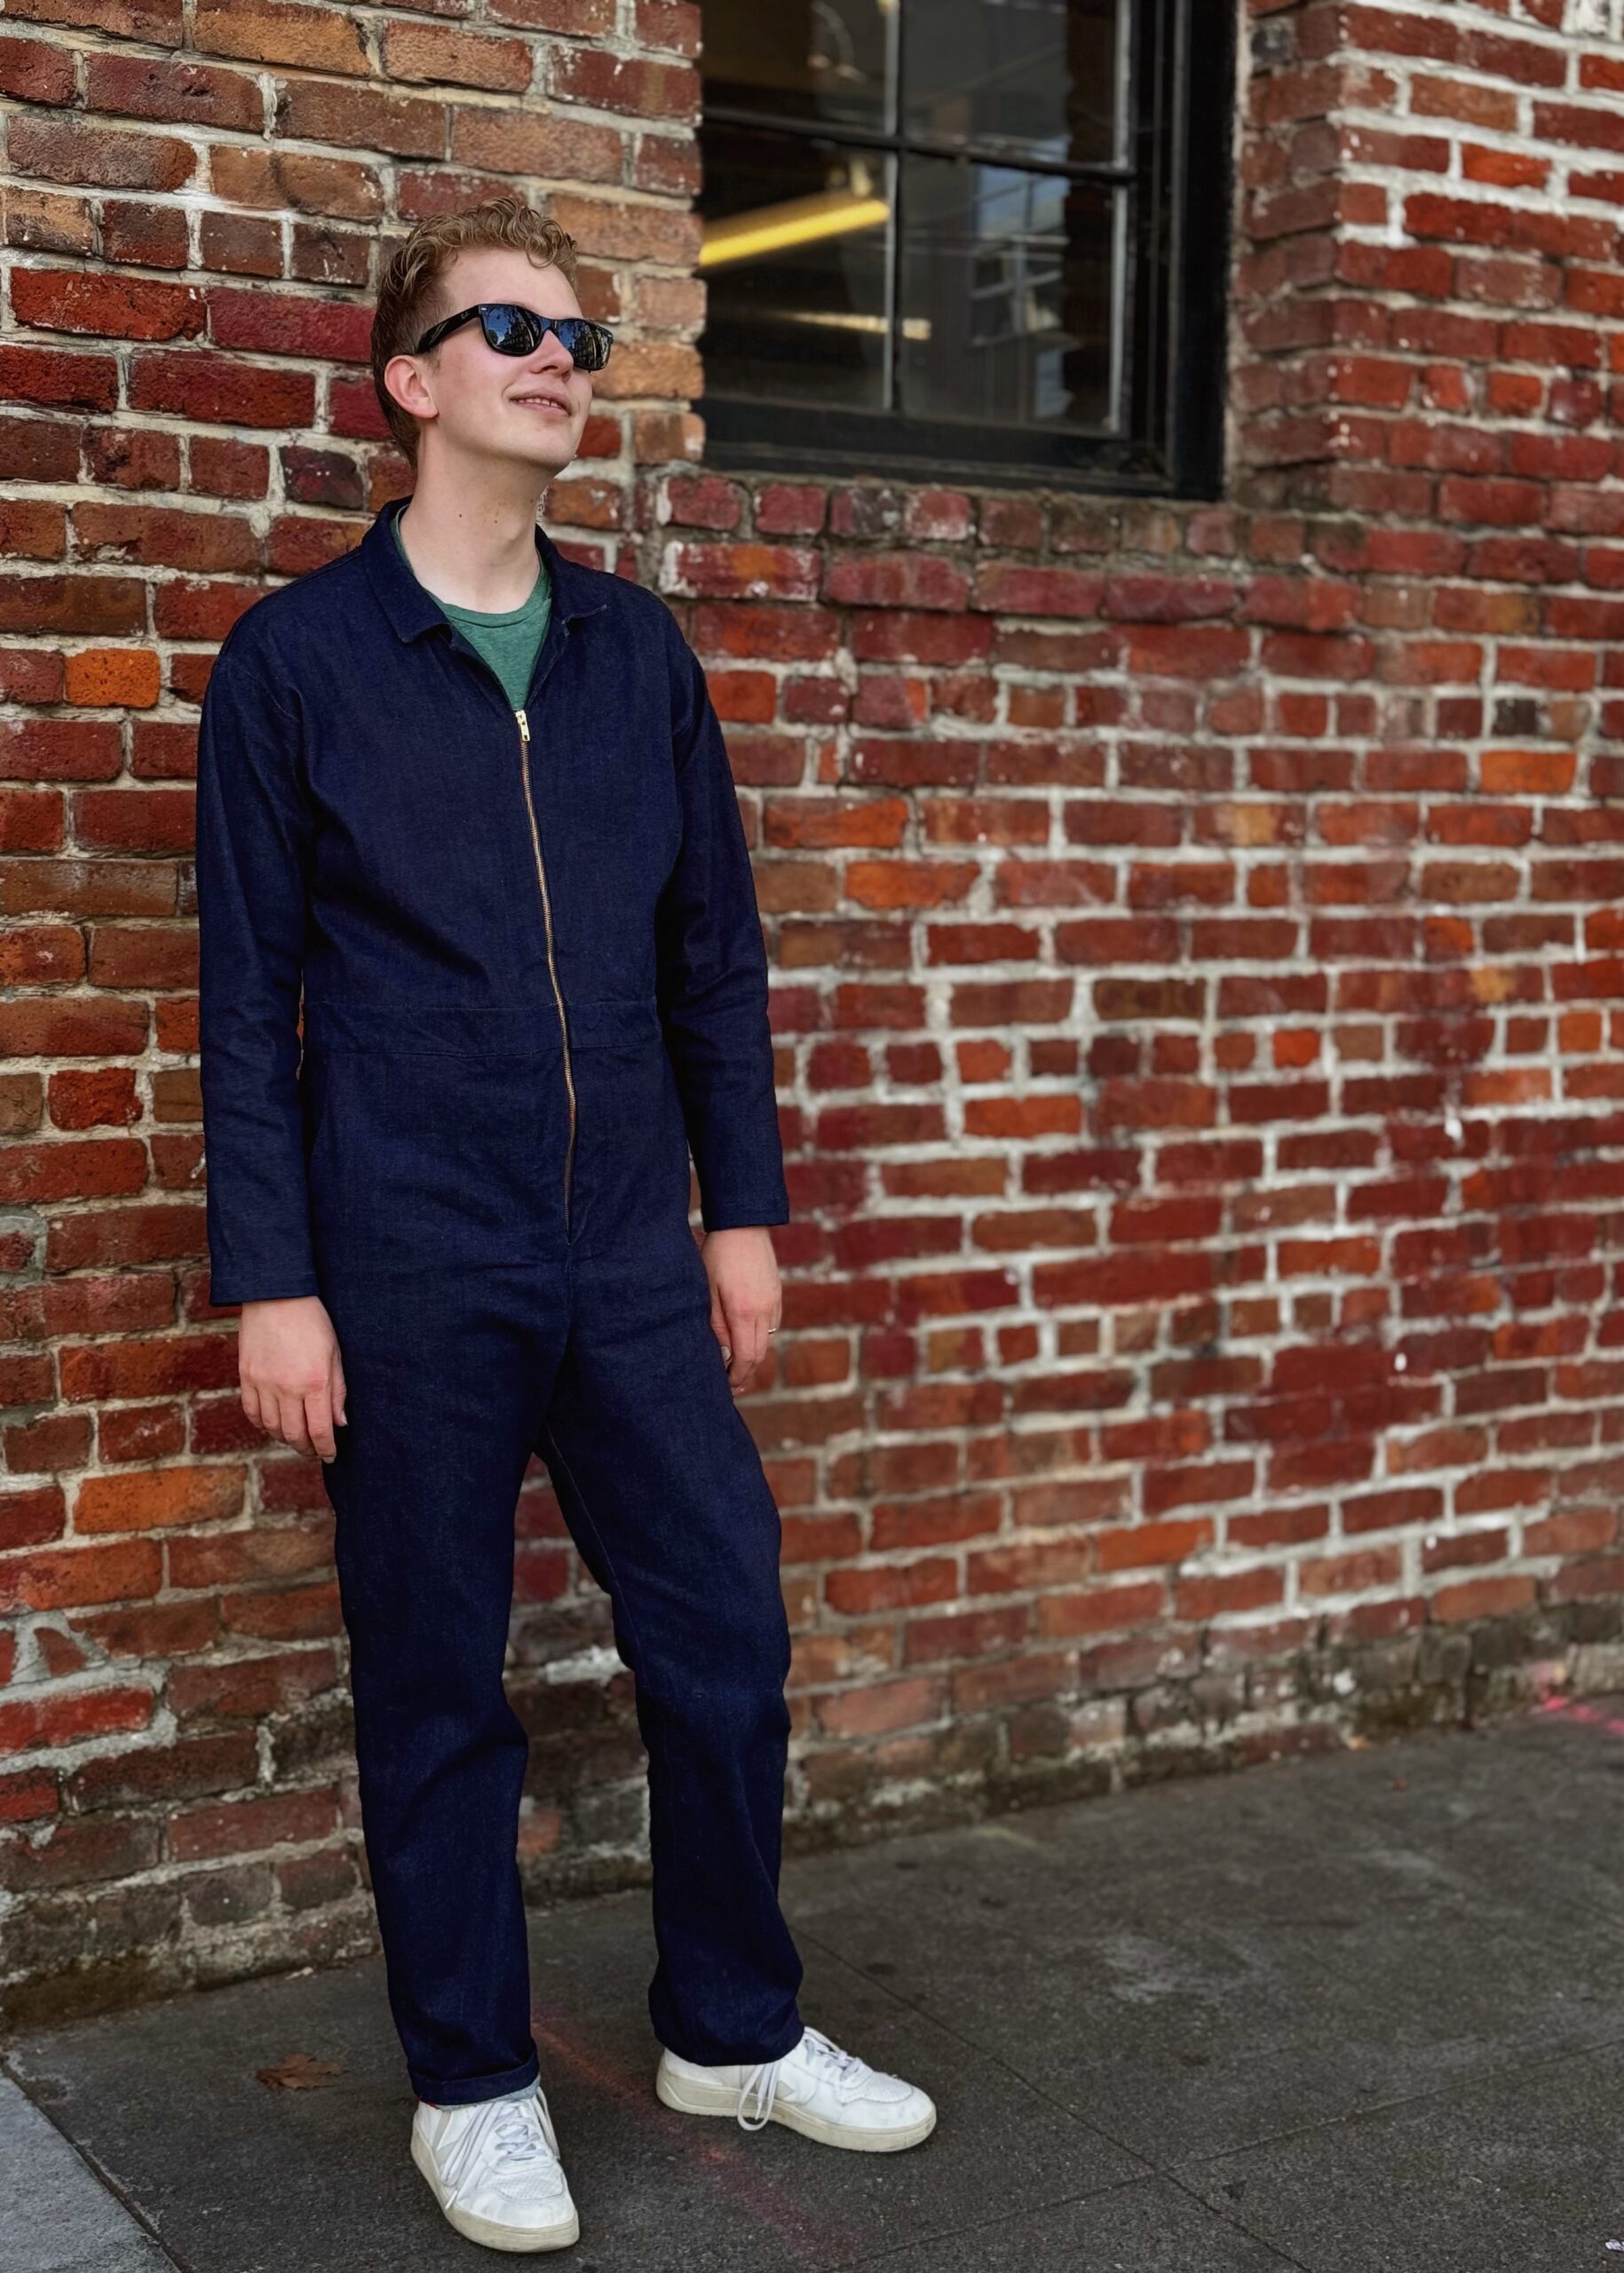
Earlier in October, I convinced Simon that we should head up to Berkeley and visit Stonemountain & Daughter Fabric for a general peruse and to buy a few notions for some of my in-progress projects. While we were there, Simon picked up this deadstock indigo stretch denim on sale, quickly became smitten, and asked if I could make him a boilersuit. Luckily for him, I enjoy a challenge 😊 There wasn’t that much yardage left (I think it was just about 3 yards) and it was a relatively narrow width, which had me a little concerned — Simon is over 6’3, and I have had to always lengthen the torso, sleeves, and legs on the other previous garments made for him. Nevertheless, we bought the remaining bolt of fabric and sat down to research boilersuit patterns for men… which seems to be a hugely limited selection? I only found two in-print patterns, and a small handful of vintage patterns on Etsy, but nothing that really suited what he was looking for; a sharp, tailored boilersuit that didn’t look too utilitarian, with a simple collar and exposed zip. In the end, I opted to use a Know Me pattern and hack it to get the result he was looking for!

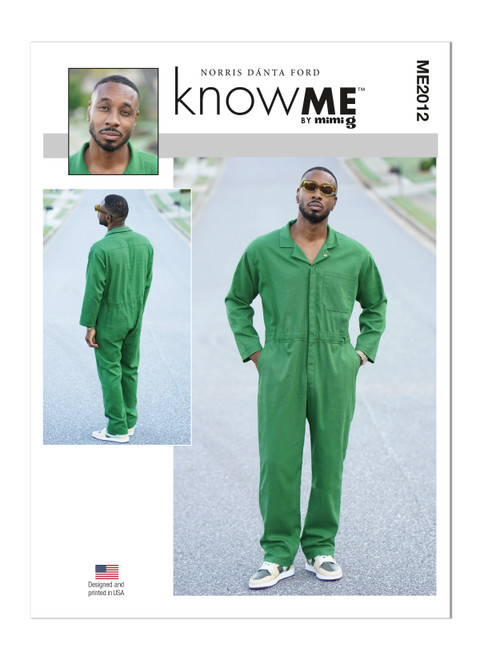
Know Me 2012 is a relaxed fit boilersuit, which can be made up in a variety of medium-weight woven fabrics, like canvas, cotton broadcloth, and denim. It is a relatively simple design, with a lapel collar, a concealed placket zip closure, and a elasticated waist, with back patch pockets and slant front pockets. It was a pretty good starting point to make various modifications to nail the fit and the look Simon was wanting, but word of warning — there is a lot of ease factored in. Obviously, the design ease is for a much more relaxed fit than what we were after, but Simon’s body measurements would have put him in a size 42 and there is 12″ of ease at the waist based on the finished garment measurements. If you want a similar look to the pattern envelope, be prepared to size down a lot.
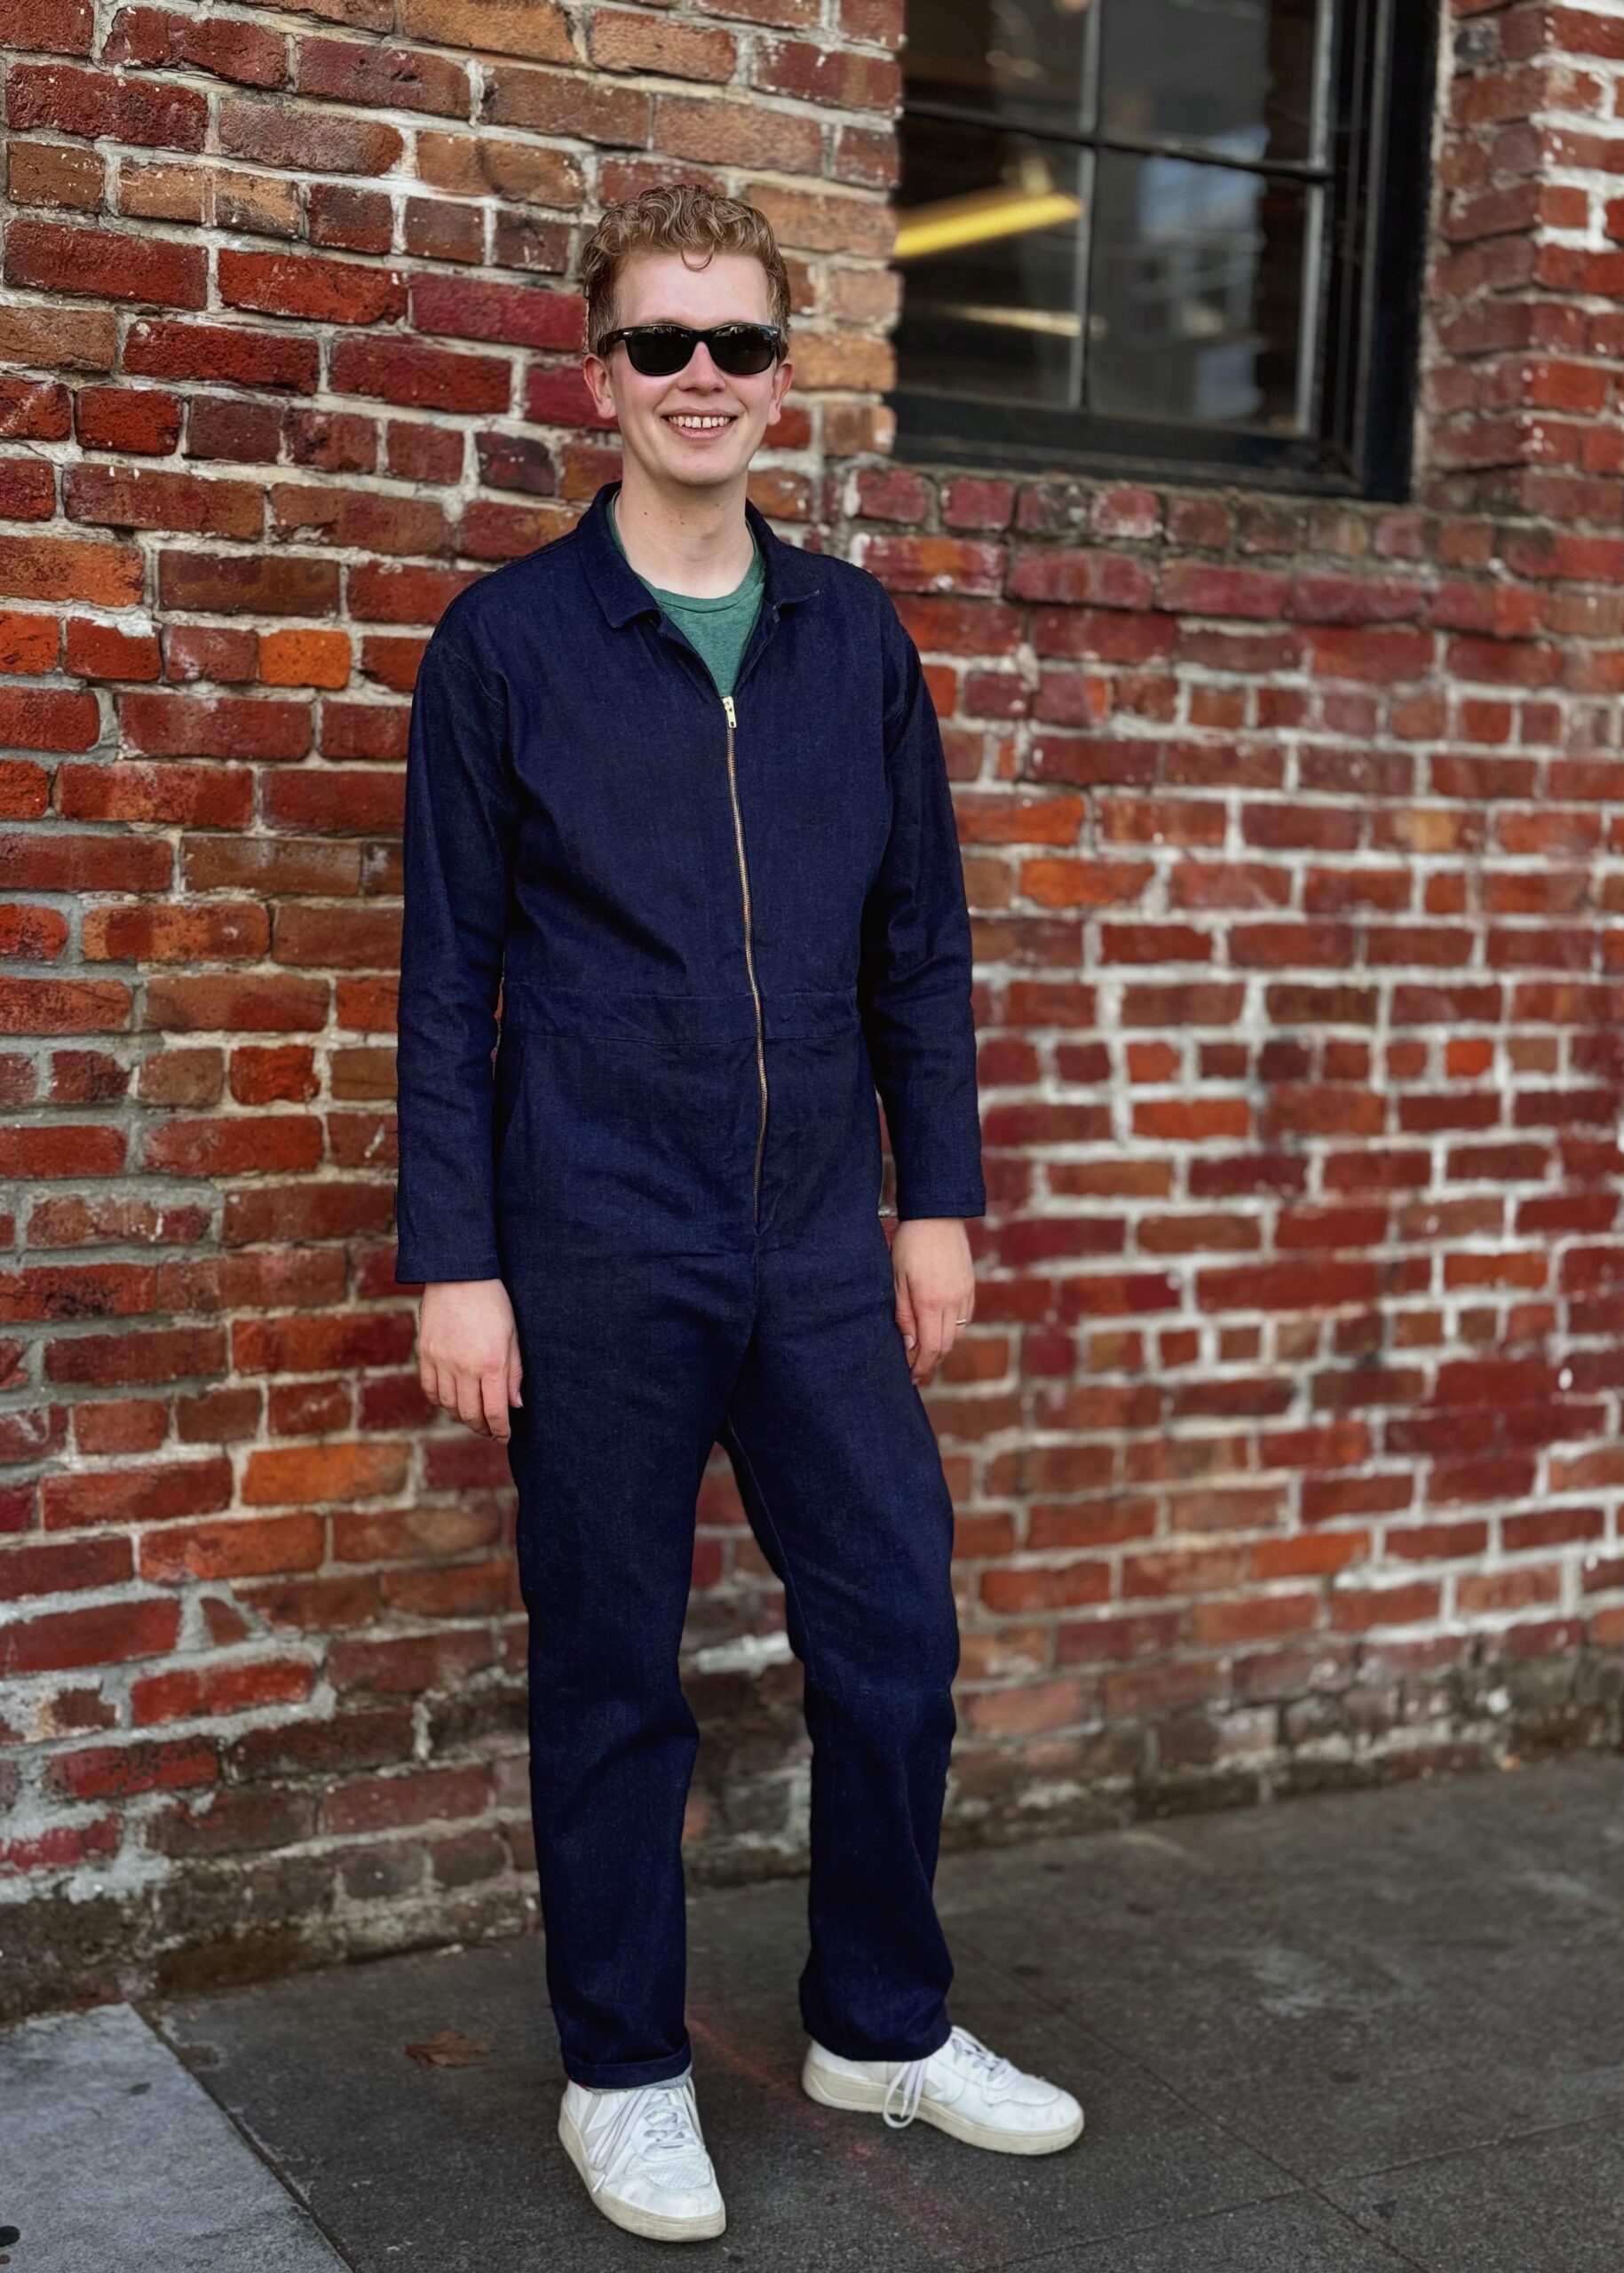
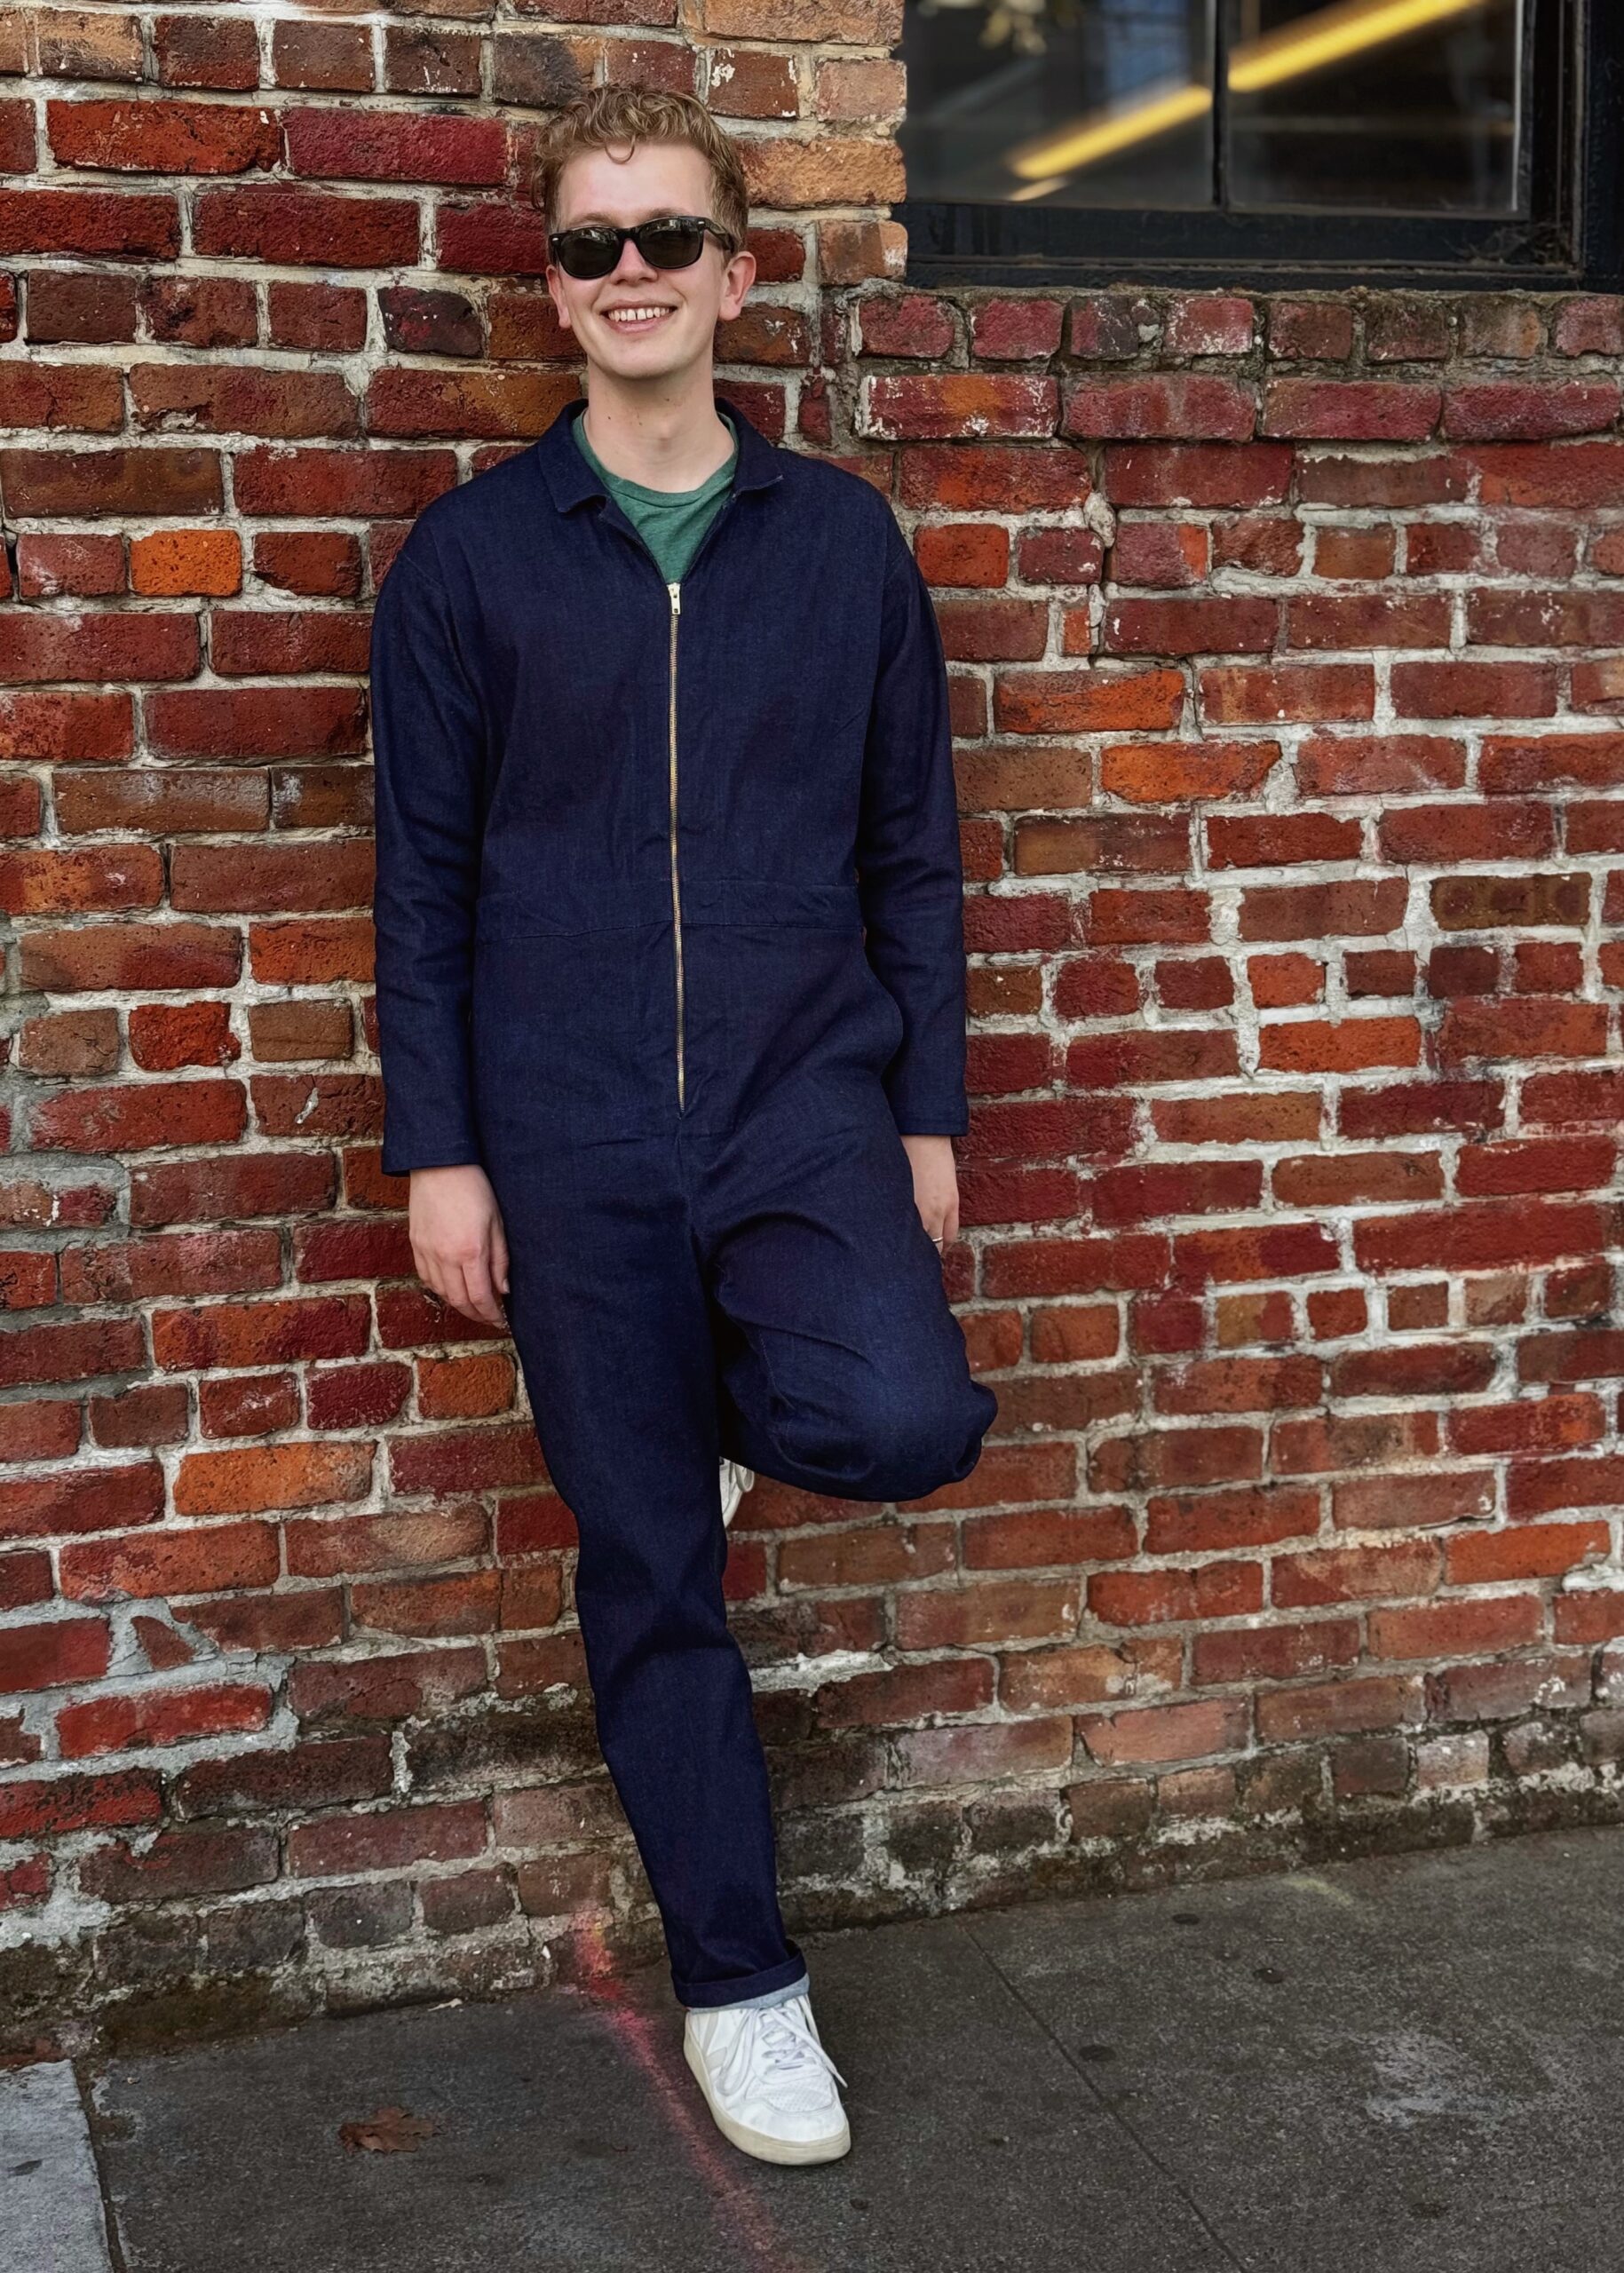

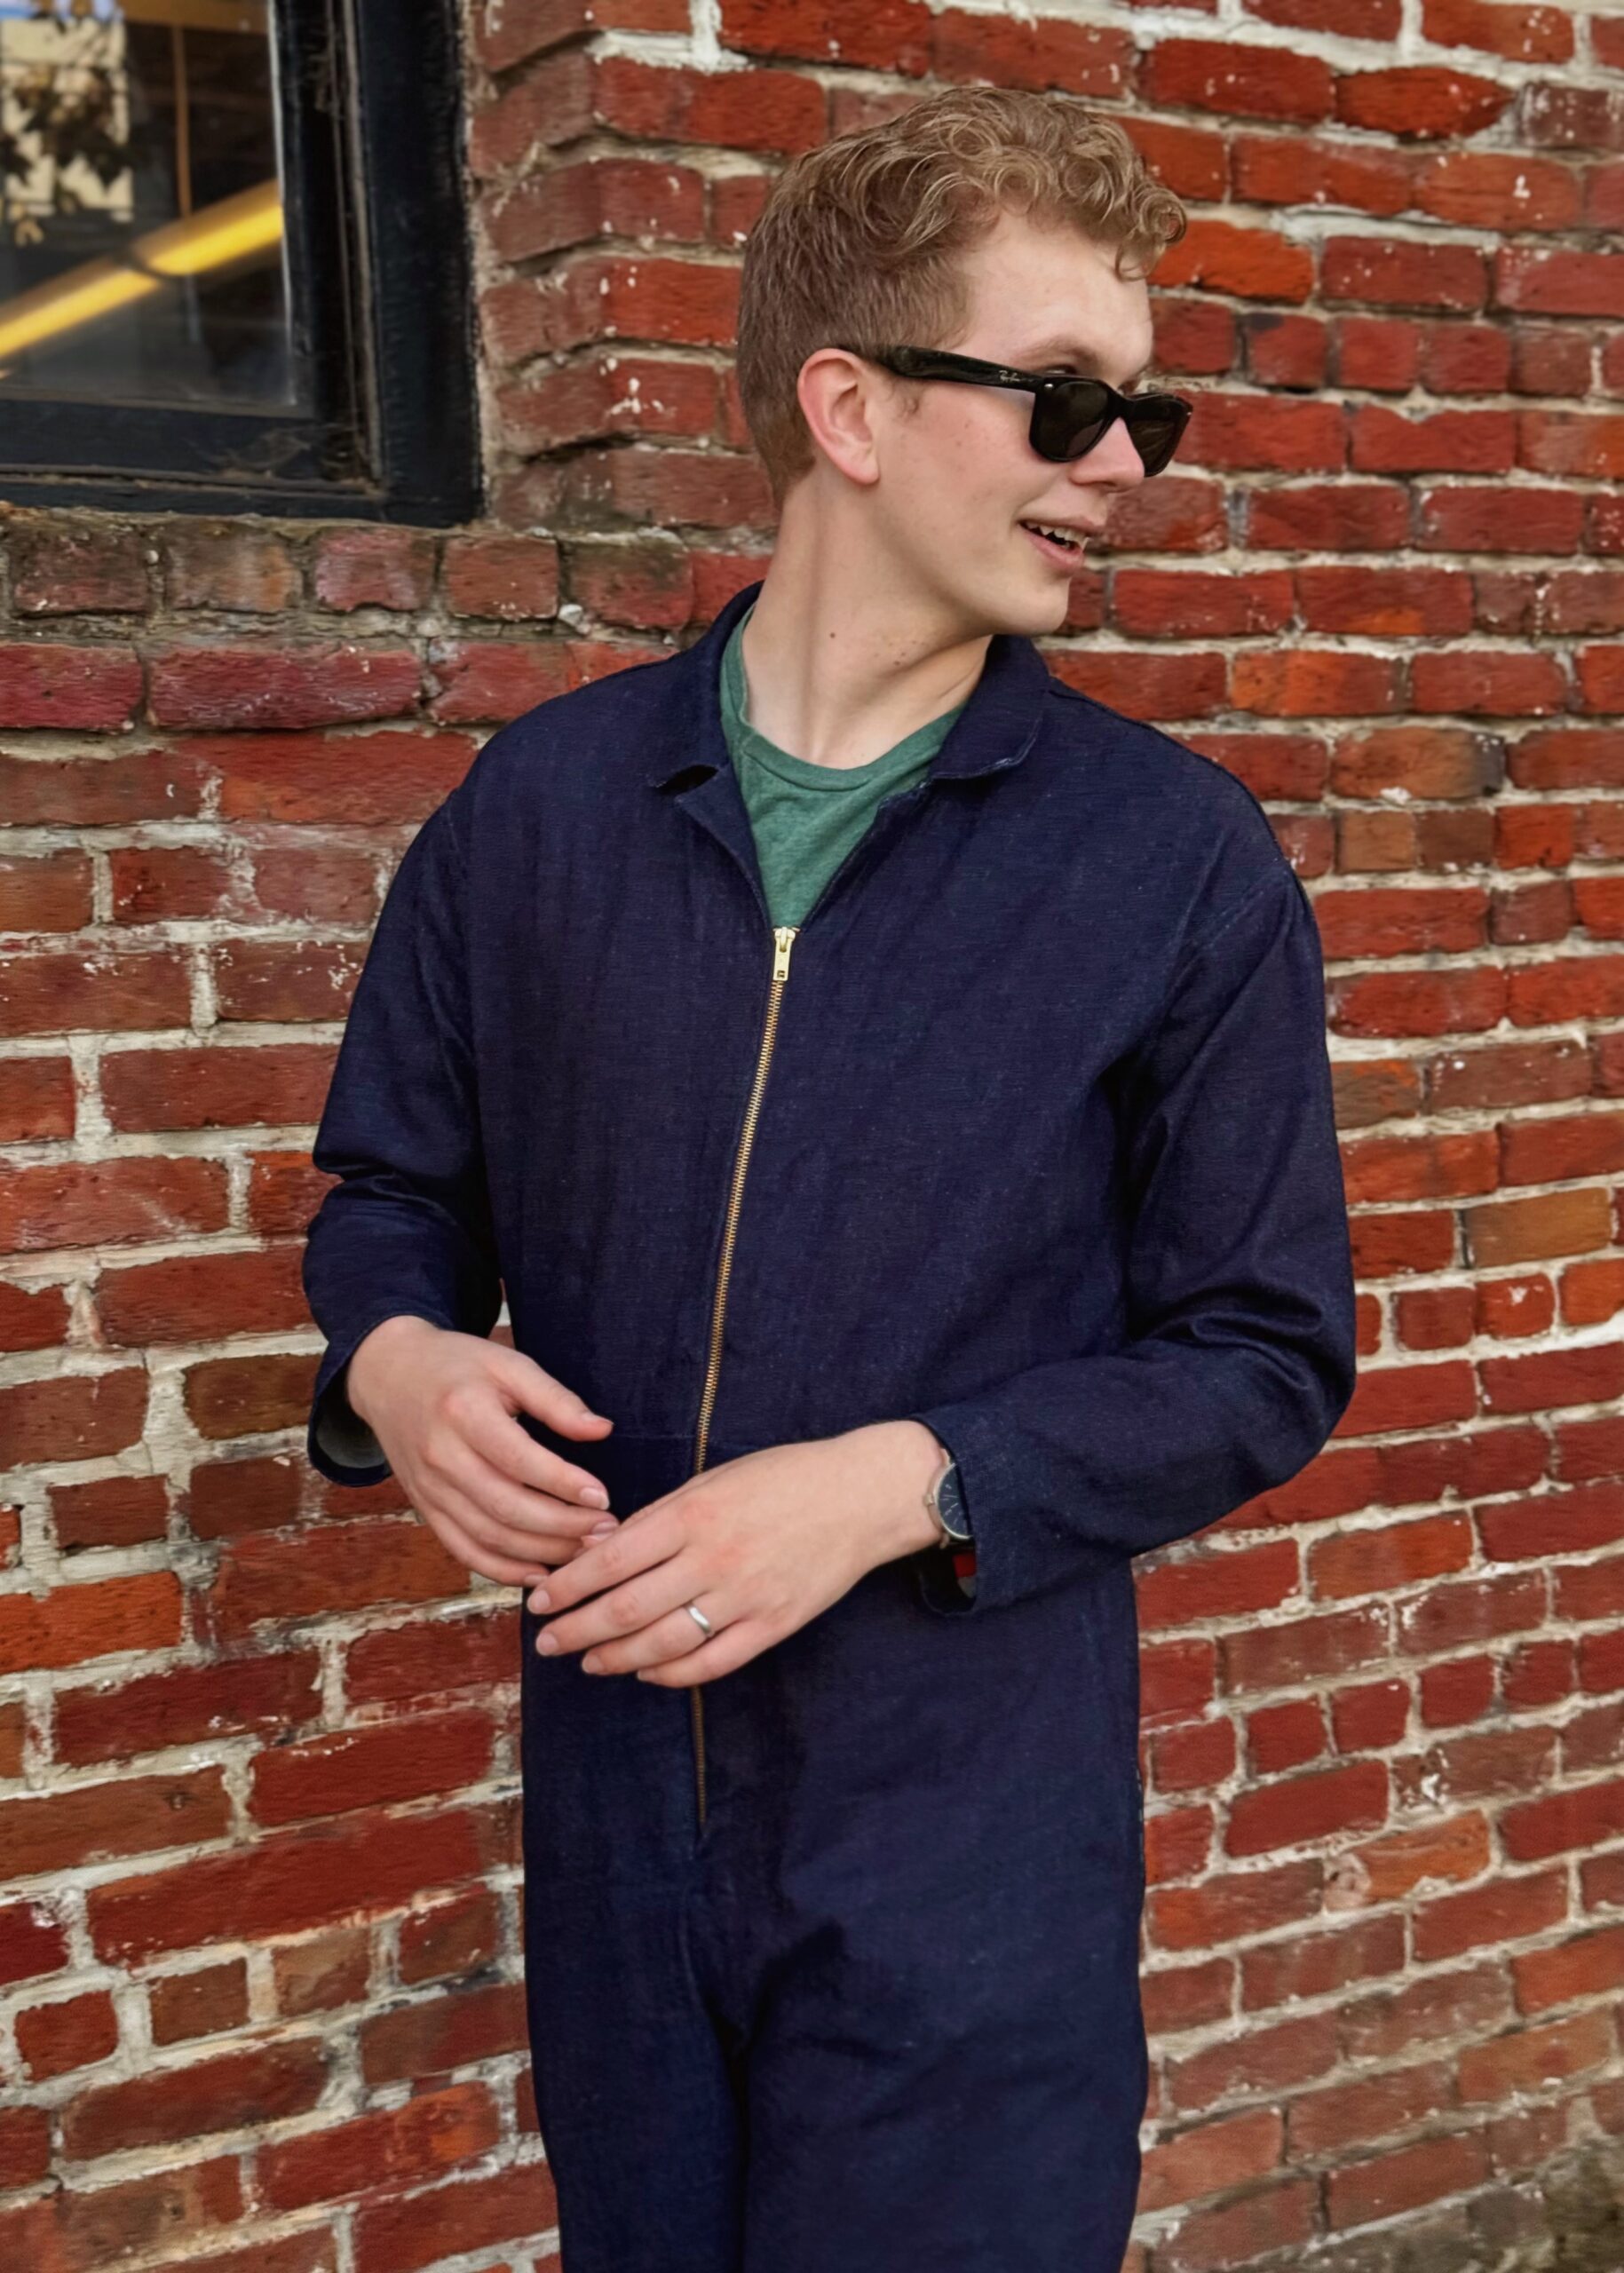
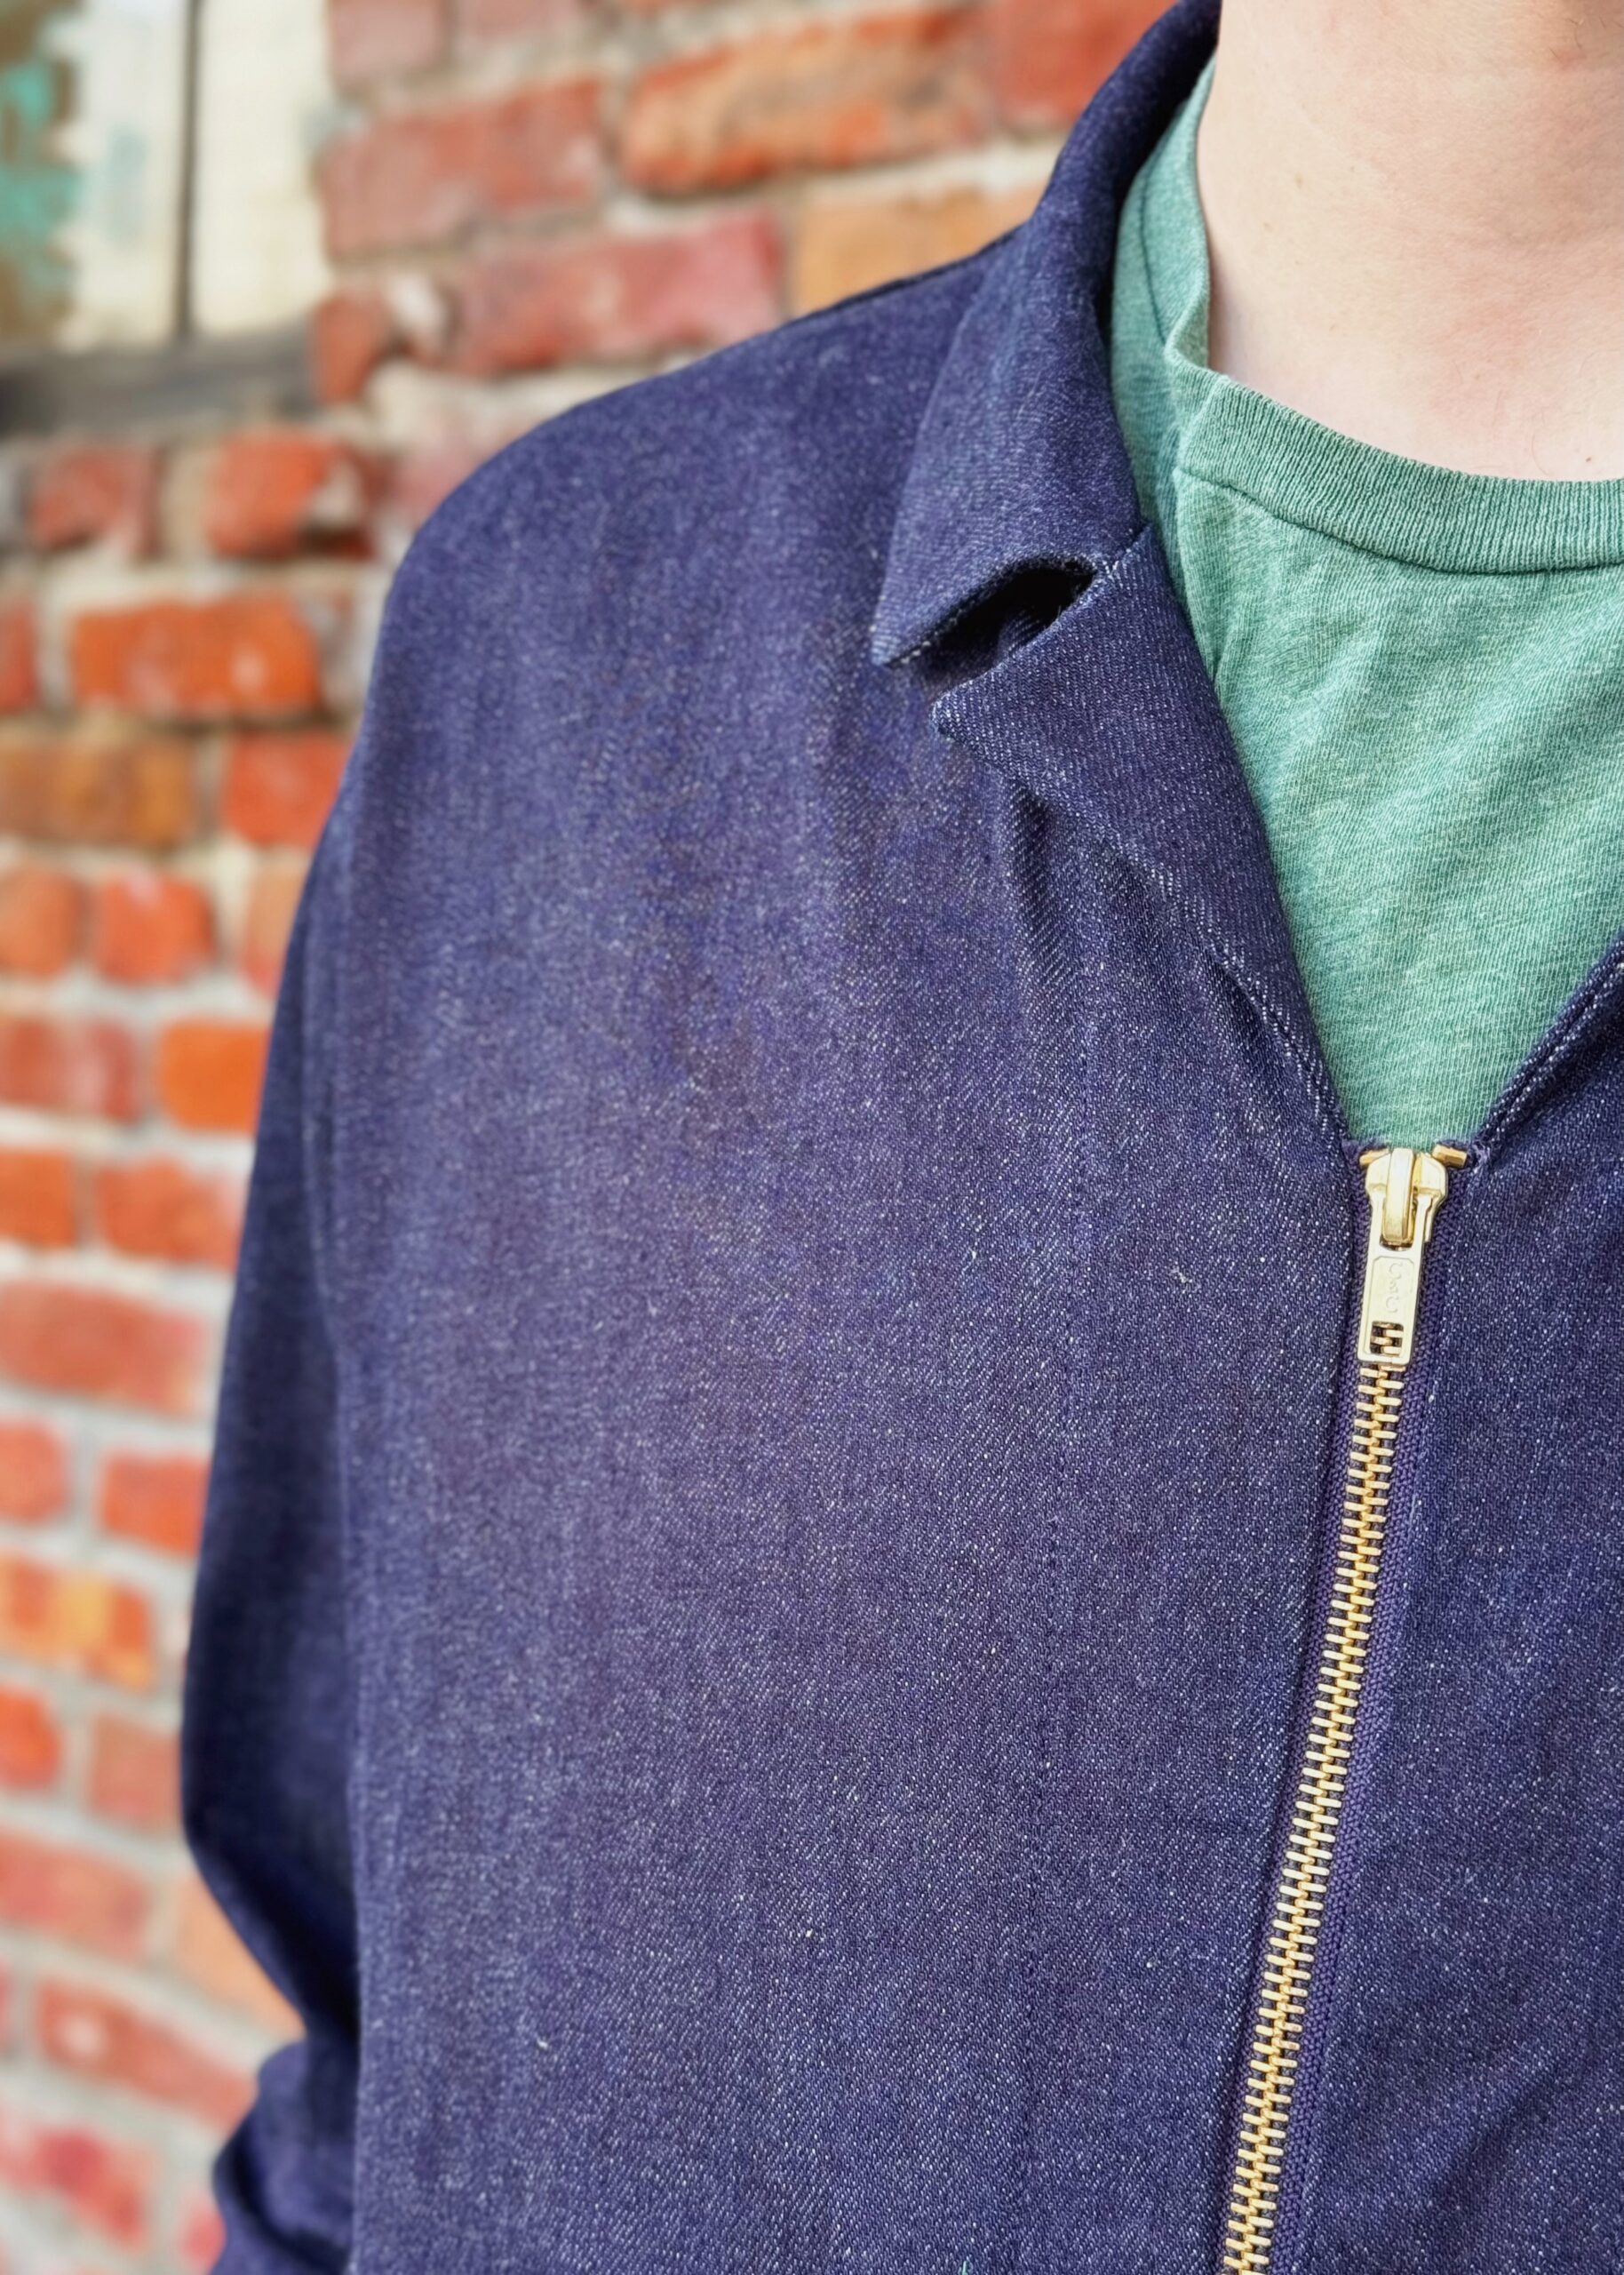
In terms of adjustments, there were plenty! Firstly, I sized down to a size 34 and made a muslin of the bodice to gauge what kind of adjustments we would need for a tailored fit that wasn’t too tight and would work if I removed the elastic at the waist. This immediately threw up some issues with the torso length, sleeve length, and shoulder width. For the next bodice muslin, I lengthened the sleeve length by 2″, lengthened the bodice front, bodice back, and the facing by 0.5″, and did a broad shoulder adjustment to widen the shoulders 0.5″. Moving on to toiling the trousers, the size 34 fitted well at the waist without any elastic, but were far too short and there were some significant issues with tightness for both the rise and seat! I lengthen the pant legs by 3¼”, increased the rise by 1.5″, and made a full seat adjustment for 3″. For the exposed zipper, I moved the zipper to a higher position and traced a new one-piece facing, and sewed it in place with the zipper teeth aligned at ⅞” from the front raw edge of the bodice, and stitching at ¼” from the teeth. I crossed my fingers as Simon walked around in the final muslin and sat down to check if he had enough ease, and I breathed a huge sigh of relief when everything looked good.
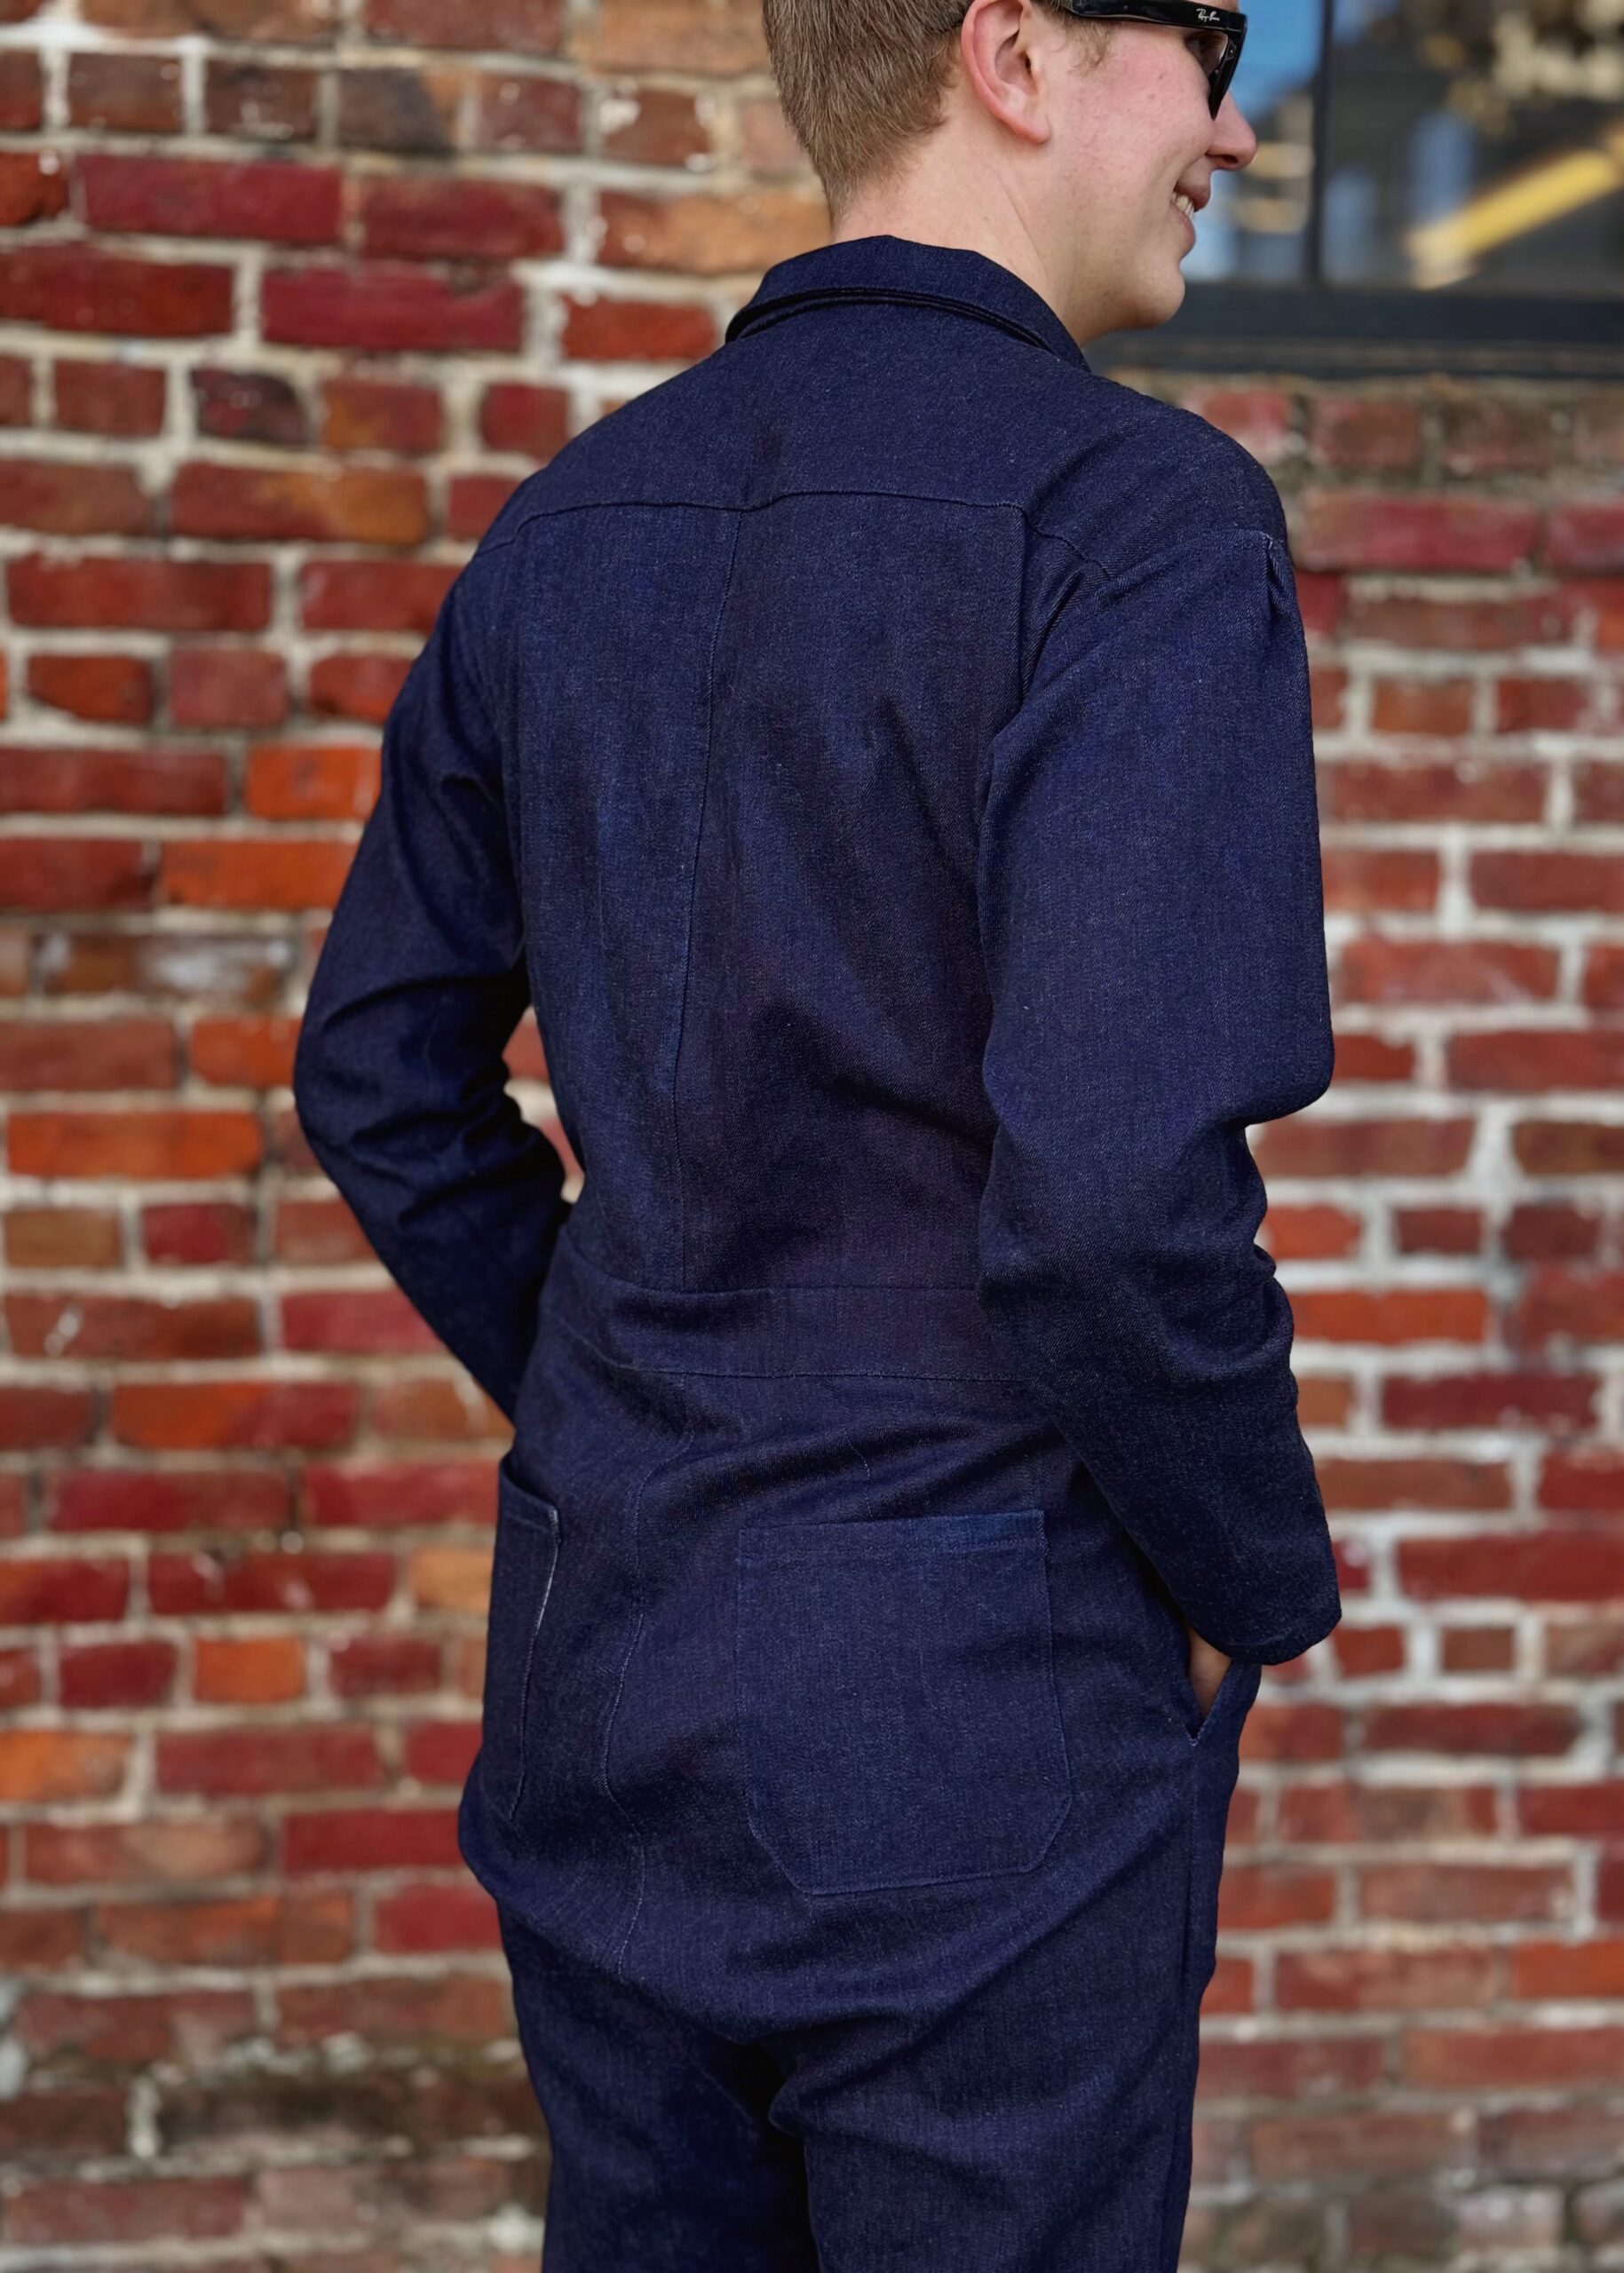
The next big challenge was squeezing these large pattern pieces on our relatively scant amount of denim; I must admit, I was pretty doubtful! One of the most important things I have learnt in my sewing journey is that you really need to pay attention to the grainline when cutting trousers, as anything cut off-grain will start twisting when worn. I pinned the trouser legs pattern pieces in place first, and then started working out where I could squeeze the remaining pattern pieces. Luckily, we had also picked up 1 yard of floral cotton poplin and I used this to make contrast facings for the waistband, yoke, and pockets for a pretty look on the inside. I am not sure I could have squeezed out all the pieces on just the denim, so I was feeling so relieved we had this fabric as a backup — plus, the denim was fairly weighty, so it helped prevent anything from becoming too bulky. I would really recommend using a lighter-weight fabric for the facings if your fabric is on the heavier side for this pattern.

What with all the muslins, this was already shaping up to be a very slow sew and I made various construction decisions to make it even slower! I really wanted to make this boilersuit as neat as possible on the inside, so I used flat-felled seams throughout, and bias bound the seams on the outer leg seams. You aren’t instructed to face the yoke, but I usually use the burrito method to face a yoke on instinct now. It just keeps everything looking so neat! There is a sewalong video for this particular pattern, which I referred to for the general gist of construction, but as I was doing my own thing for the exposed zipper, I didn’t rely on the instructions too much.

Simon: [internally] “Walking… I can walk normally… I got this”

Despite being one of the most time-consuming projects I have done, I am so, so, so happy with this finished boilersuit. Simon gave me potentially the best compliment you can give a sewist who has made you a garment — “I love wearing this, it makes me feel so confident and good” — and it makes me smile every time he wears it. It was definitely worth all the adjustments and toiles! It has really made me itch to make a boilersuit of my own, in a black canvas with plenty of quirky patches on the sleeves. Time to research for a pattern…!
Know Me 2012 Boilersuit
Size 34 – 52
Chest: 34” – 52”
Waist: 28” – 48”
Hips: 35” – 53″


Thank you for the review. I opened up the pattern and looked at the size of the pieces and was concerned about the overall size of the jumpsuit being too big. You provided a lot of valuable advice. I was too thinking of modifying the zipper…
There is a lot of ease factored into this pattern for sure! Hope you can make something spectacular from it 😊