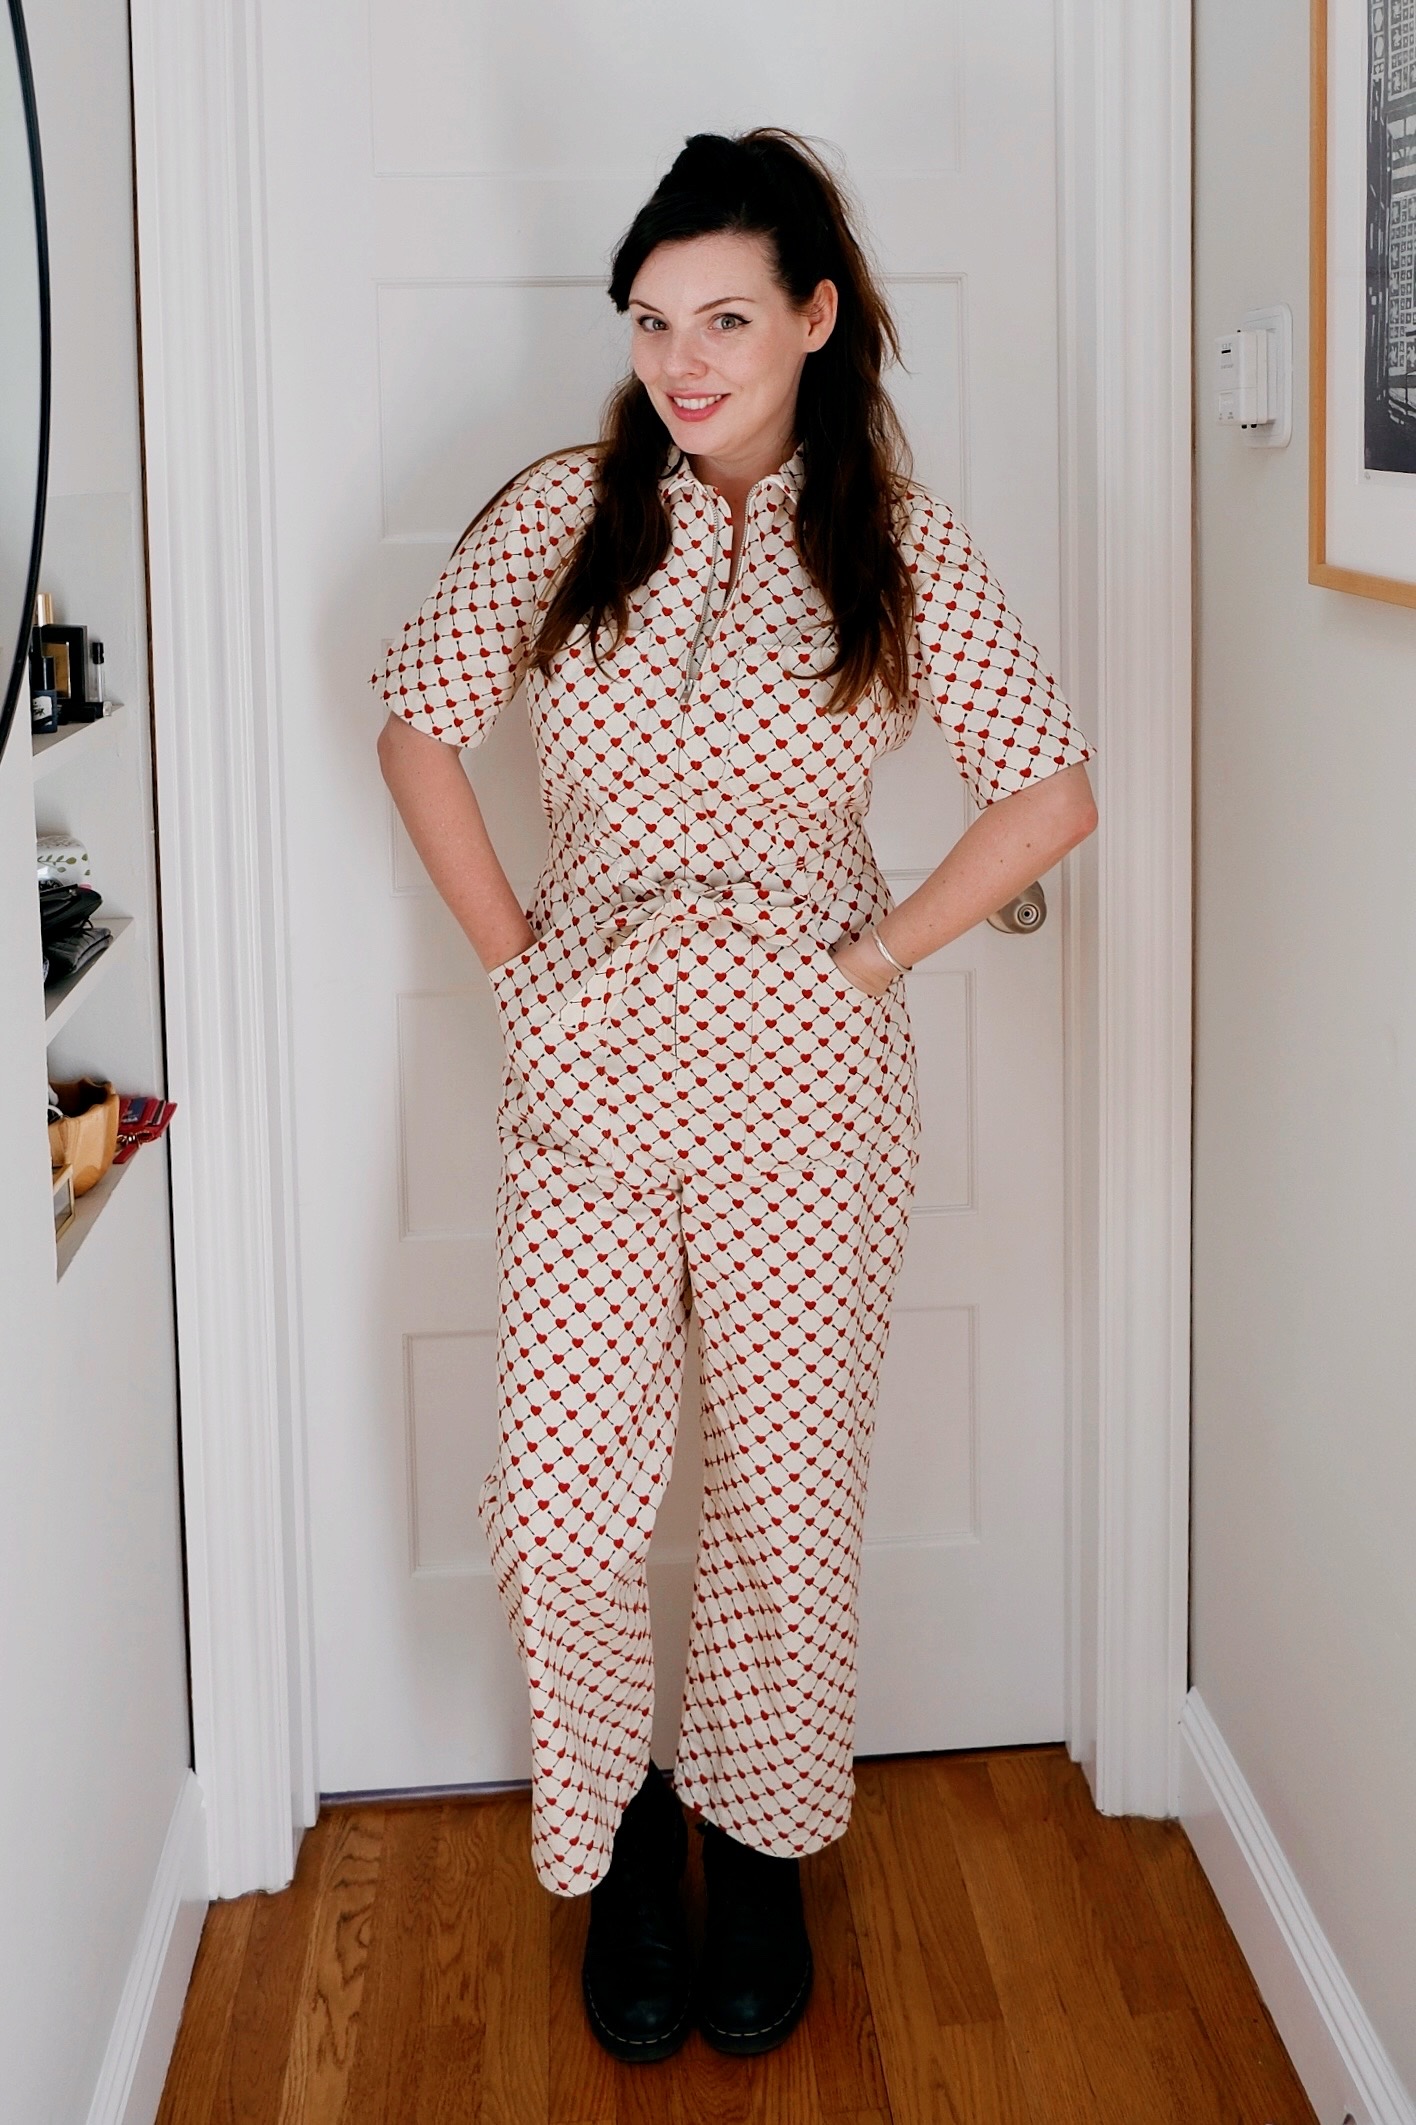
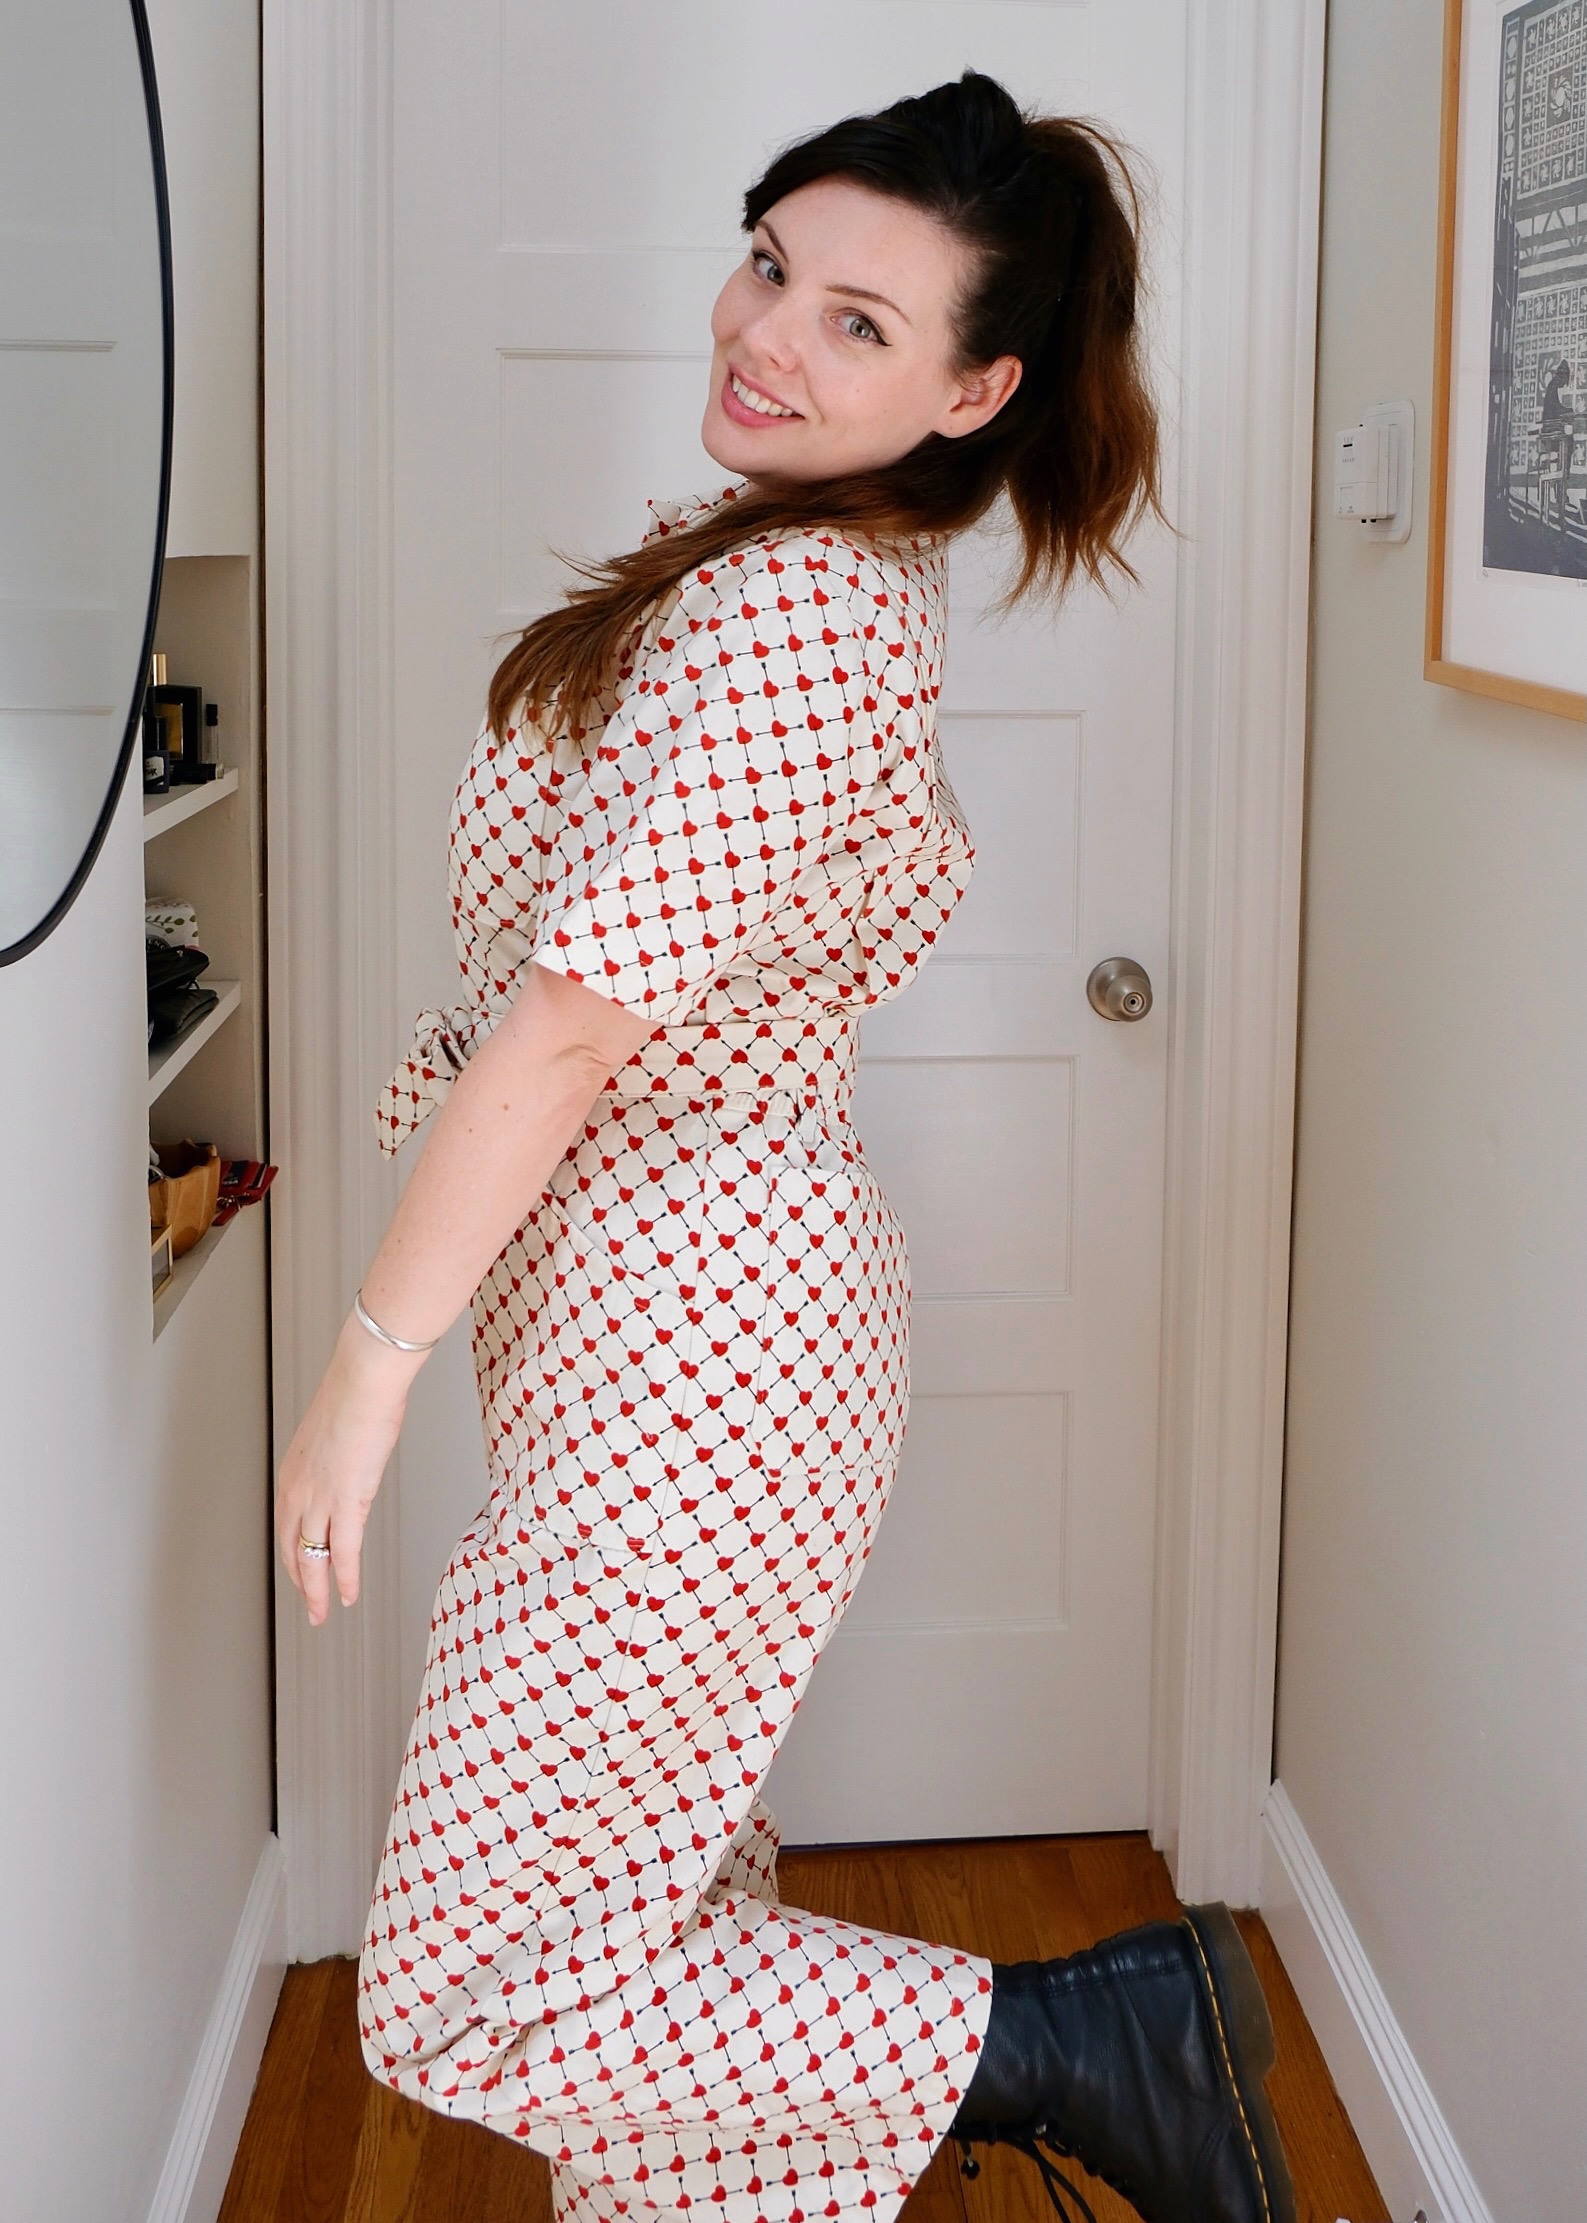
Some patterns need no introduction in the sewing community, they are just that well-known and beloved. When Minerva gifted me 3 metres of their print-on-demand cotton denim twill for a #MinervaMake, I instantly knew which pattern to pair with it! Head over to Minerva to read my blog post or scroll down for more details and photos.
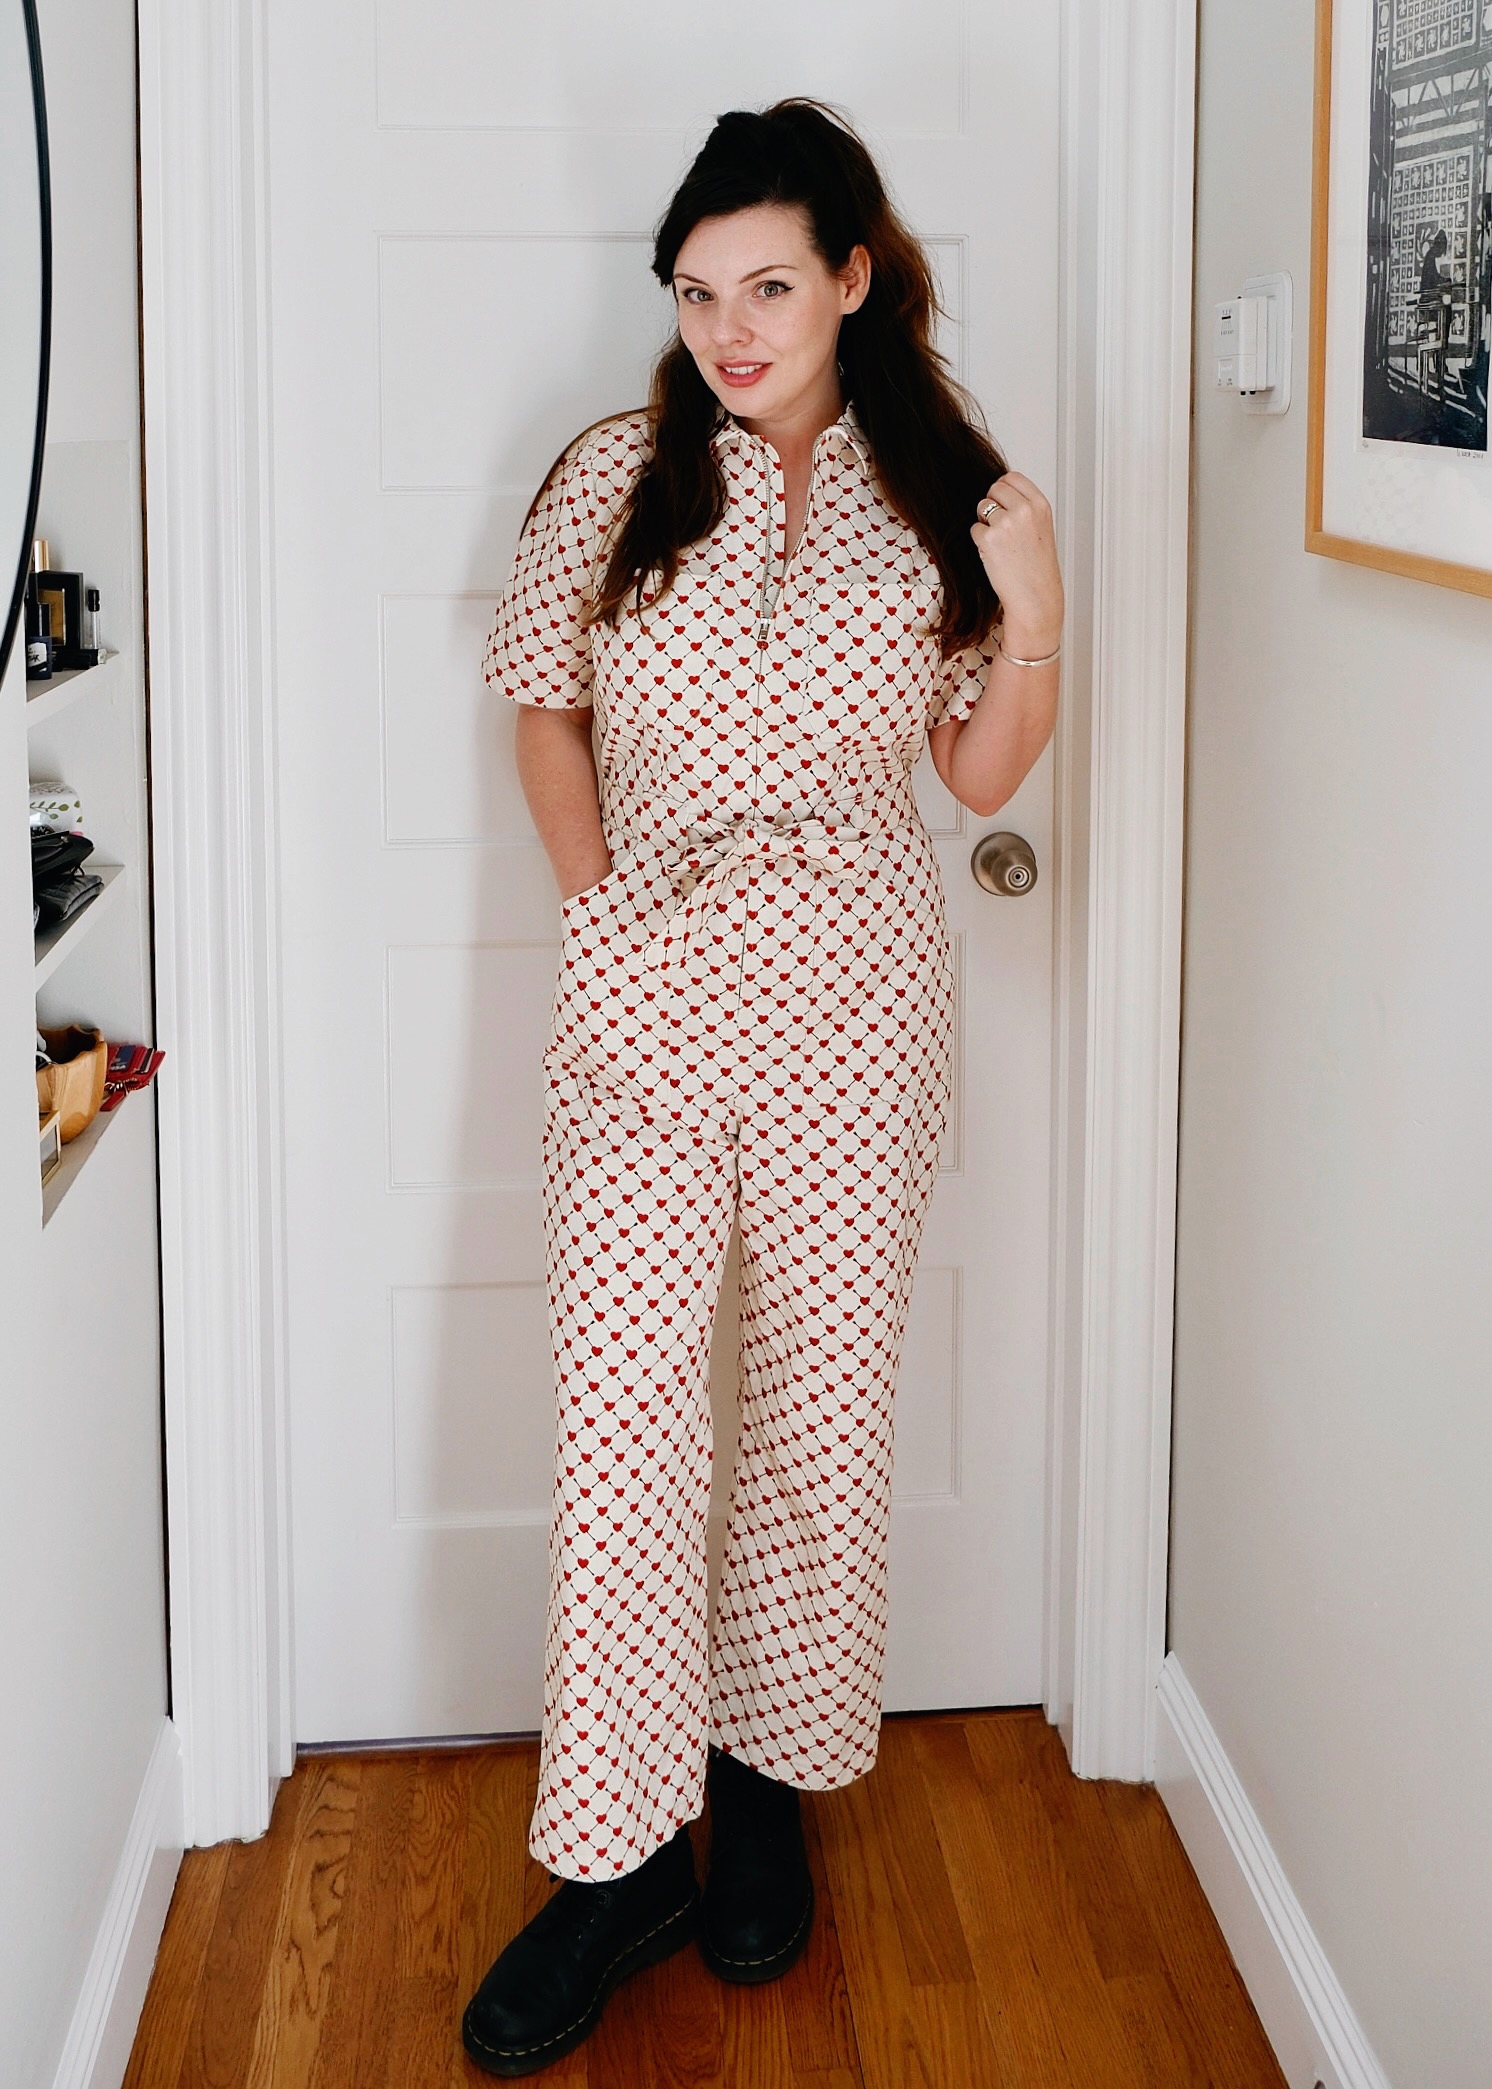
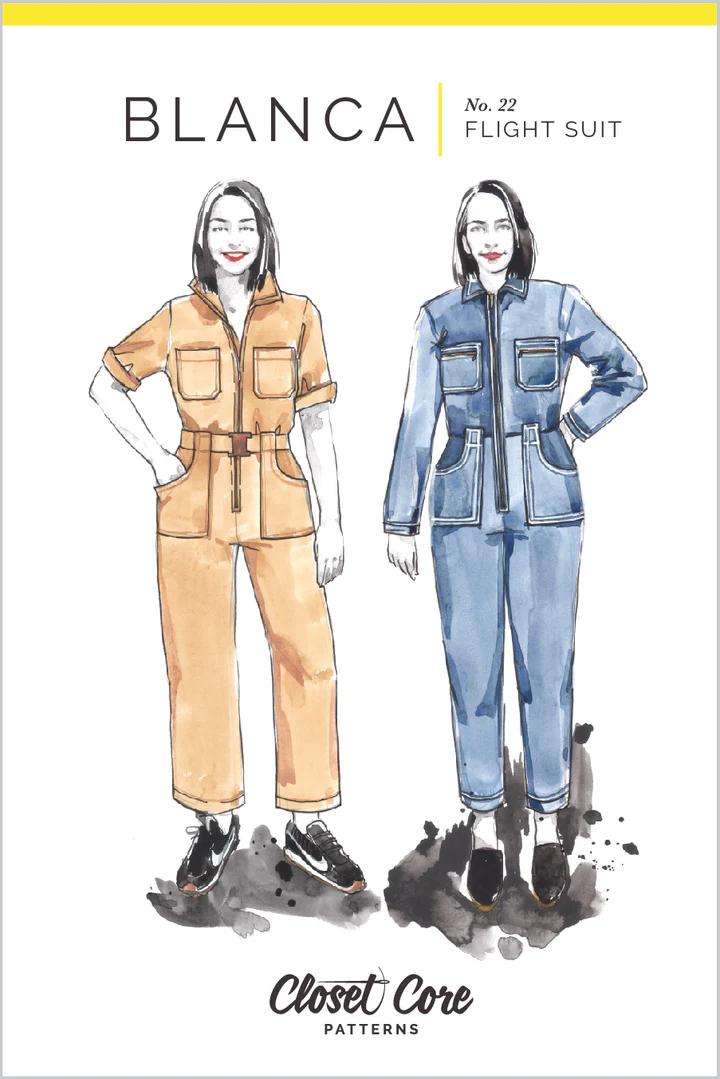
When the Closet Core Patterns Blanca Flight Suit was launched early in the pandemic, I remember being just awestruck at all the amazing versions sewists began sharing on Instagram. In 2020, I was still very much a beginner sewist, so making something as complex as this boilersuit seemed like it would forever lie far beyond my personal sewing capabilities. Several years later, I realised two things simultaneously: a) I probably could tackle this pattern now with minimal issues and b) it is pretty funny how the improvement of your sewing skills kinda sneaks up on you! So I put the Closet Core Patterns Blanca Flight Suit on my Make Nine 2025 plans… and then promptly ran out of time to make it that year 😅 All this preamble is to say that I am delighted with myself for finally making this absolute classic pattern! While this is certainly classified as a more advanced sewing pattern, it is also the perfect involved, absorbing project to get stuck into.
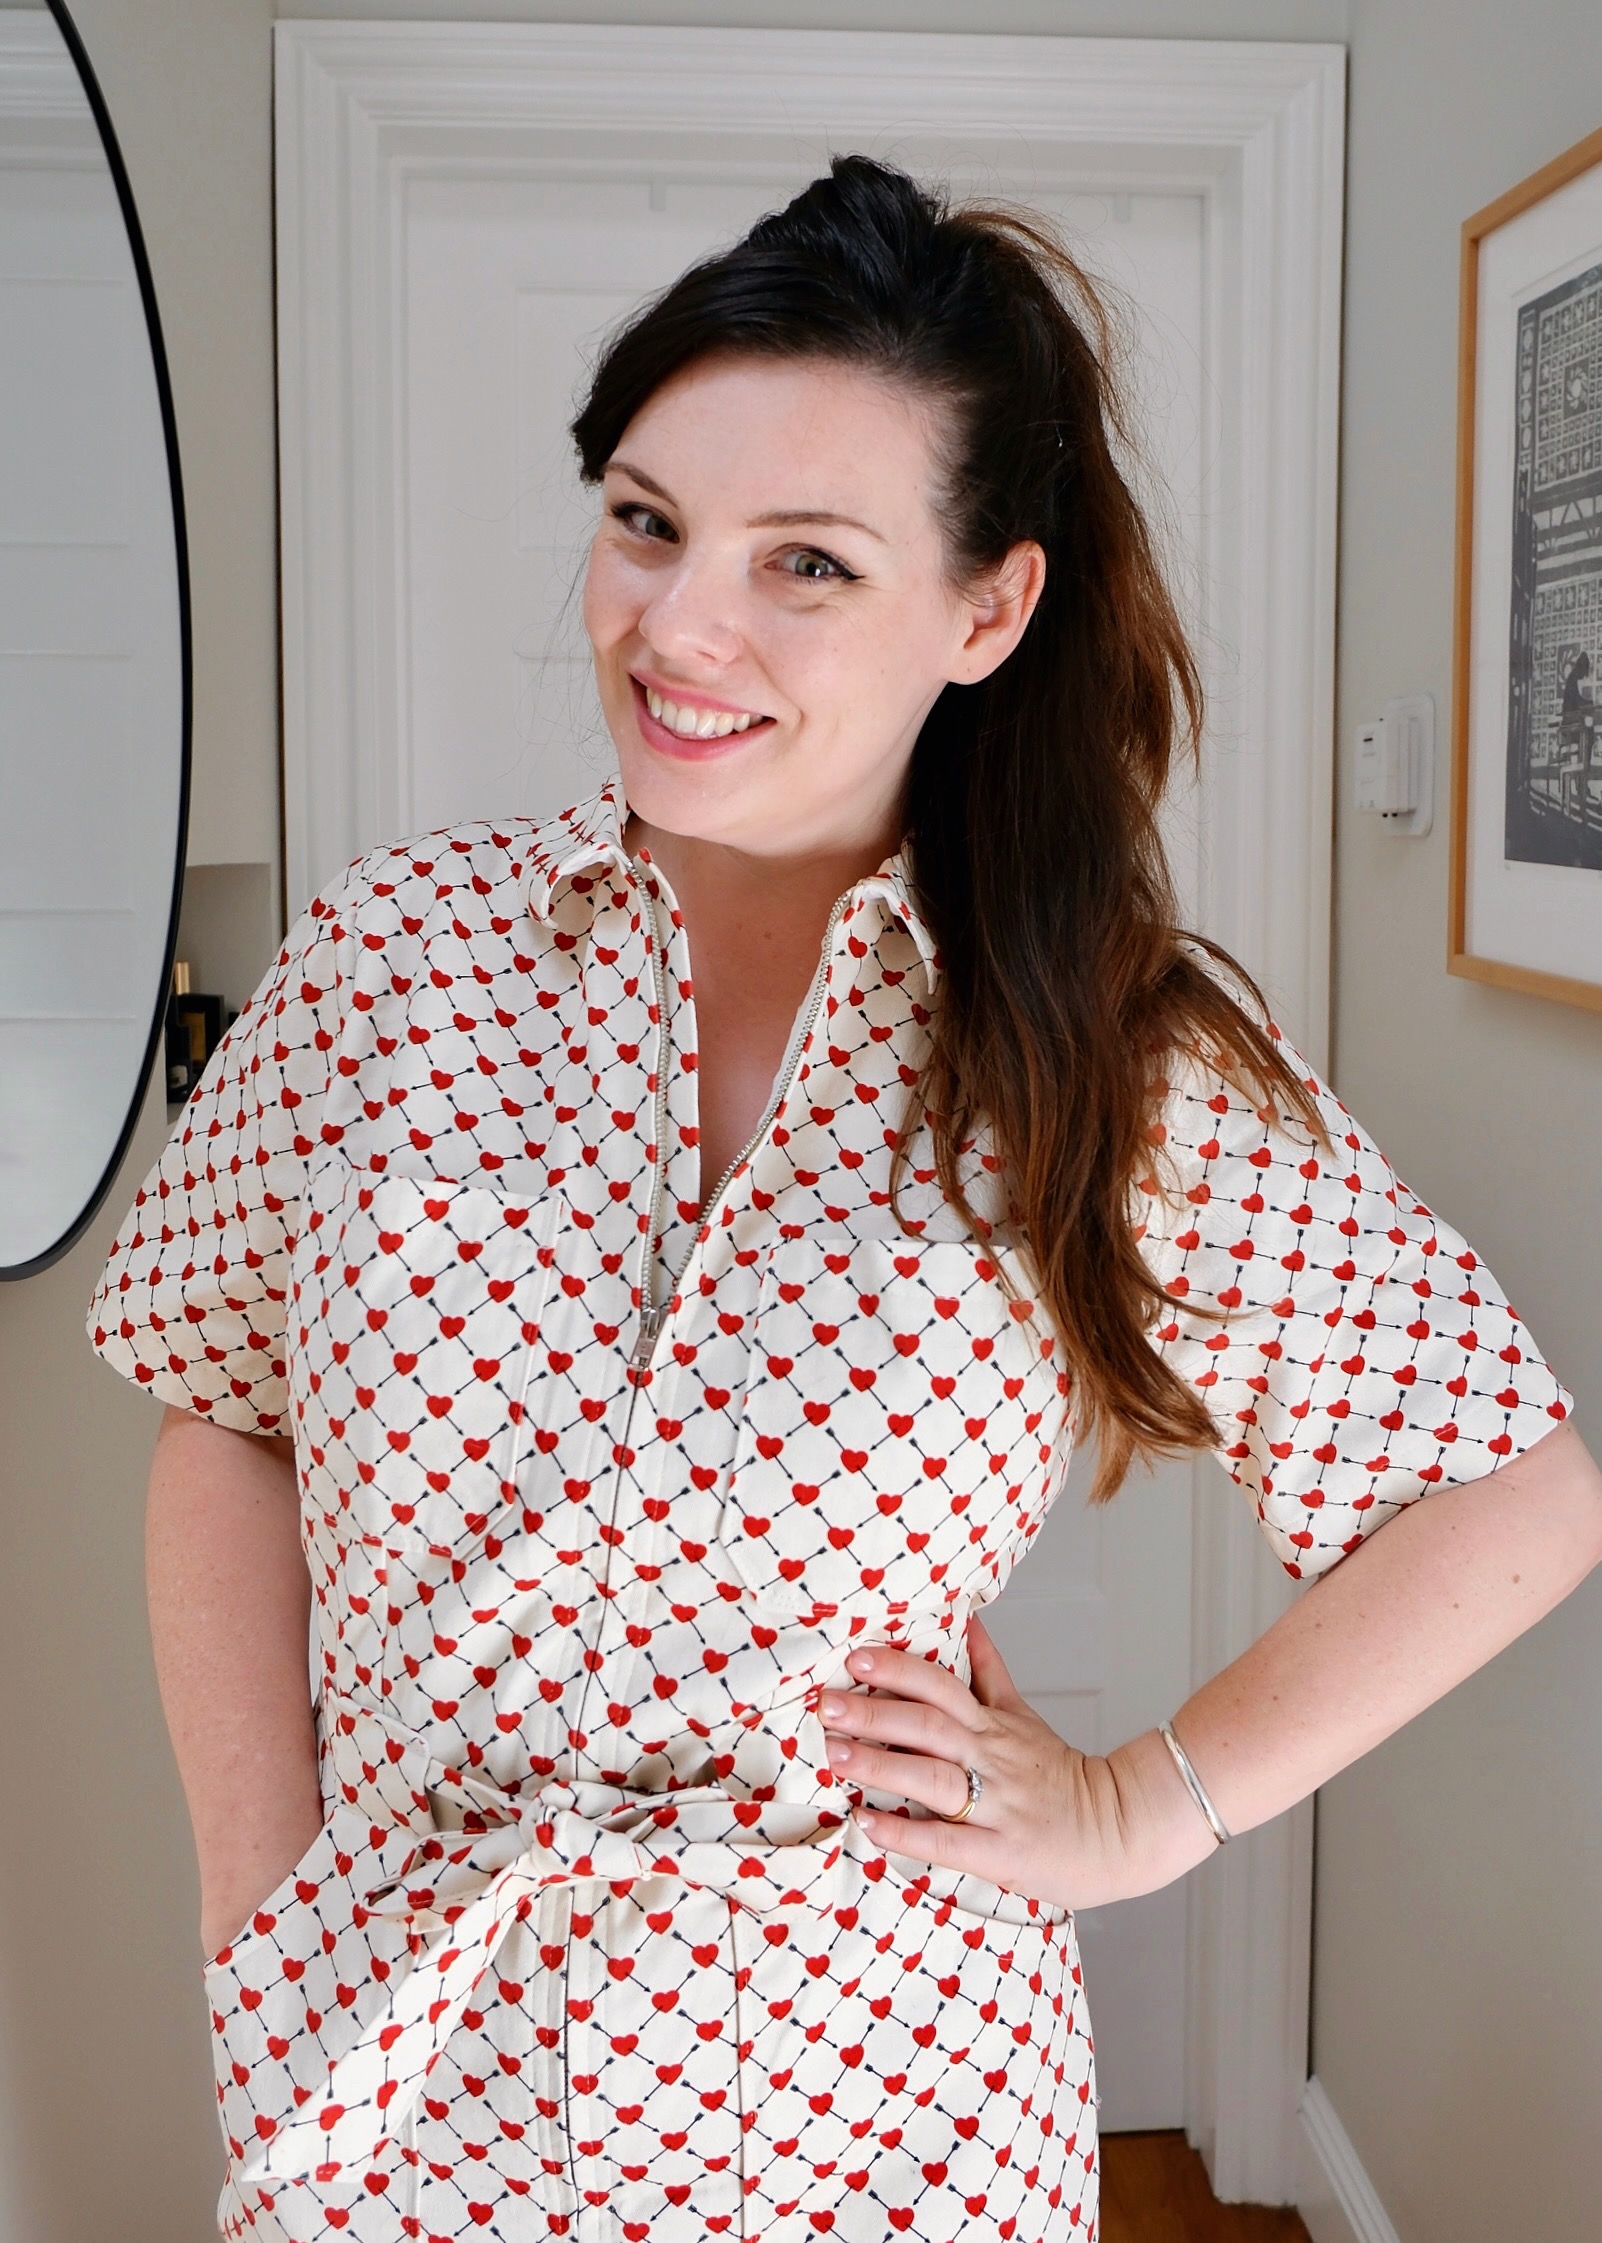
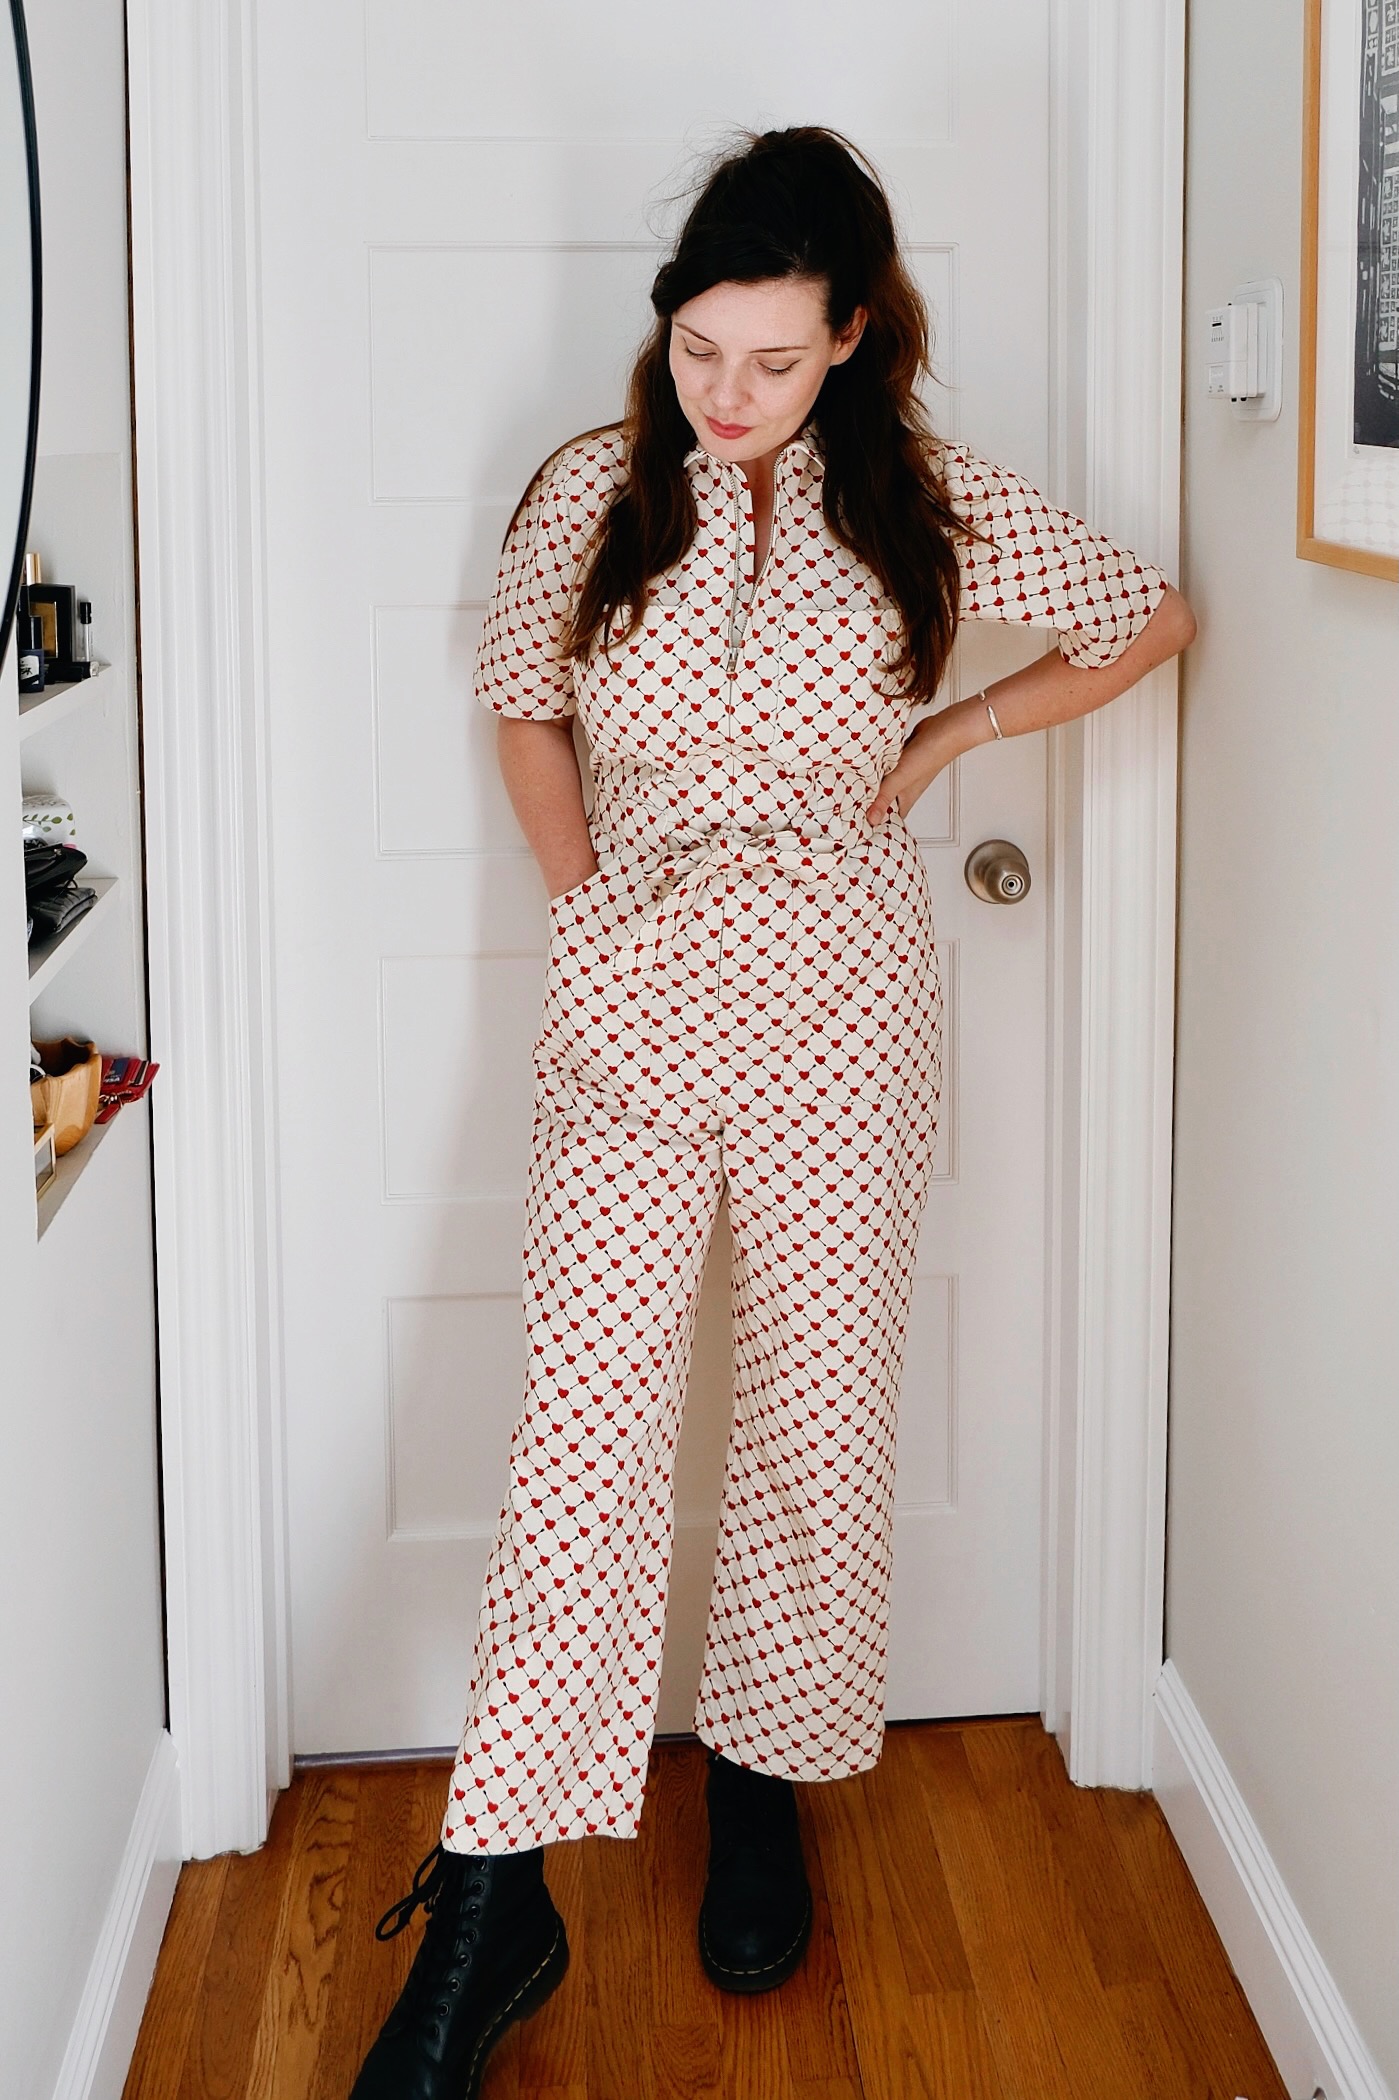
The Blanca Flight Suit is a semi-fitted boiler suit pattern, with plenty of nods to vintage workwear. The bodice has a relaxed fit, with a centre-front zip with a zipper shield, a traditional collar, a dropped shoulder, optional patch pockets or zippered pockets at the bust, and a pin-tuck pleated back. There is plenty of ease in the trouser portion, with rear patch pockets, front patch pockets that double as belt loops, a tie belt or buckled belt, and a straight-cut leg that can either be cropped or tapered at the hem with a tab and button. You can either have a short sleeve, a long sleeve, or a tapered sleeve with snaps.
Blanca is designed for structured woven fabrics, like canvas, denim, gabardine, corduroy, and twill. It is also possible to make a softer look with a drapey fabric, such as linen, tencel twill or silk noil. Since finishing this denim twill Blanca, I have been daydreaming about a silk matka version in a cinnamon shade for summer!
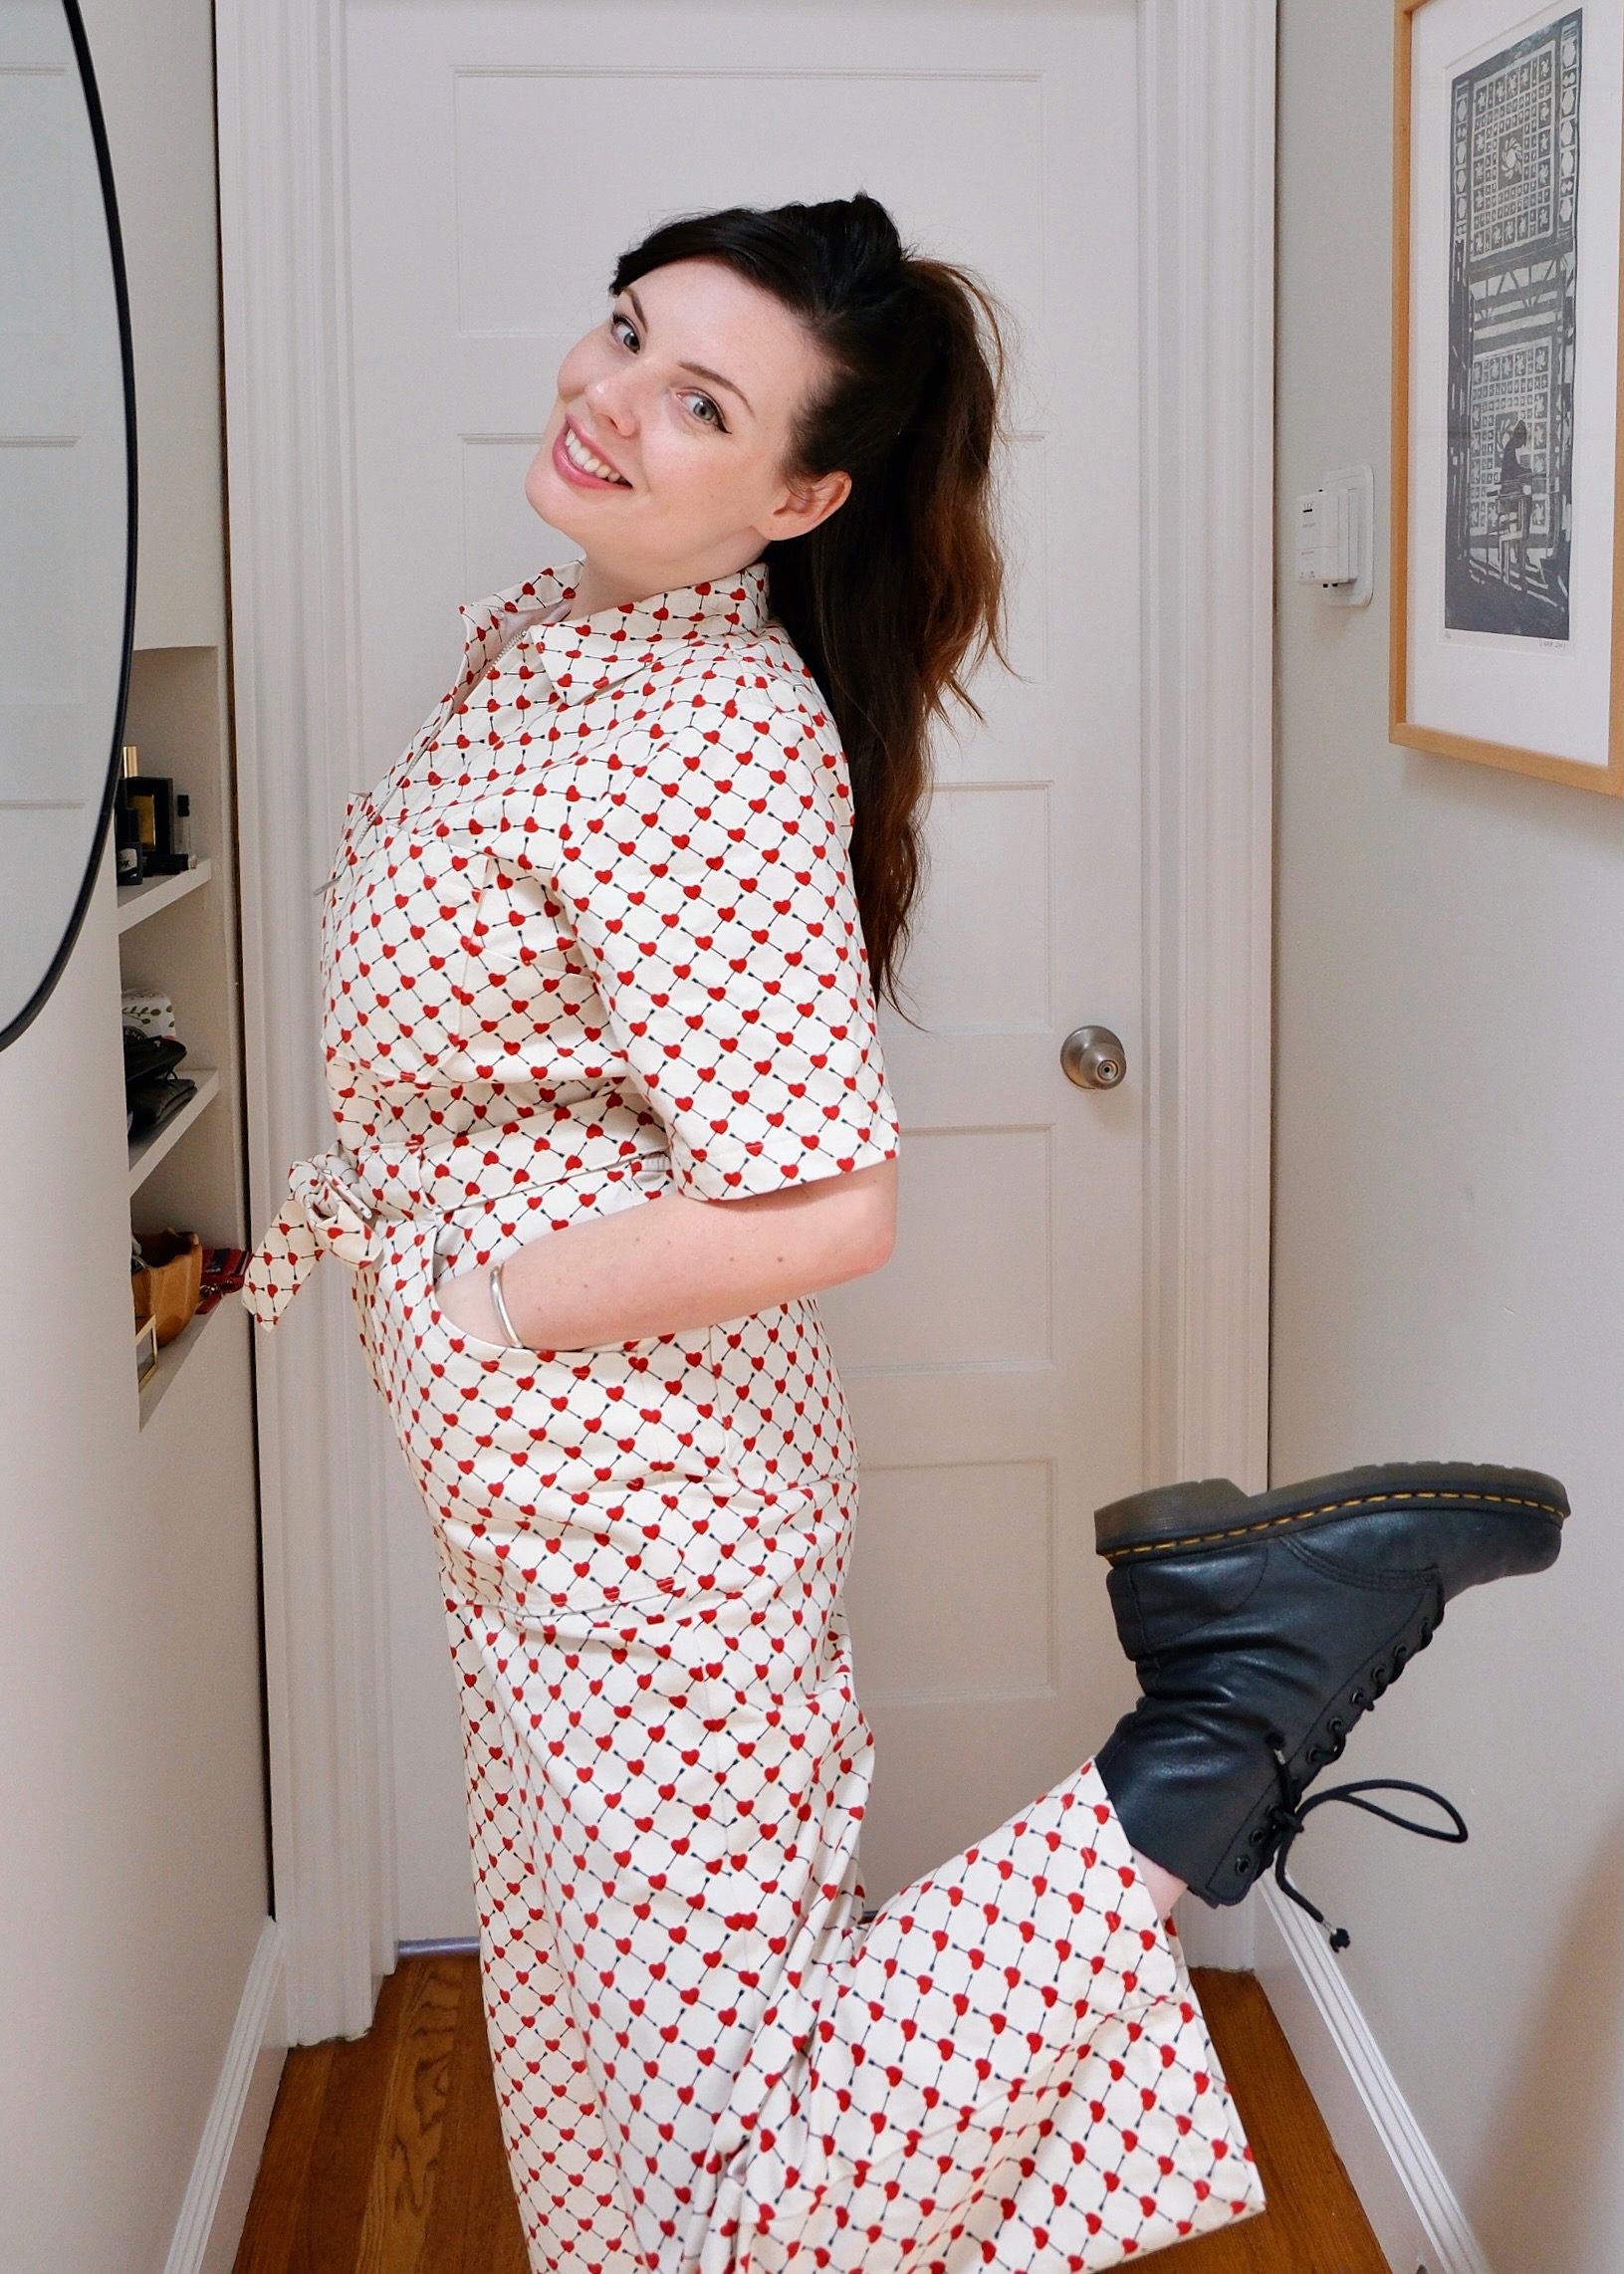
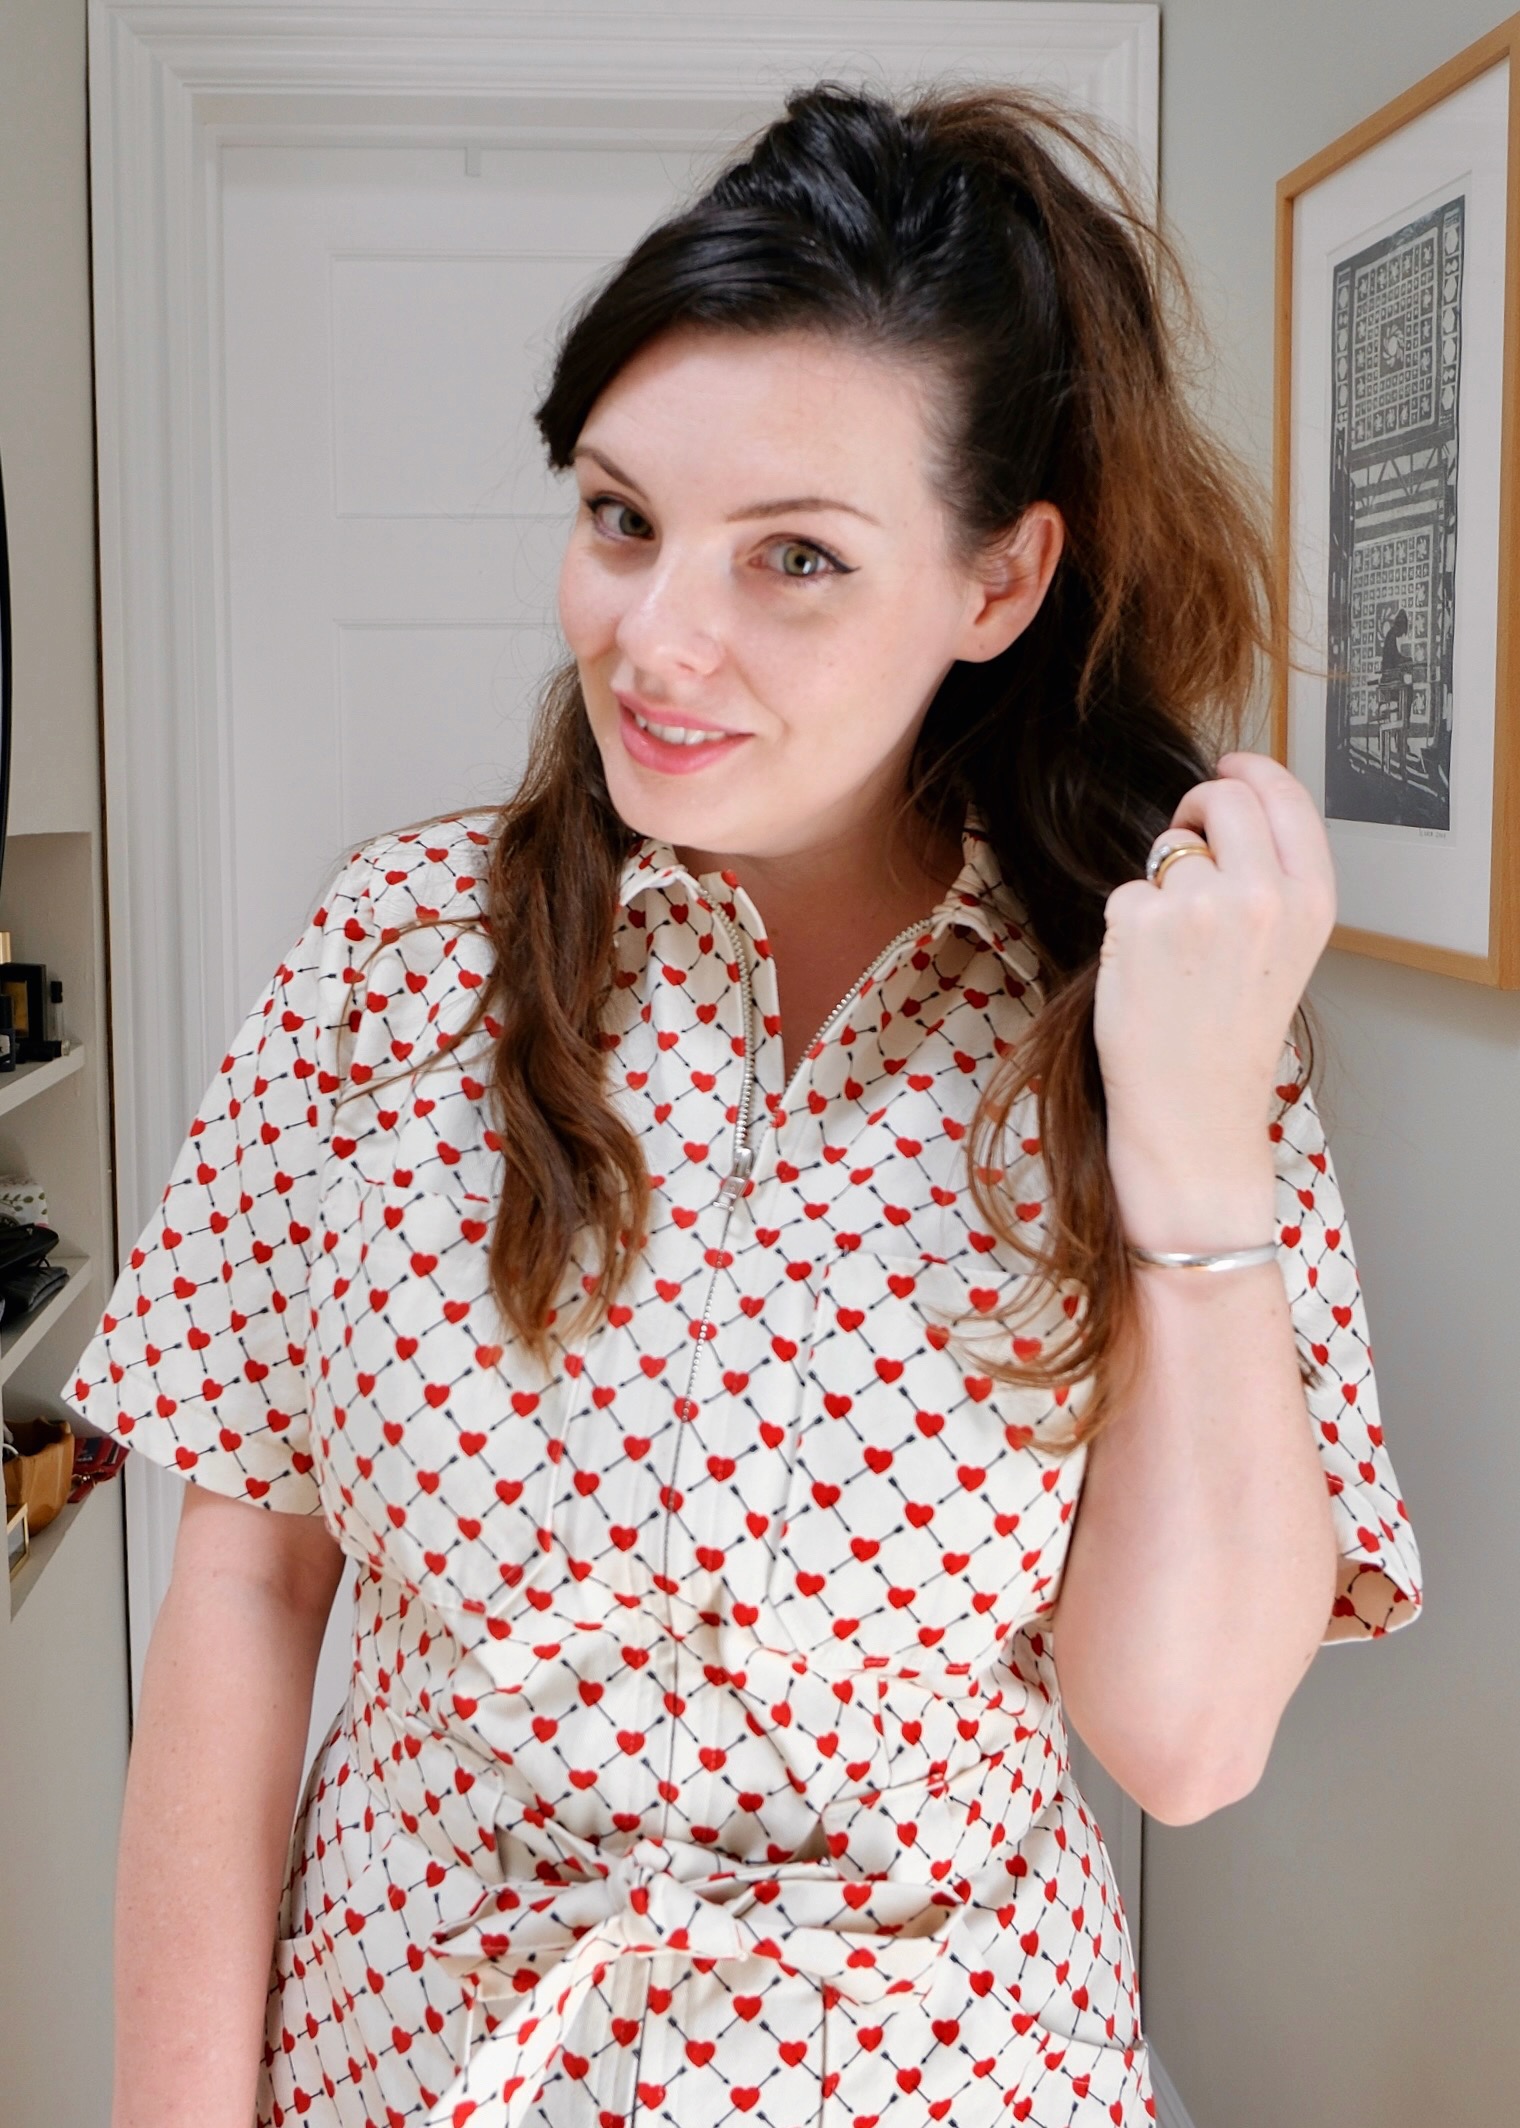
I opted to make the version with short sleeves, a tie belt and a cropped leg, as I wanted the option to layer my long-sleeved, mock-neck tees underneath during colder days. I specifically ordered 5″ long zips to make the zippered breast pockets and then promptly lost them, only for them to reemerge after the project was complete… Such is life. I am happy enough making do with the breast patch pockets, as I don’t really use them anyway. For the main zip, I used a 22″ zip that I didn’t need to shorten, which is a real win — I find using pliers to pull off zip teeth such a finicky task! All my zips are YKK and came from Zipper & Thread, where I customised the zip lengths and got a pretty excellent colour match for my fabric.
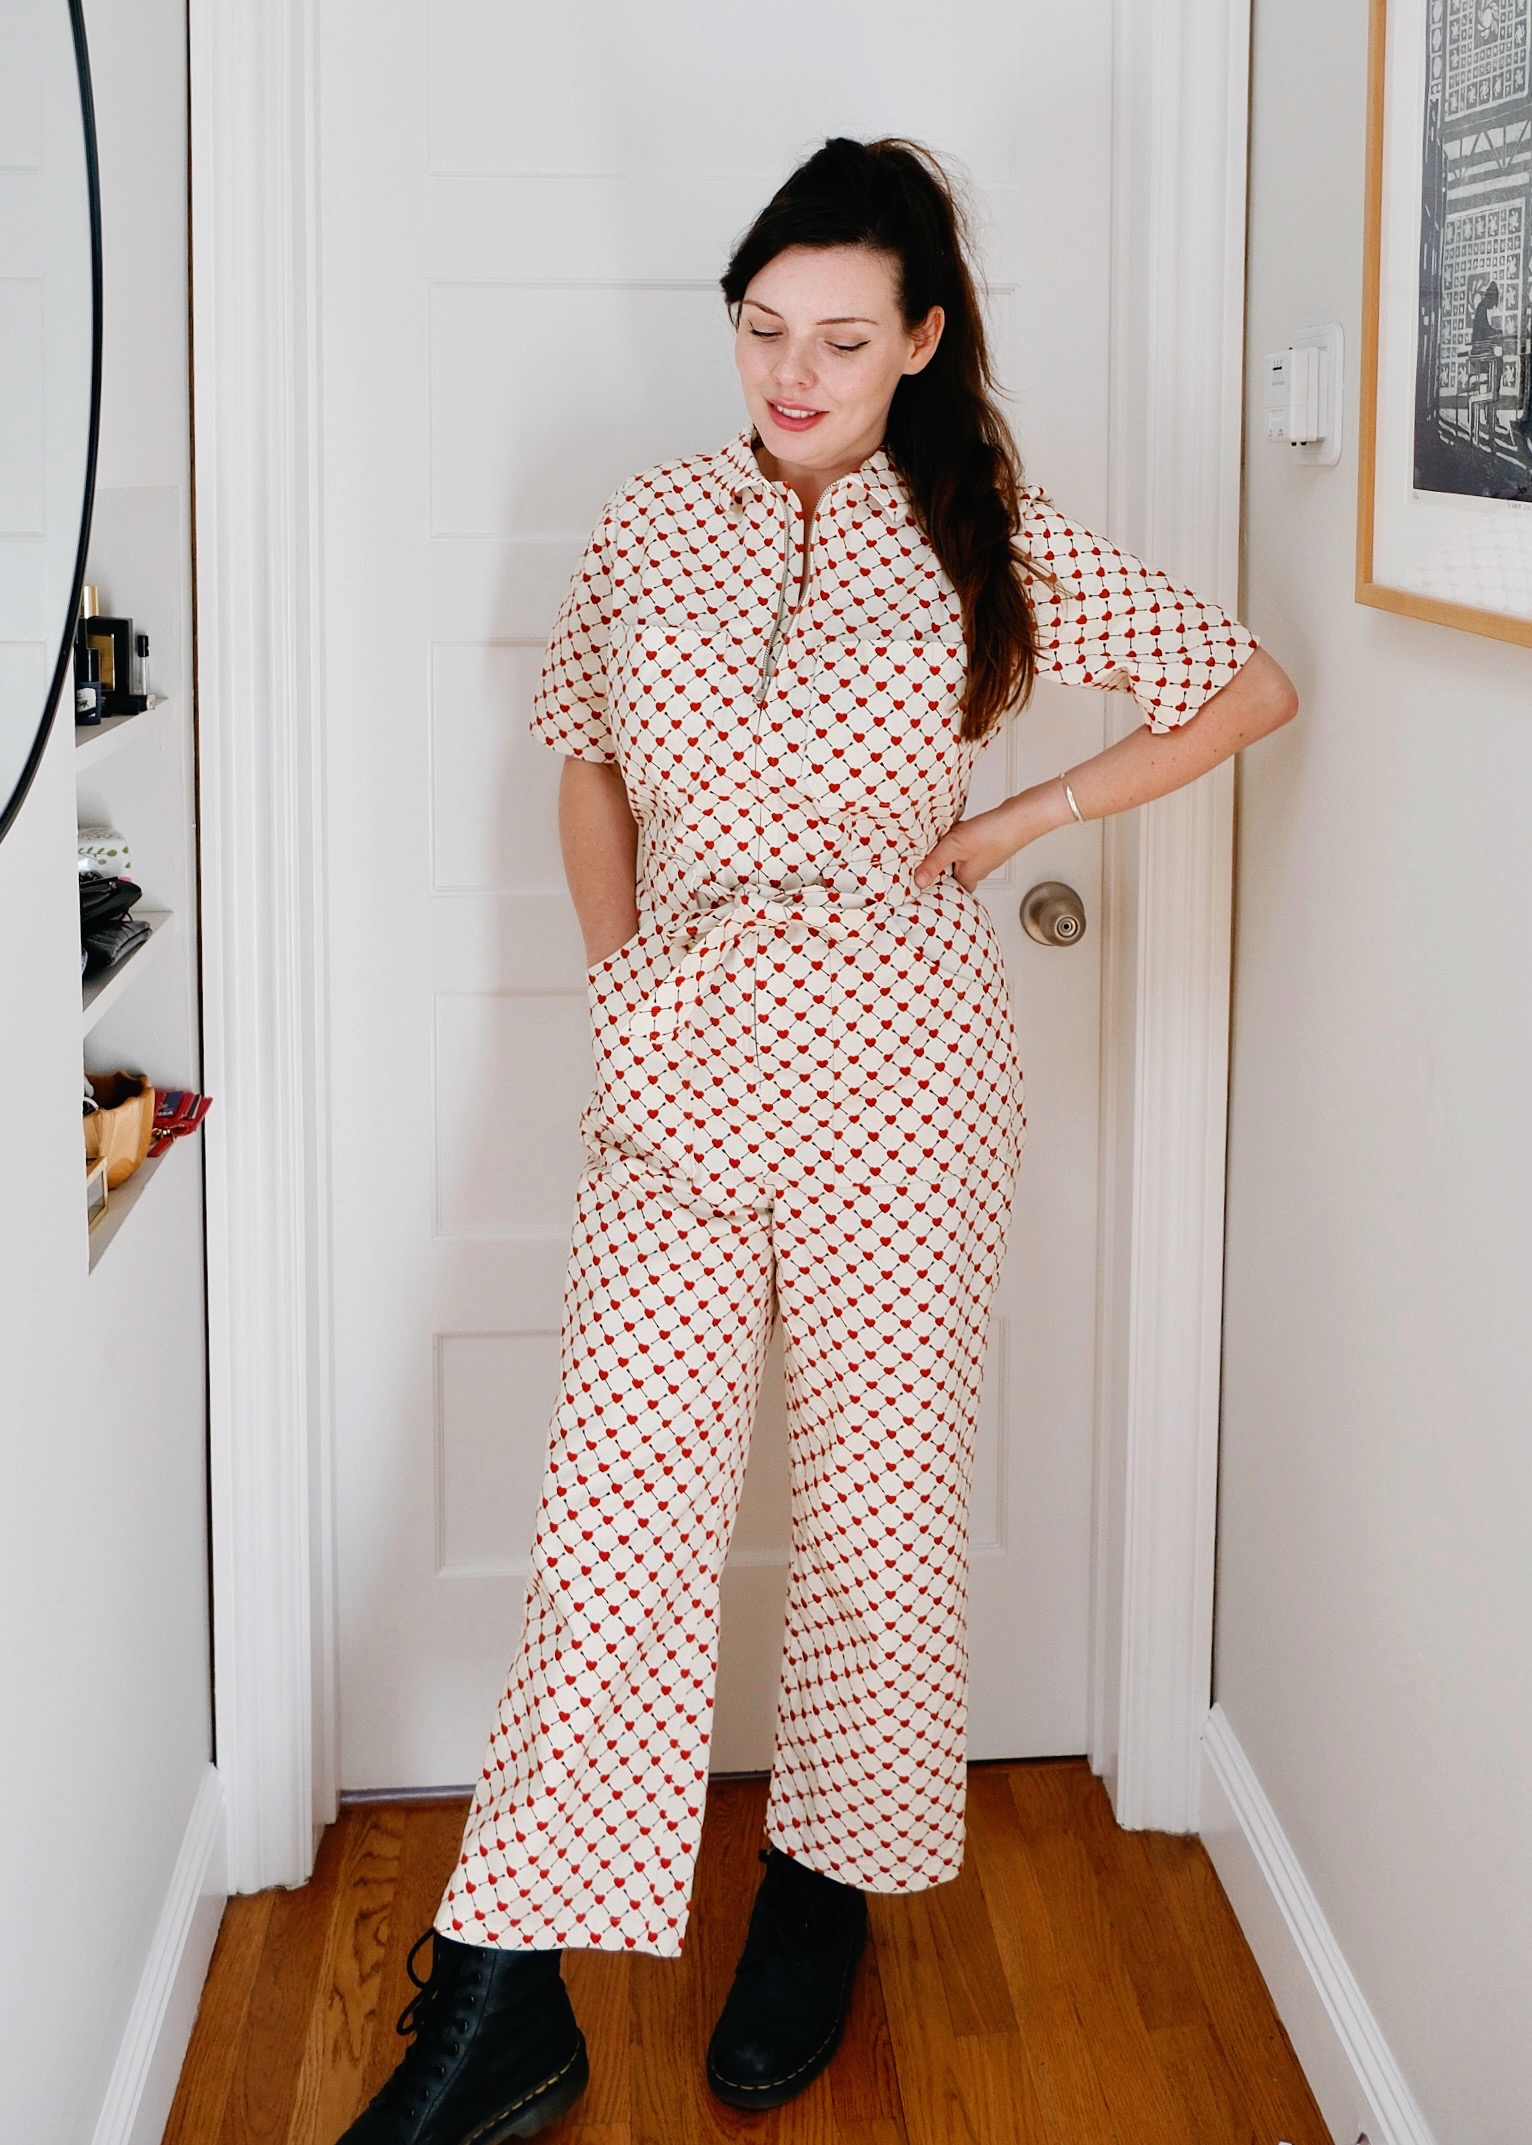
The fabric is part of a design collaboration between What Abi Makes and Minerva, where you can get any of her ten exclusive print designs on the seemingly ever-expanding Minerva print-on-demand basecloths. I went for the Cupid’s Kiss design on 100% cotton denim twill. The background is a neutral cream colour, with a cute little heart and arrow print. This is a reasonably heavyweight fabric (roughly 9oz) and there is no stretch — only the slightest ‘give’ — so getting a comfortable fit both across and along the body would be key, as there wouldn’t be the wiggle room you usually get with a stretch woven! The fabric has a soft hand, with a slightly brushed texture thanks to the twill weave. This is a firm, structured fabric and it holds its shape well, which is perfect for sewing patterns designed for hard-wearing, bottom-weight fabrics. I prewashed this fabric twice on a warm setting and tumble-dried it, just to ensure any shrinkage was taken care of. I was so excited to get immediately stuck into this project, but I took my time before actually cutting into this lovely fabric — this patience paid off.
Before I started cutting out my pattern pieces, there were a few changes I wanted to make right off the bat:
- I am not very tall — only 5ft 4″ on a good day — so I like to make sure nothing feels too out-of-proportion on my body or I tend to look swamped.
- I have a large bust but very narrow shoulders, so bodices without darts and very dropped shoulders don’t do anything for me.
- I am pretty short-waisted, so I like my waistbands to sit on my natural waist to give me some definition there. The pattern does suggest adding elastic to the back waistband channel to get the garment to fit tighter through the back waist.
- The last boilersuit I made had a slightly dropped crotch — it isn’t enough to bother me, but I did want to eliminate it on this version. This would have to be a bit of a balancing act, as allowing for ease along the body is important for when you are lifting your arms up or bending down, otherwise you may feel like you are being cut in two!
With these pattern adjustments in mind, I reviewed the incredibly comprehensive finished garment measurements and decided that making a size 12 would be a good starting position for me. I probably could have blended down to a size 10 at the waist and hip, but I opted to keep things simple, given that I knew I needed to make several adjustments. I also recommend making a muslin (or two! or even three!) for this garment — scratch that, I insist you make a muslin for this garment! I chose to tissue-fit once using Swedish tracing paper that you can sew, made my adjustments accordingly, made a muslin that factored in these adjustments, made a few more tweaks, and then sewed a final muslin with all my changes before I cut into this precious denim twill. I found the two guides on the Closet Core Patterns website were really useful for working out fit adjustments (this one specifically for the Blanca and this one for general jeans fitting), so here are all the fitting adjustments I made to the pattern:
- A 1″ full bust adjustment to gain a total of 2″ at the bust — this added bust and waist darts to the bodice
- Added 1 ½” wide elastic to the back waist channel
- Front and back leg: increased the rise by 1 ¾” (again, I am very short-waisted!)
- Front leg: Removed ¼” from front crotch curve (Shorten Crotch Adjustment)
- Shortened front and back bodice by 1 ½” (trying to keep the proportions in check after adjusting the leg rise)
- Raised under armscye by ⅝” and reflected this change on the sleeves
- A HEFTY narrow shoulder adjustment — I removed 1″ from the shoulder and could probably lose another ½” if I was really nitpicking
- Back leg: ½” removed (Sway Back Adjustment)
- Back bodice: there was some blousing excess at the centre back that I removed, leaving enough to remain comfortable when bending over
- Pintuck pleats moved closer to the centre back by 1″
- With all the fussy fitting, I lengthened the zipper shield by 2″, which I then trimmed to the correct length once the garment was partially assembled
Phew! It was pretty gruelling to keep making these tweaks and fitting adjustments, but I knew the pay-off would be worth it, so I just kept my focus and listened to a playlist of uplifting songs to keep me going!
DETAILS!
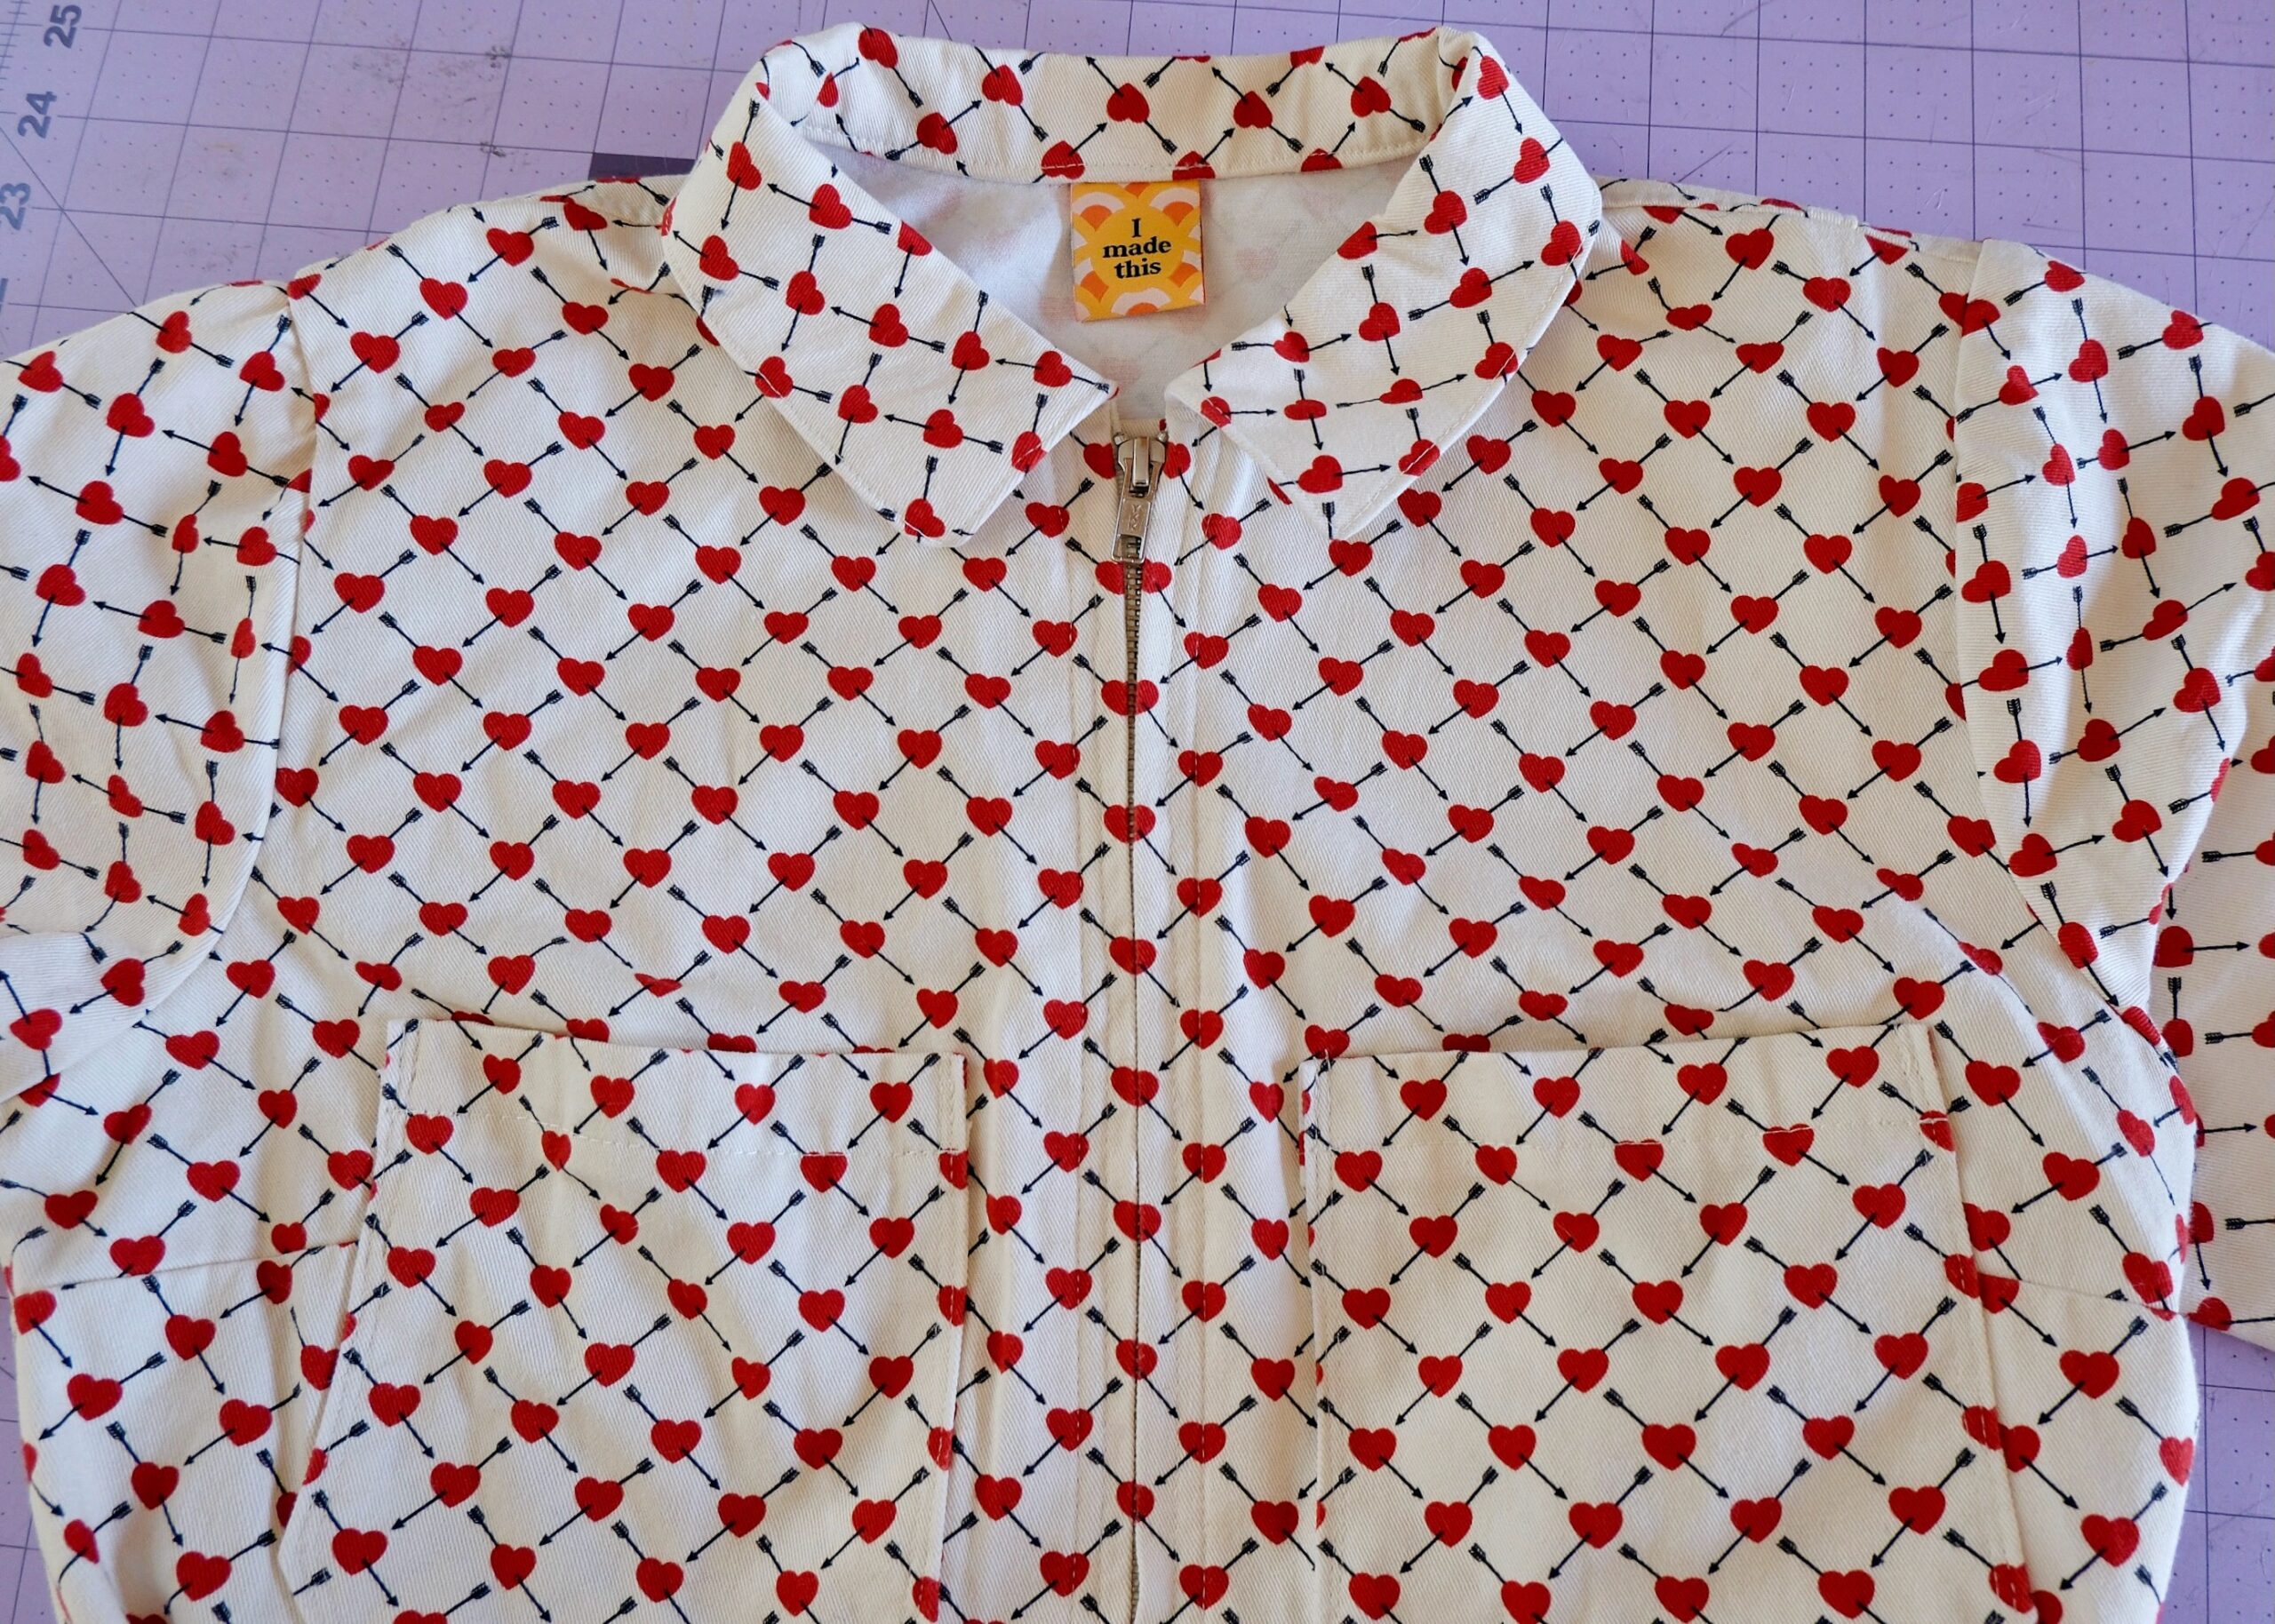
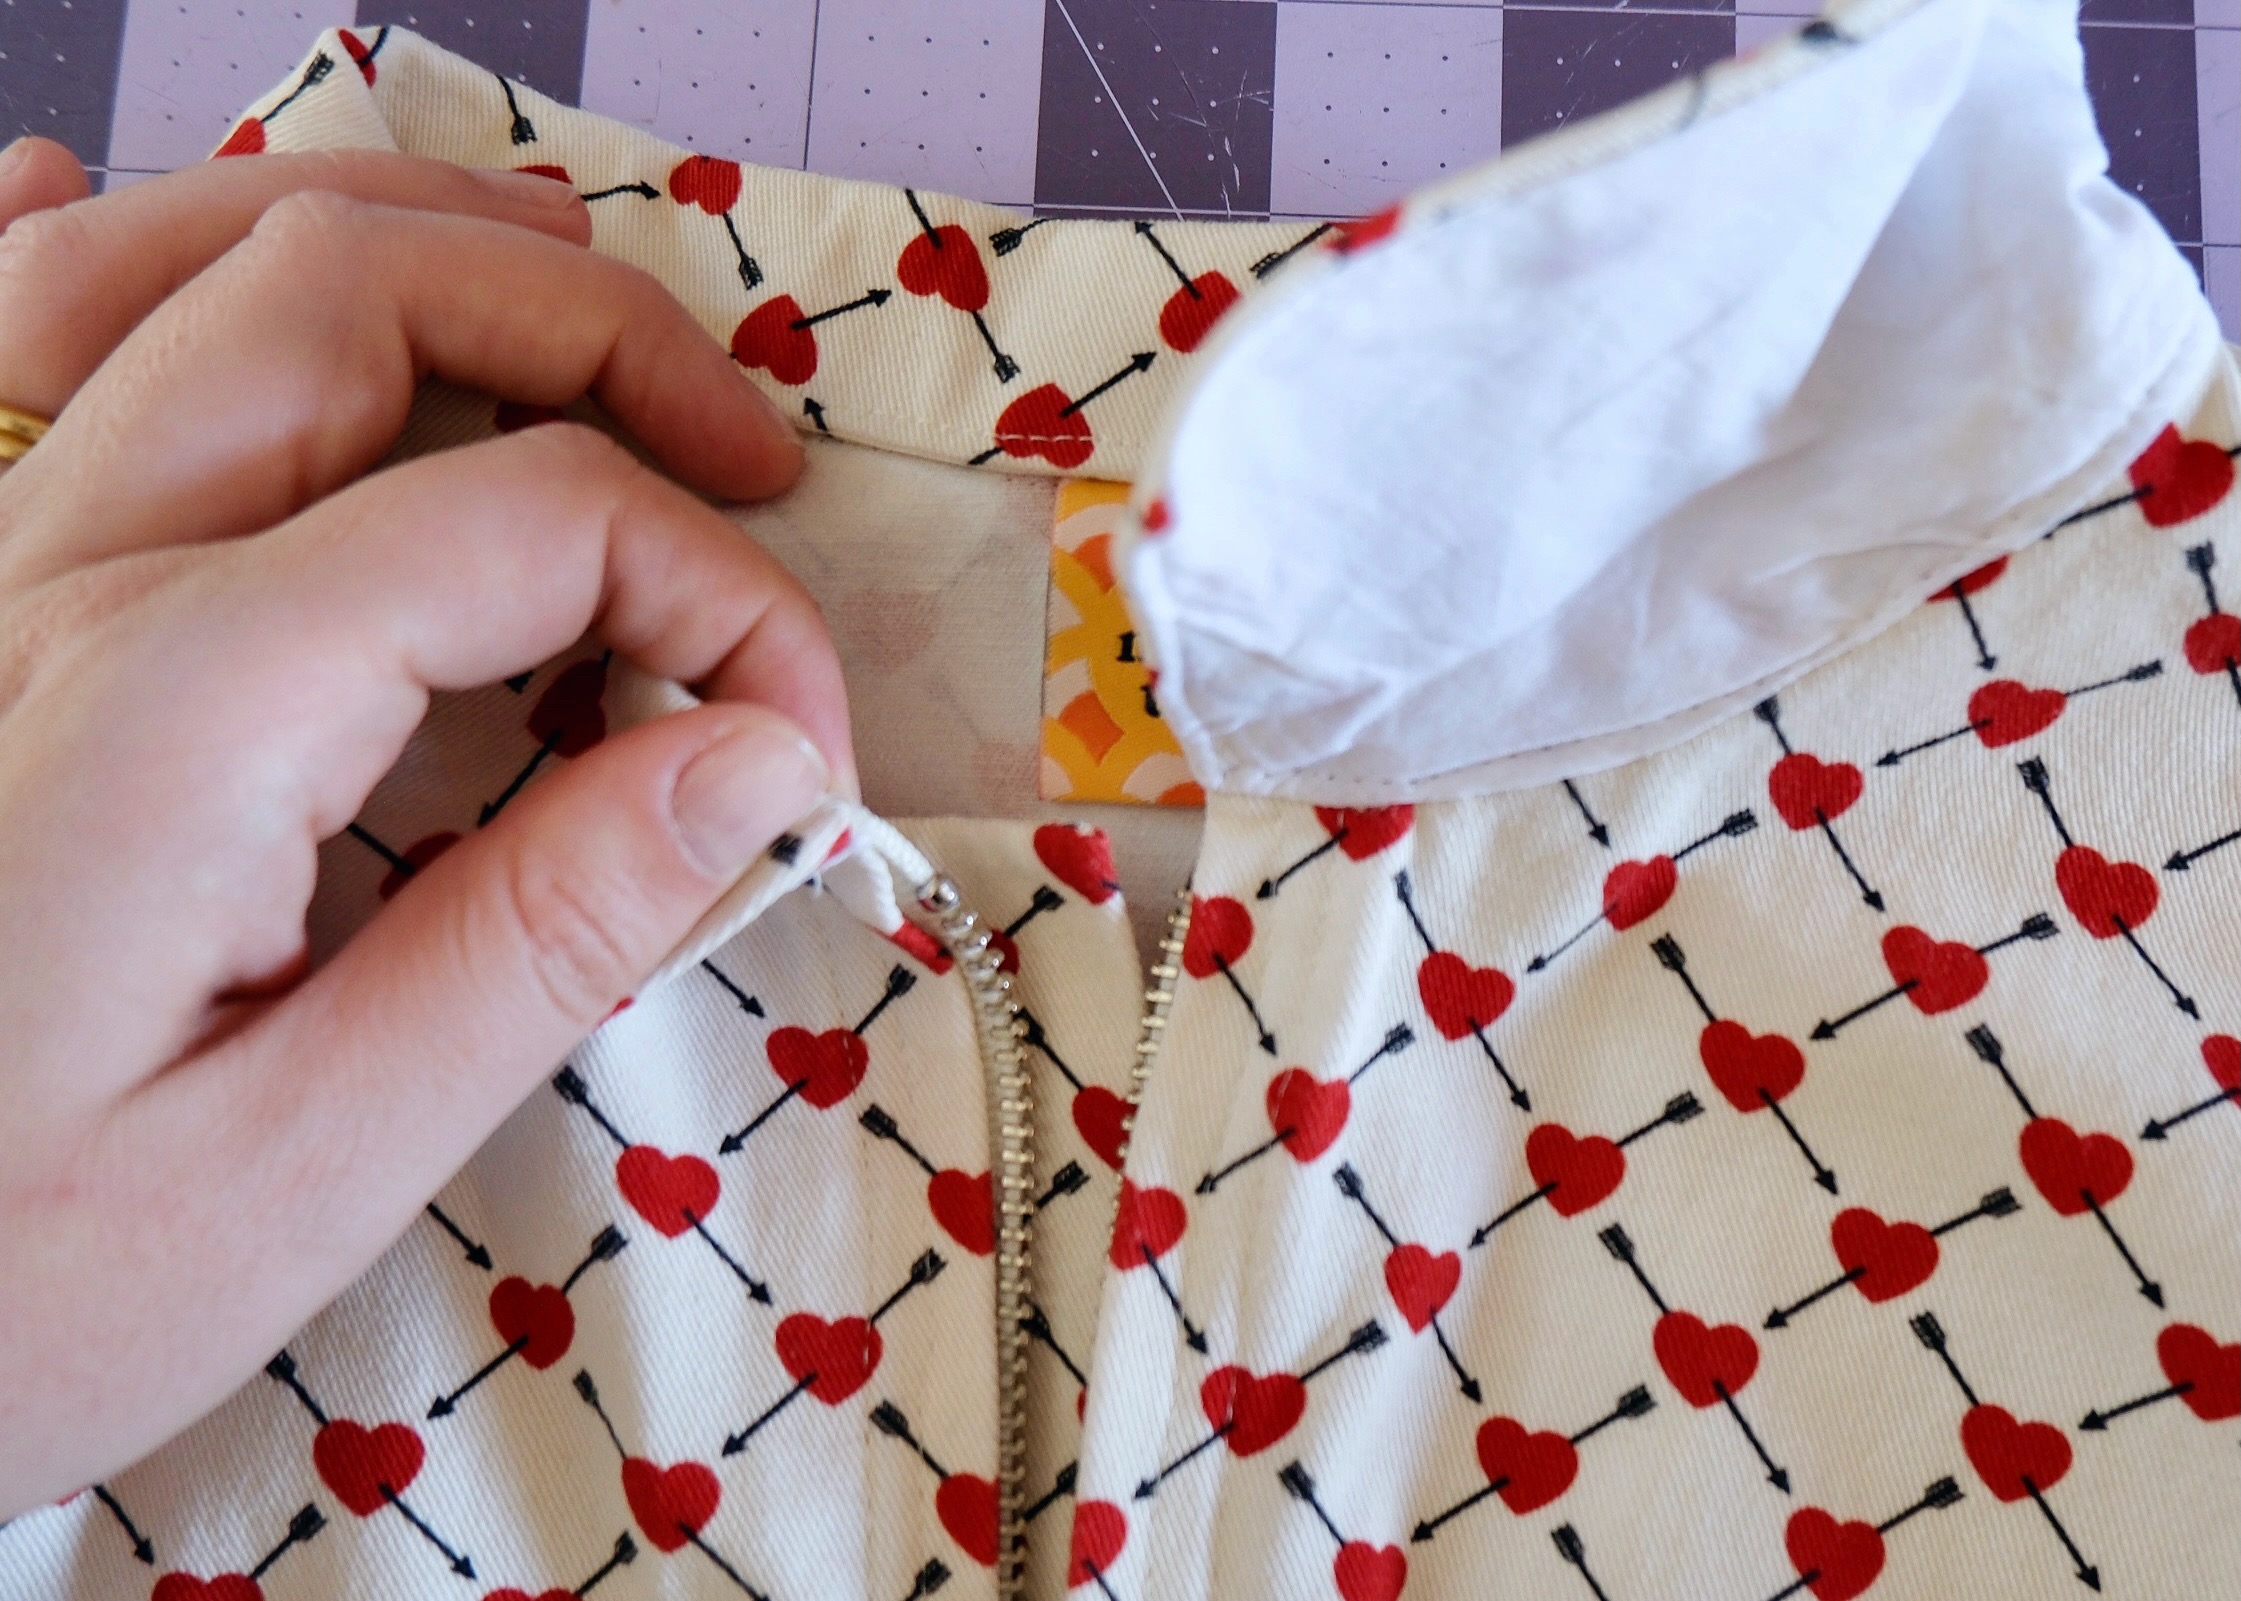
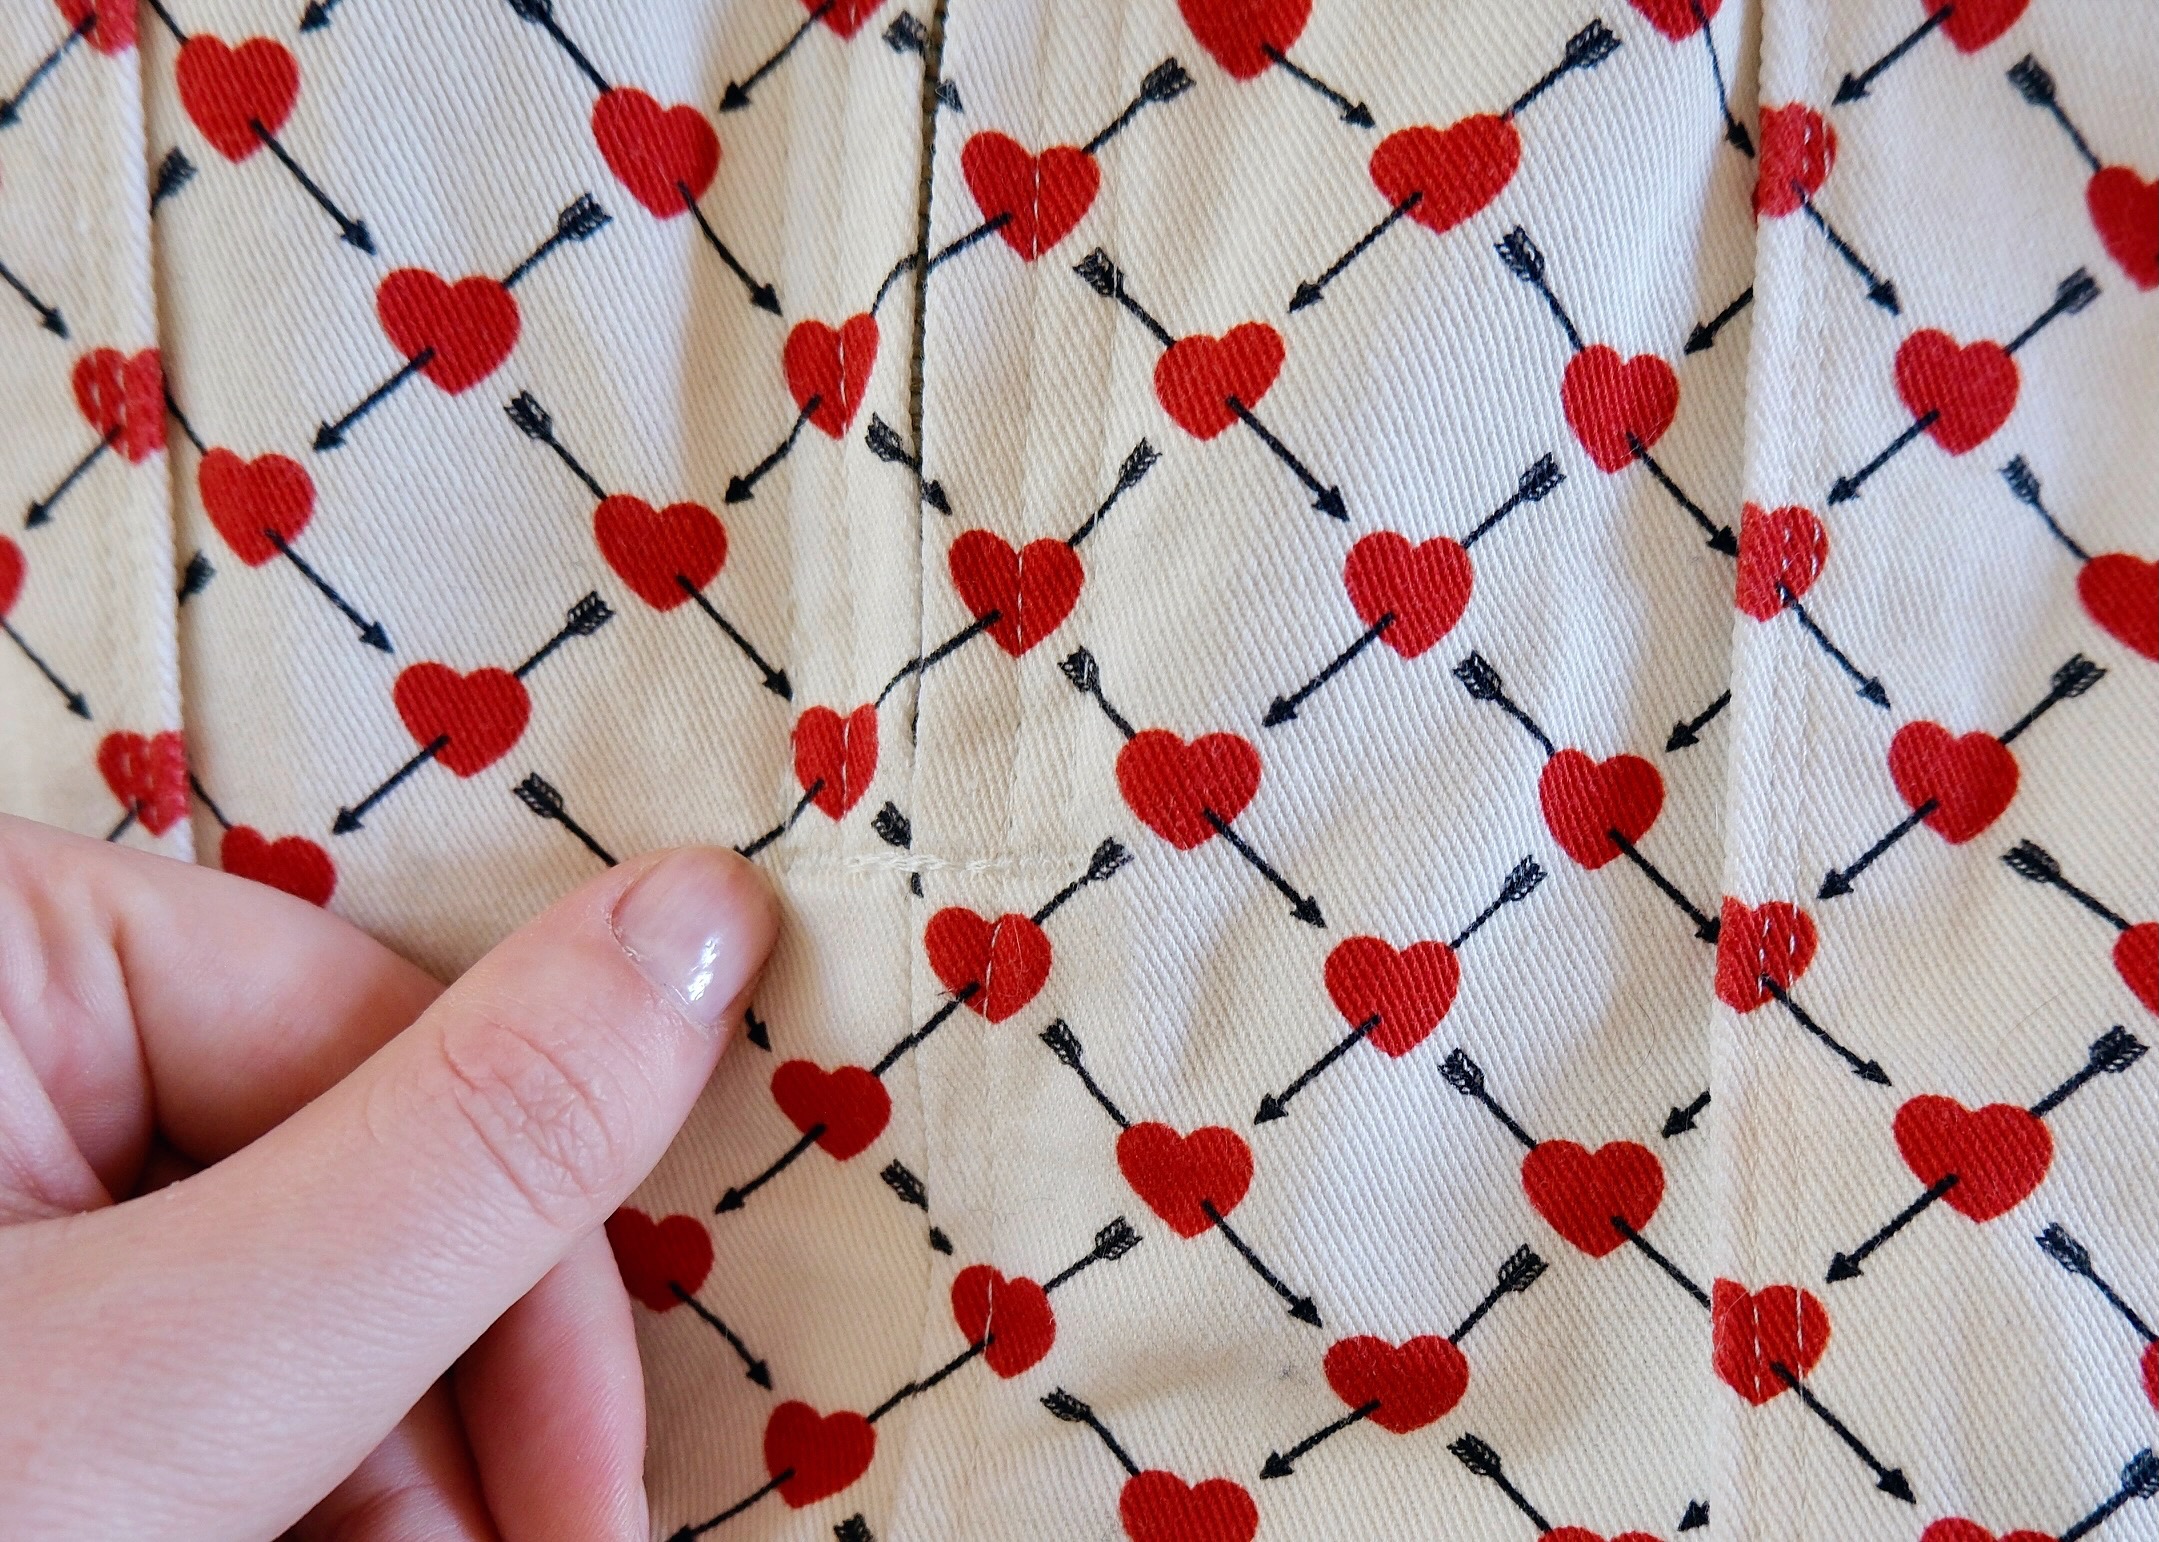
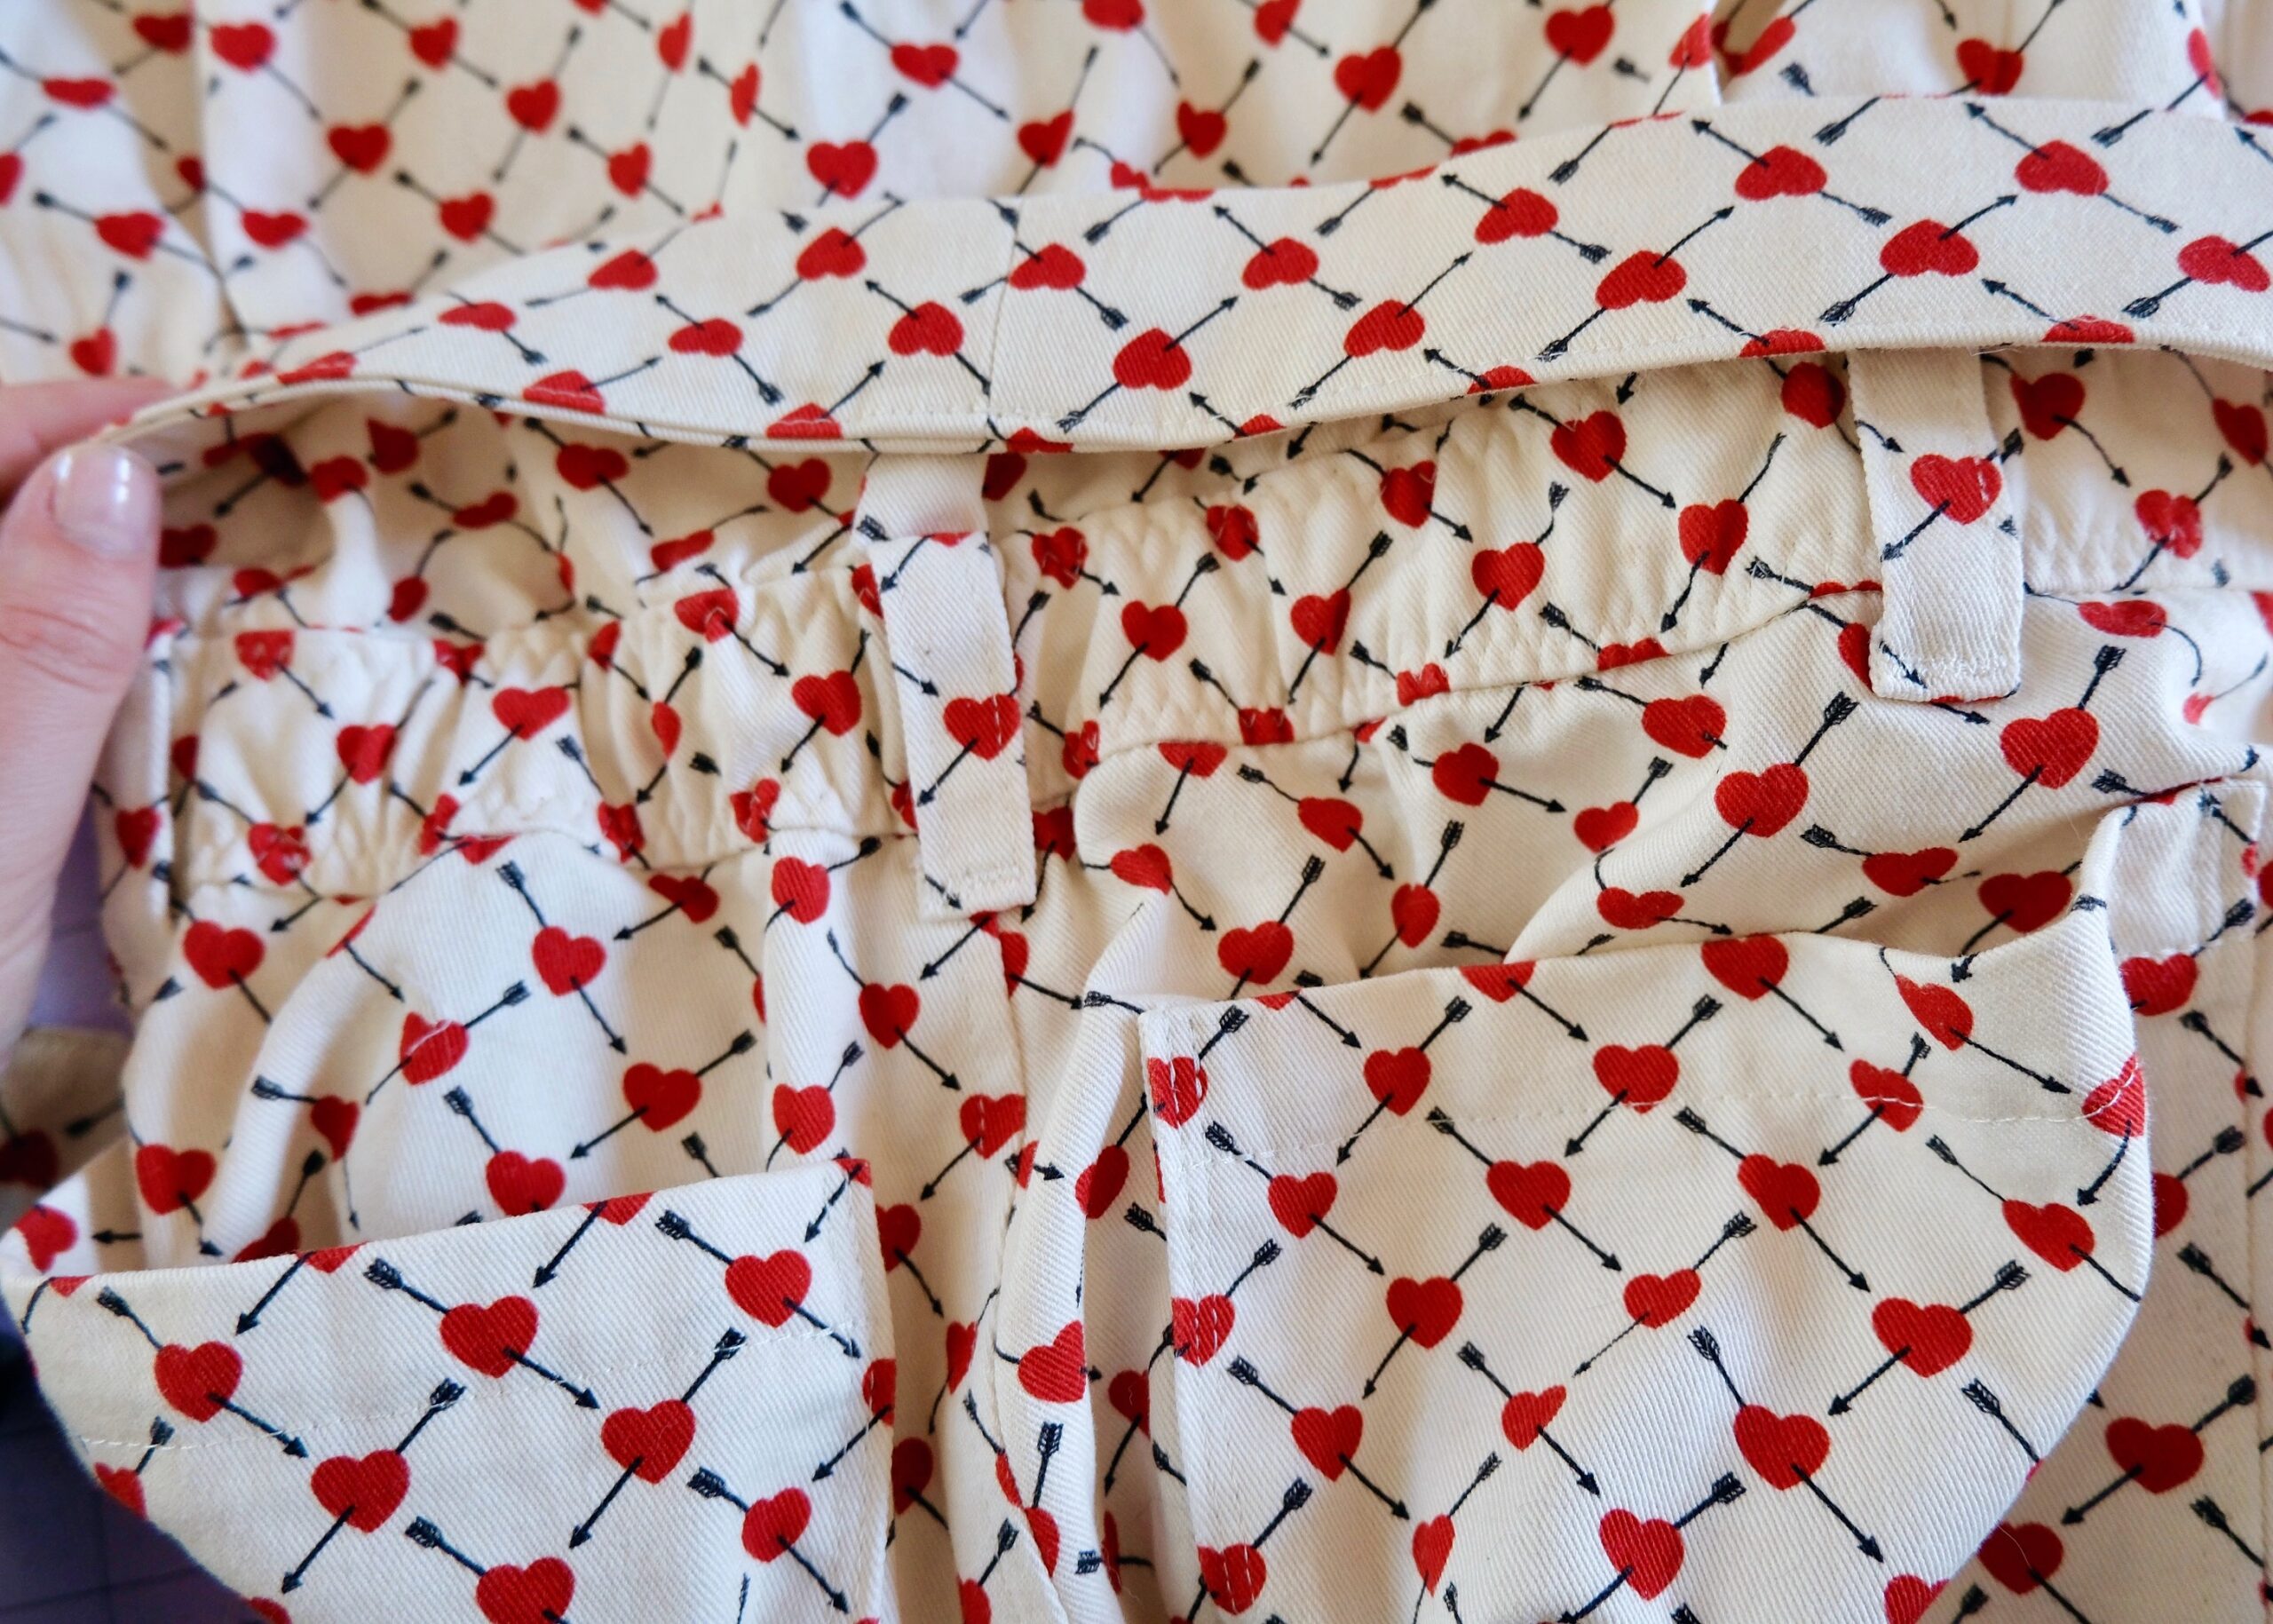
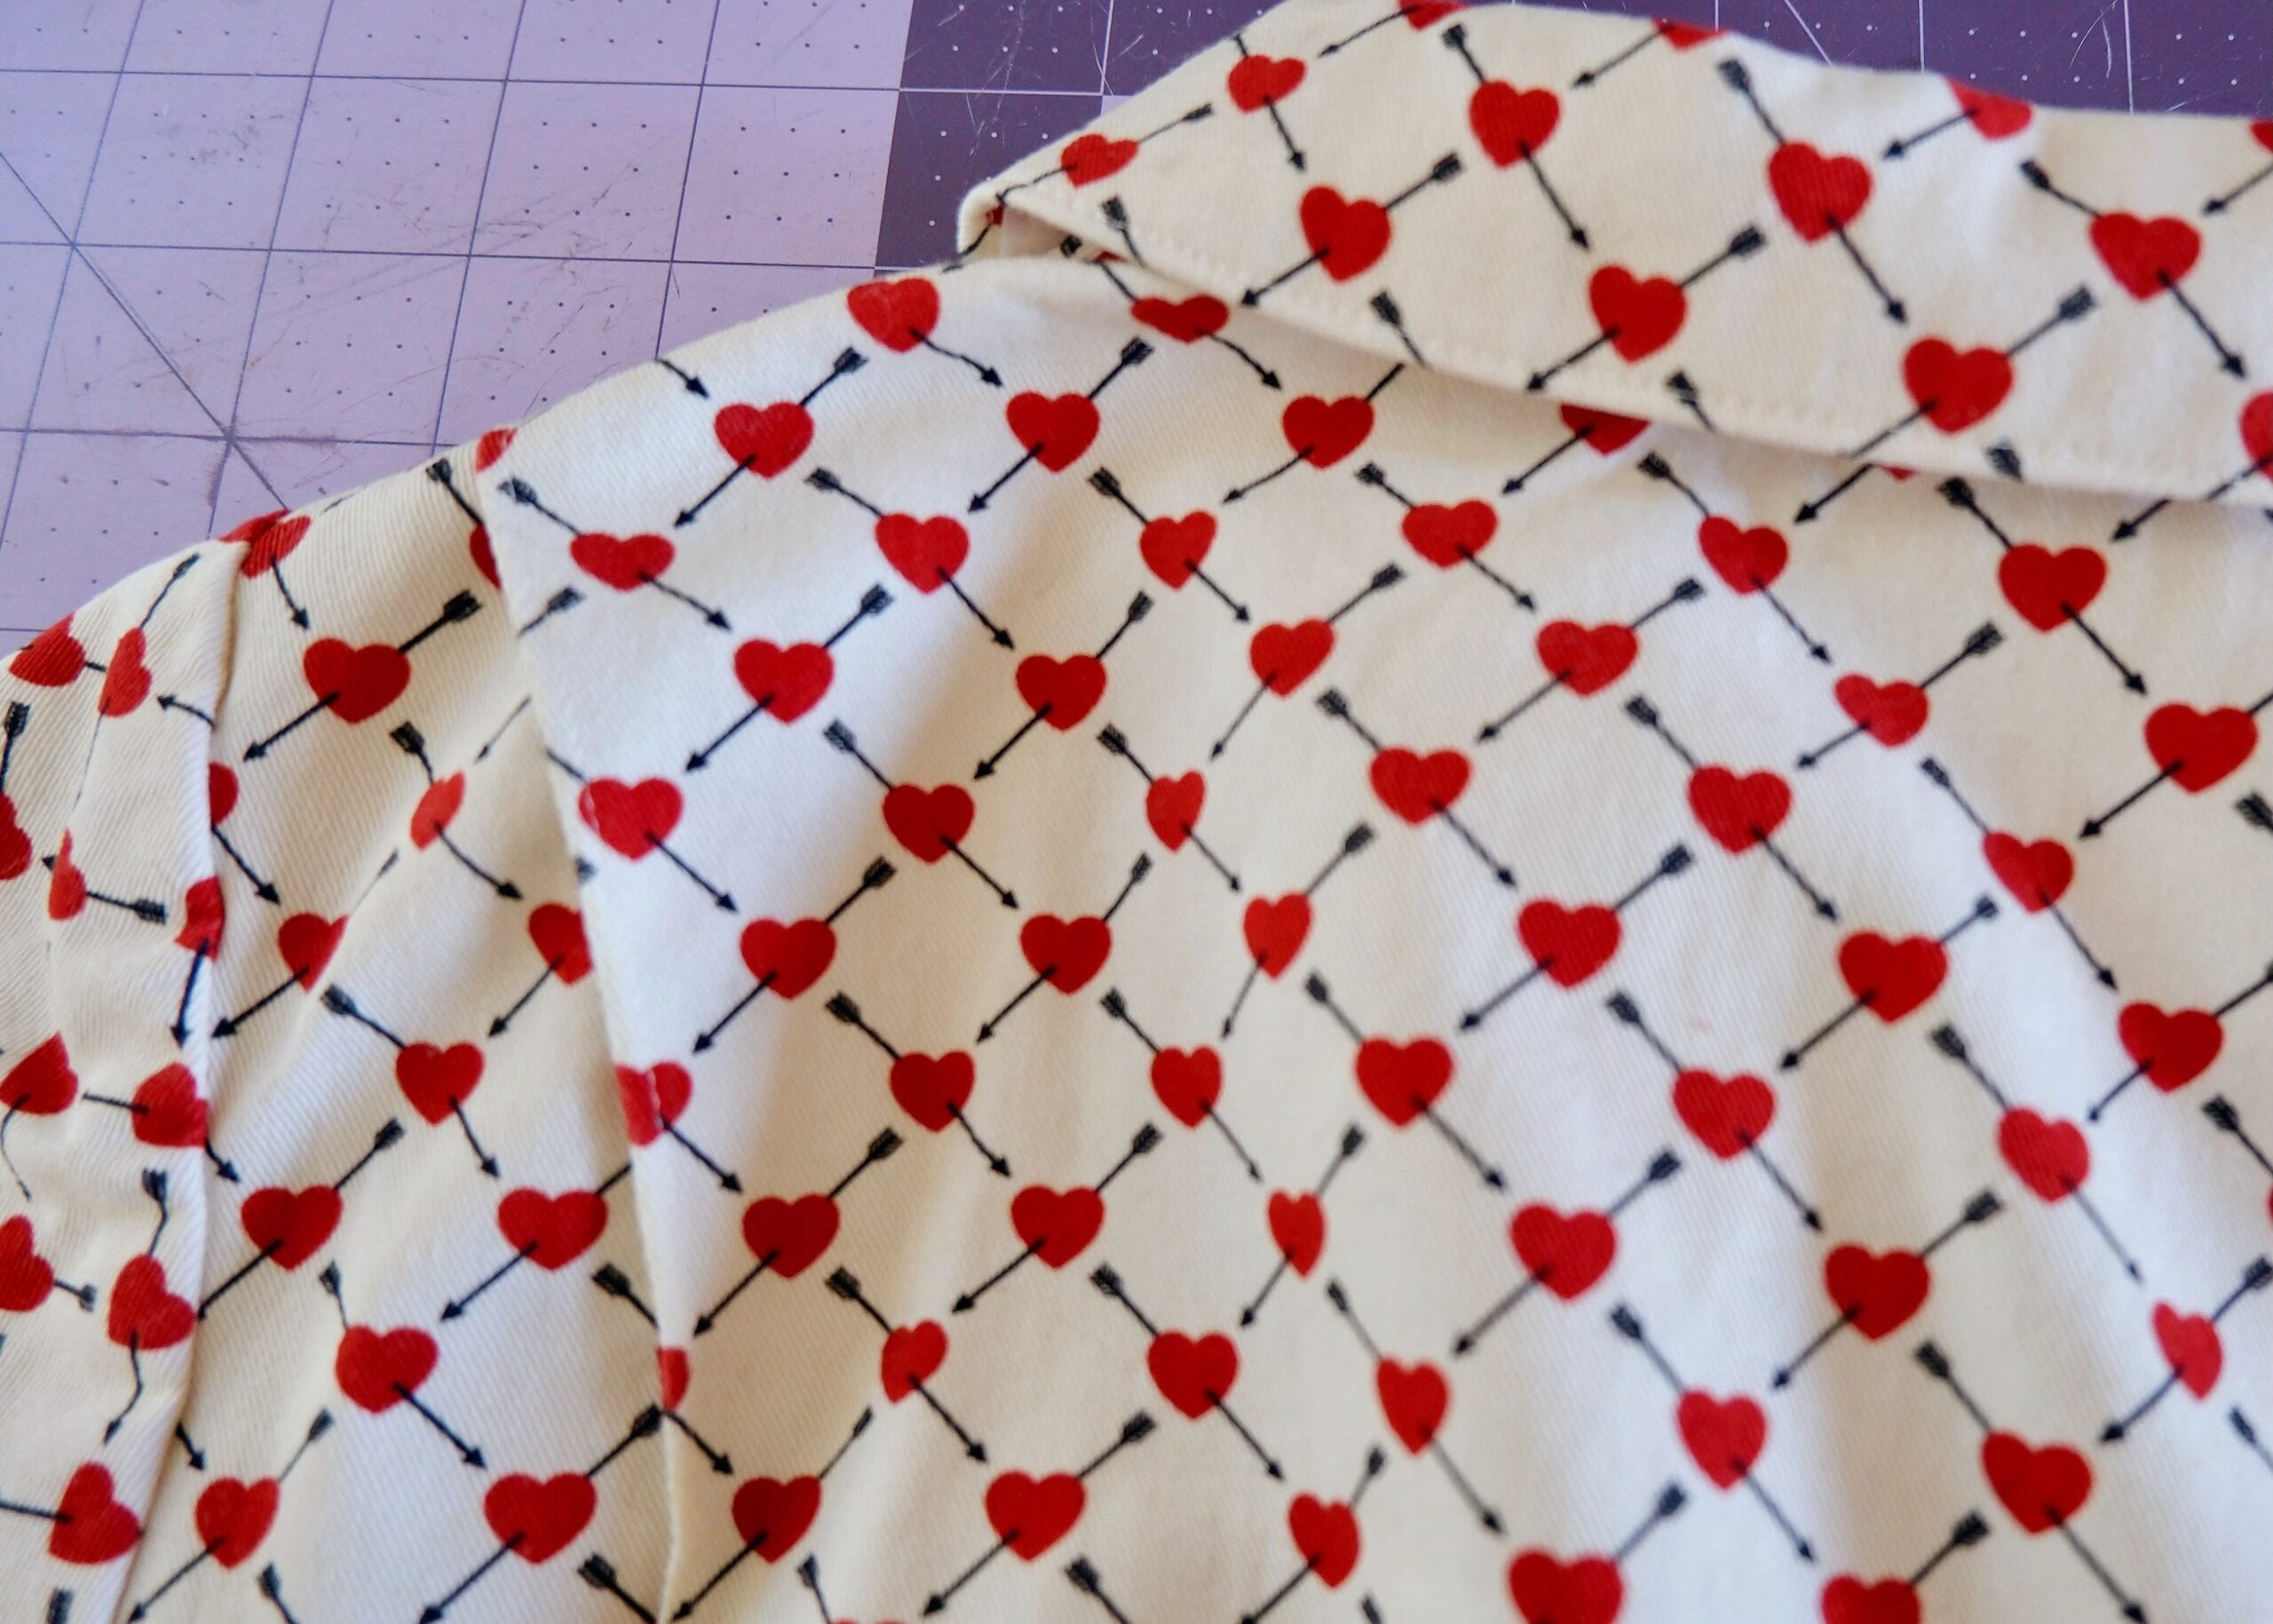
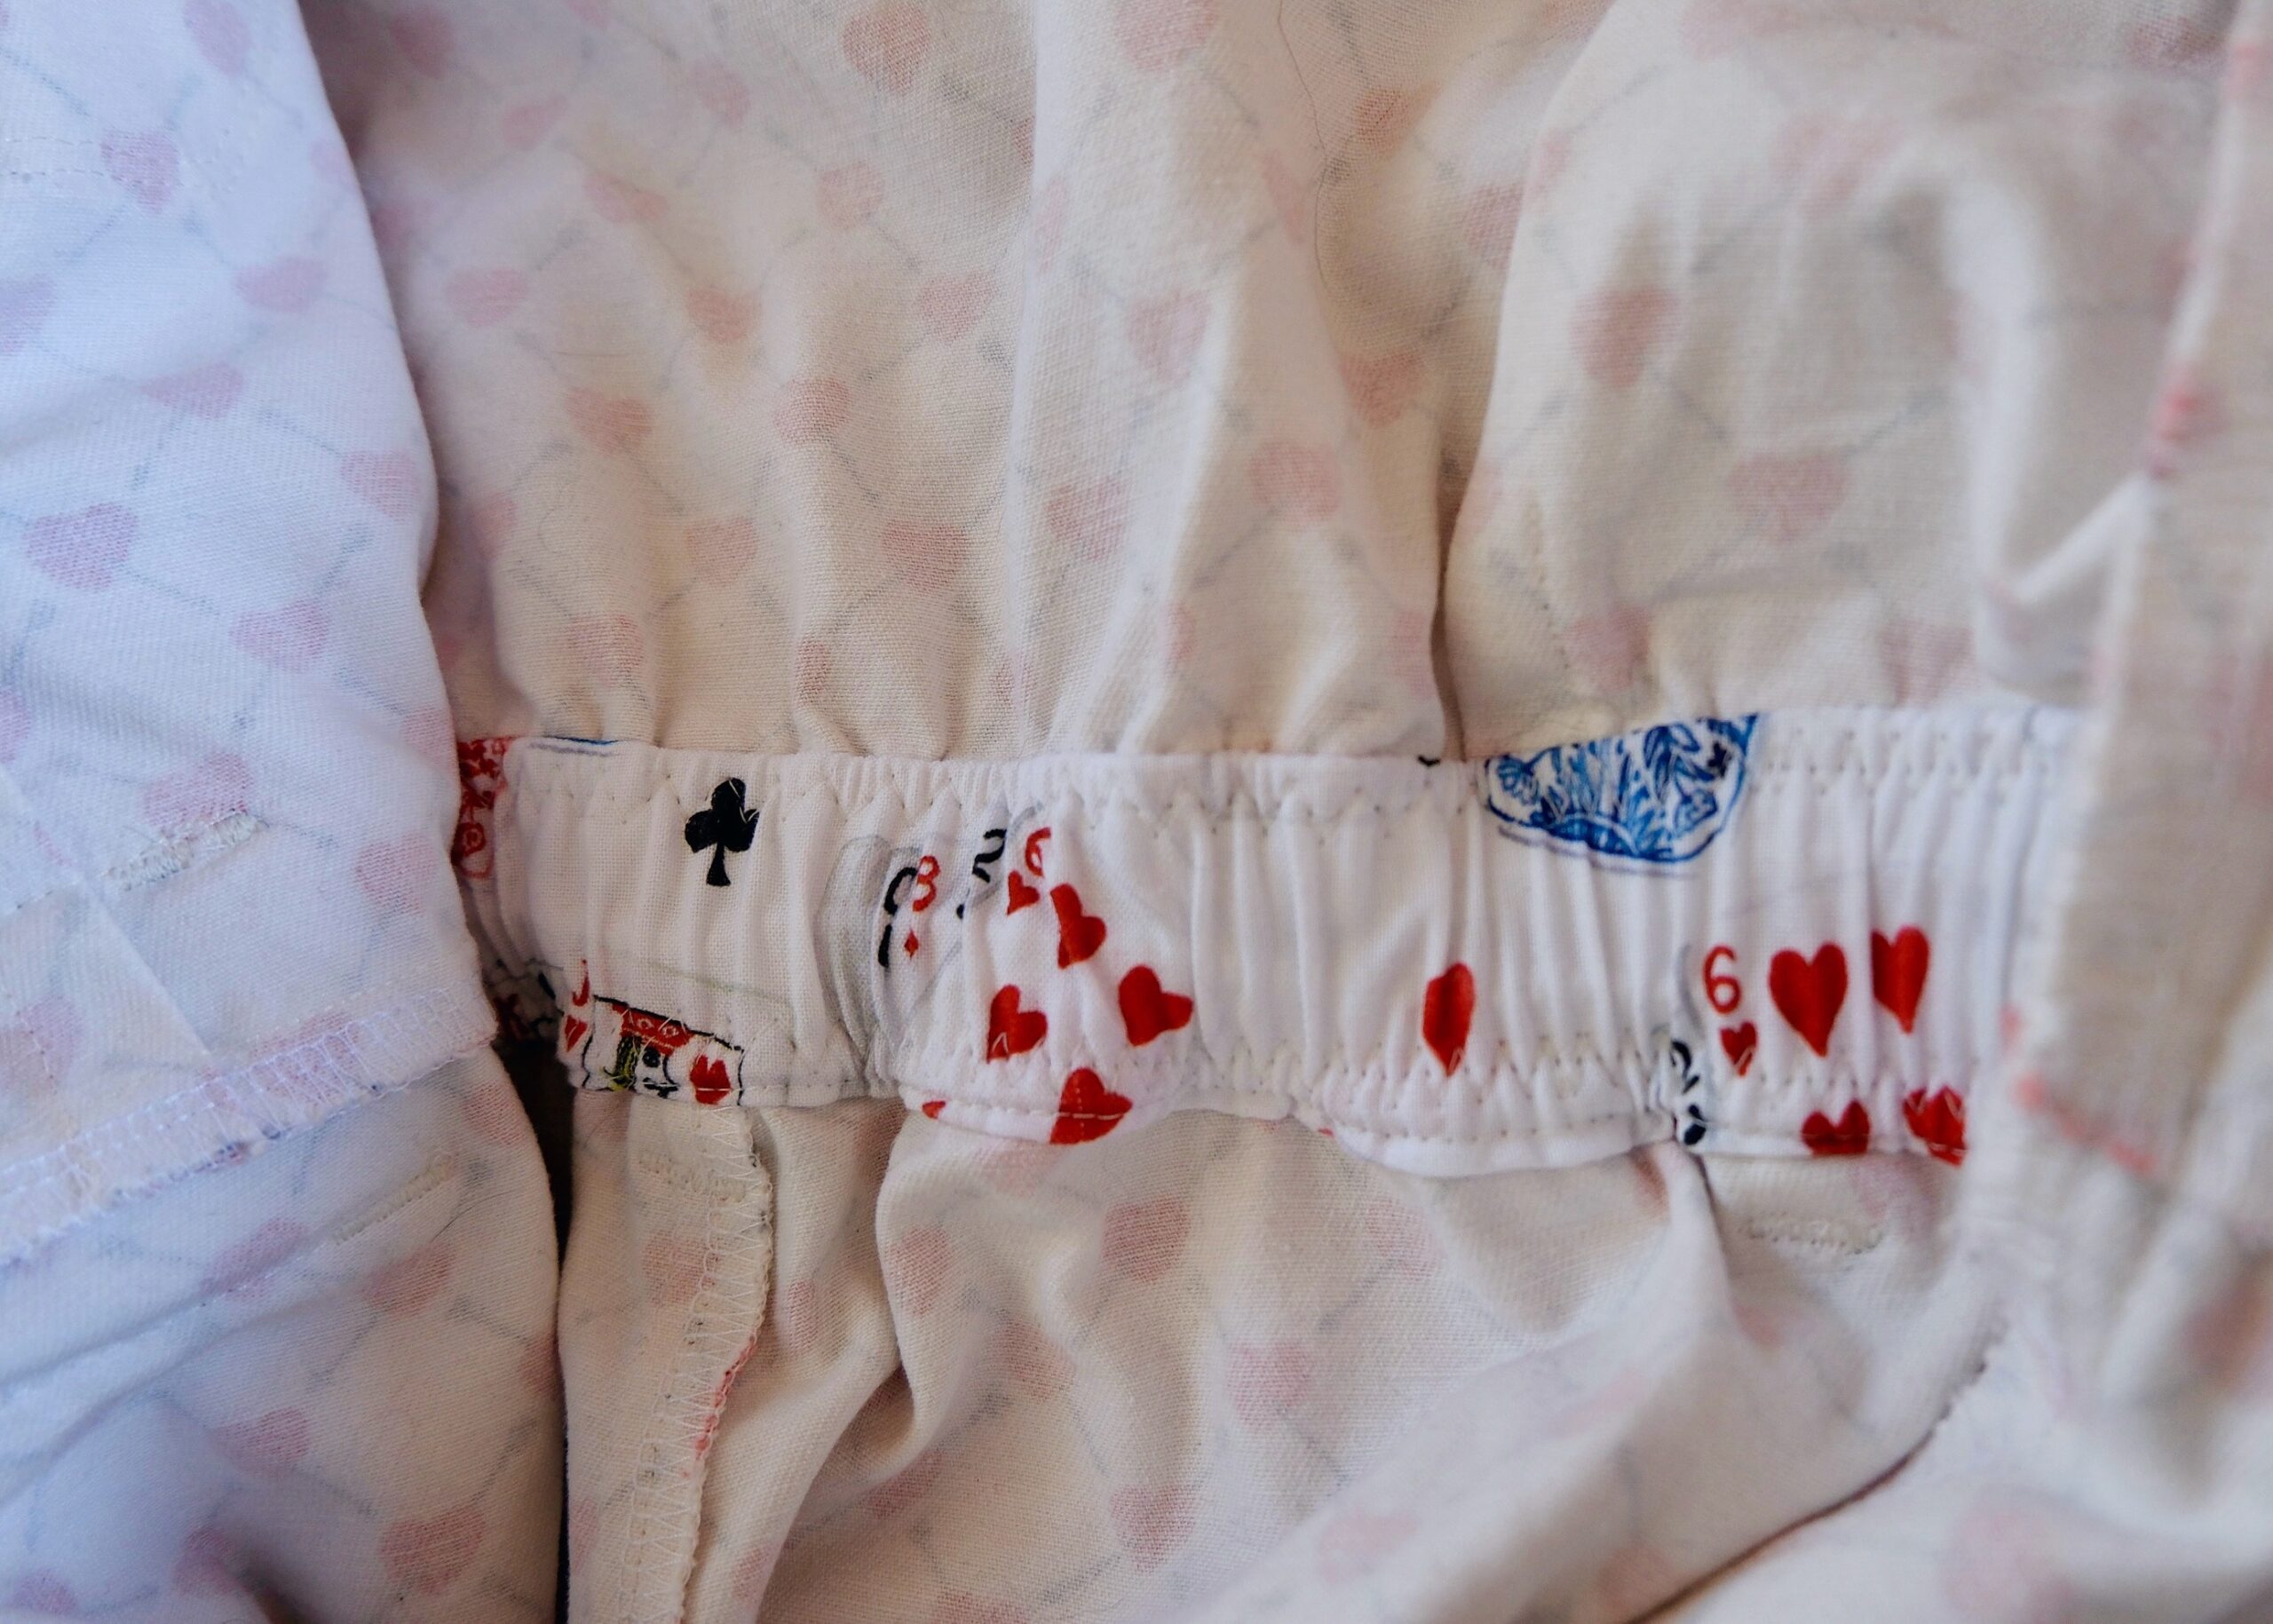
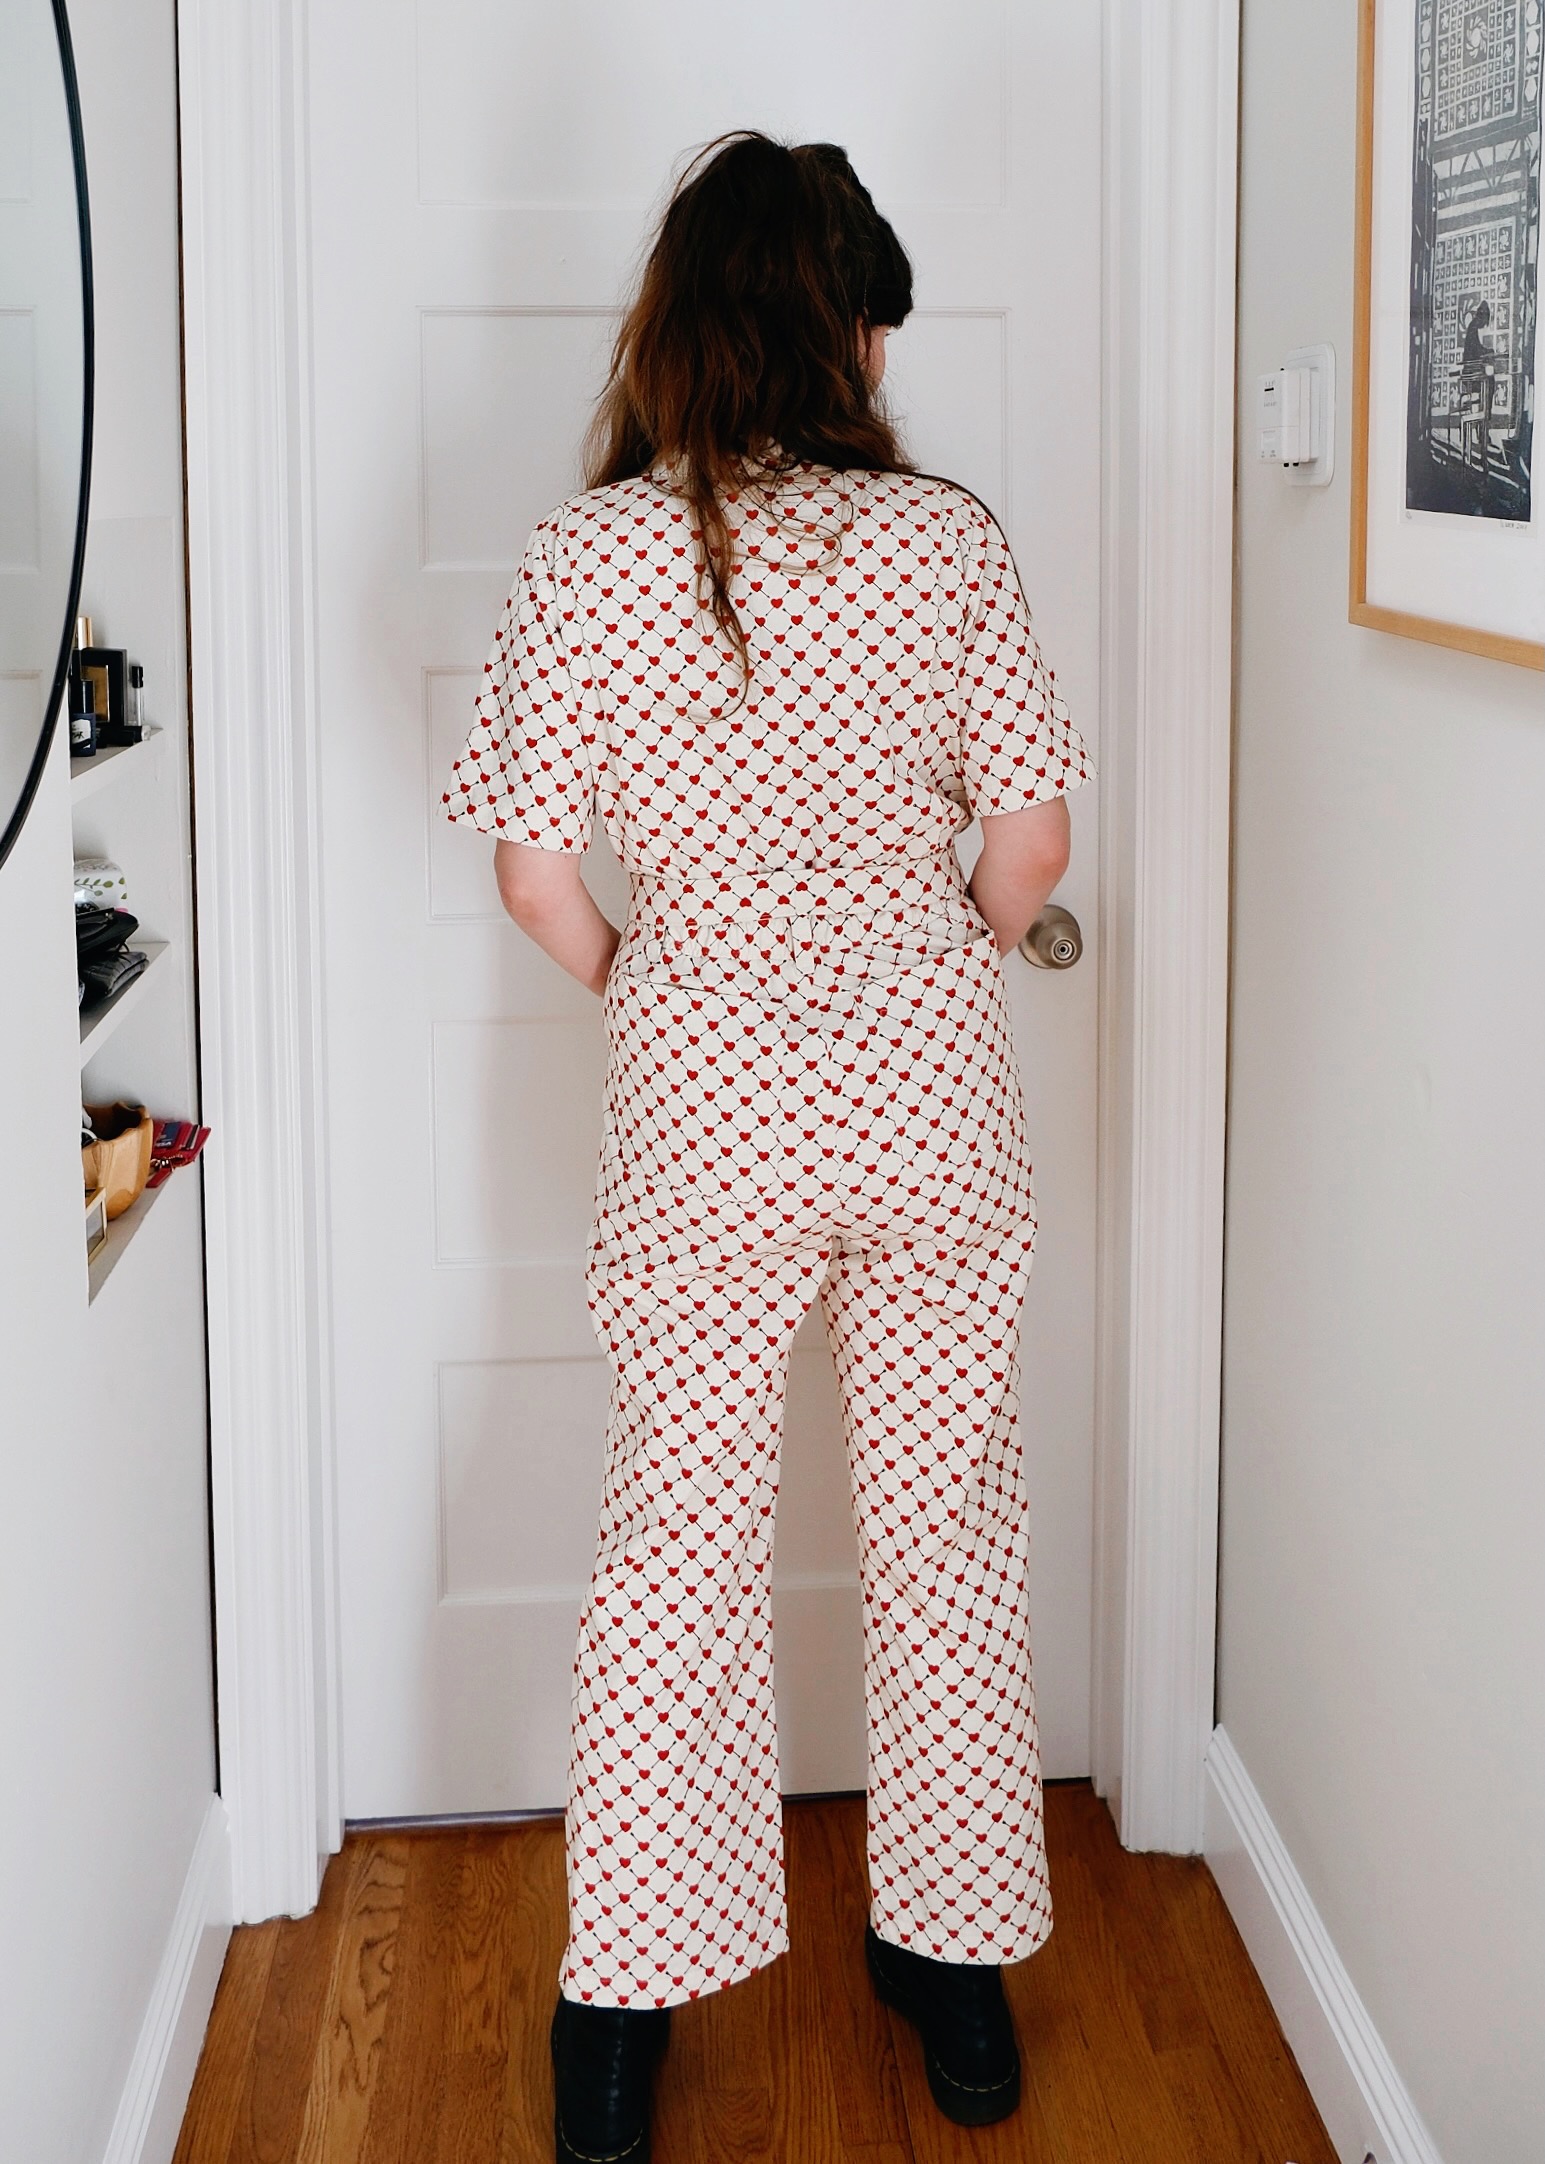
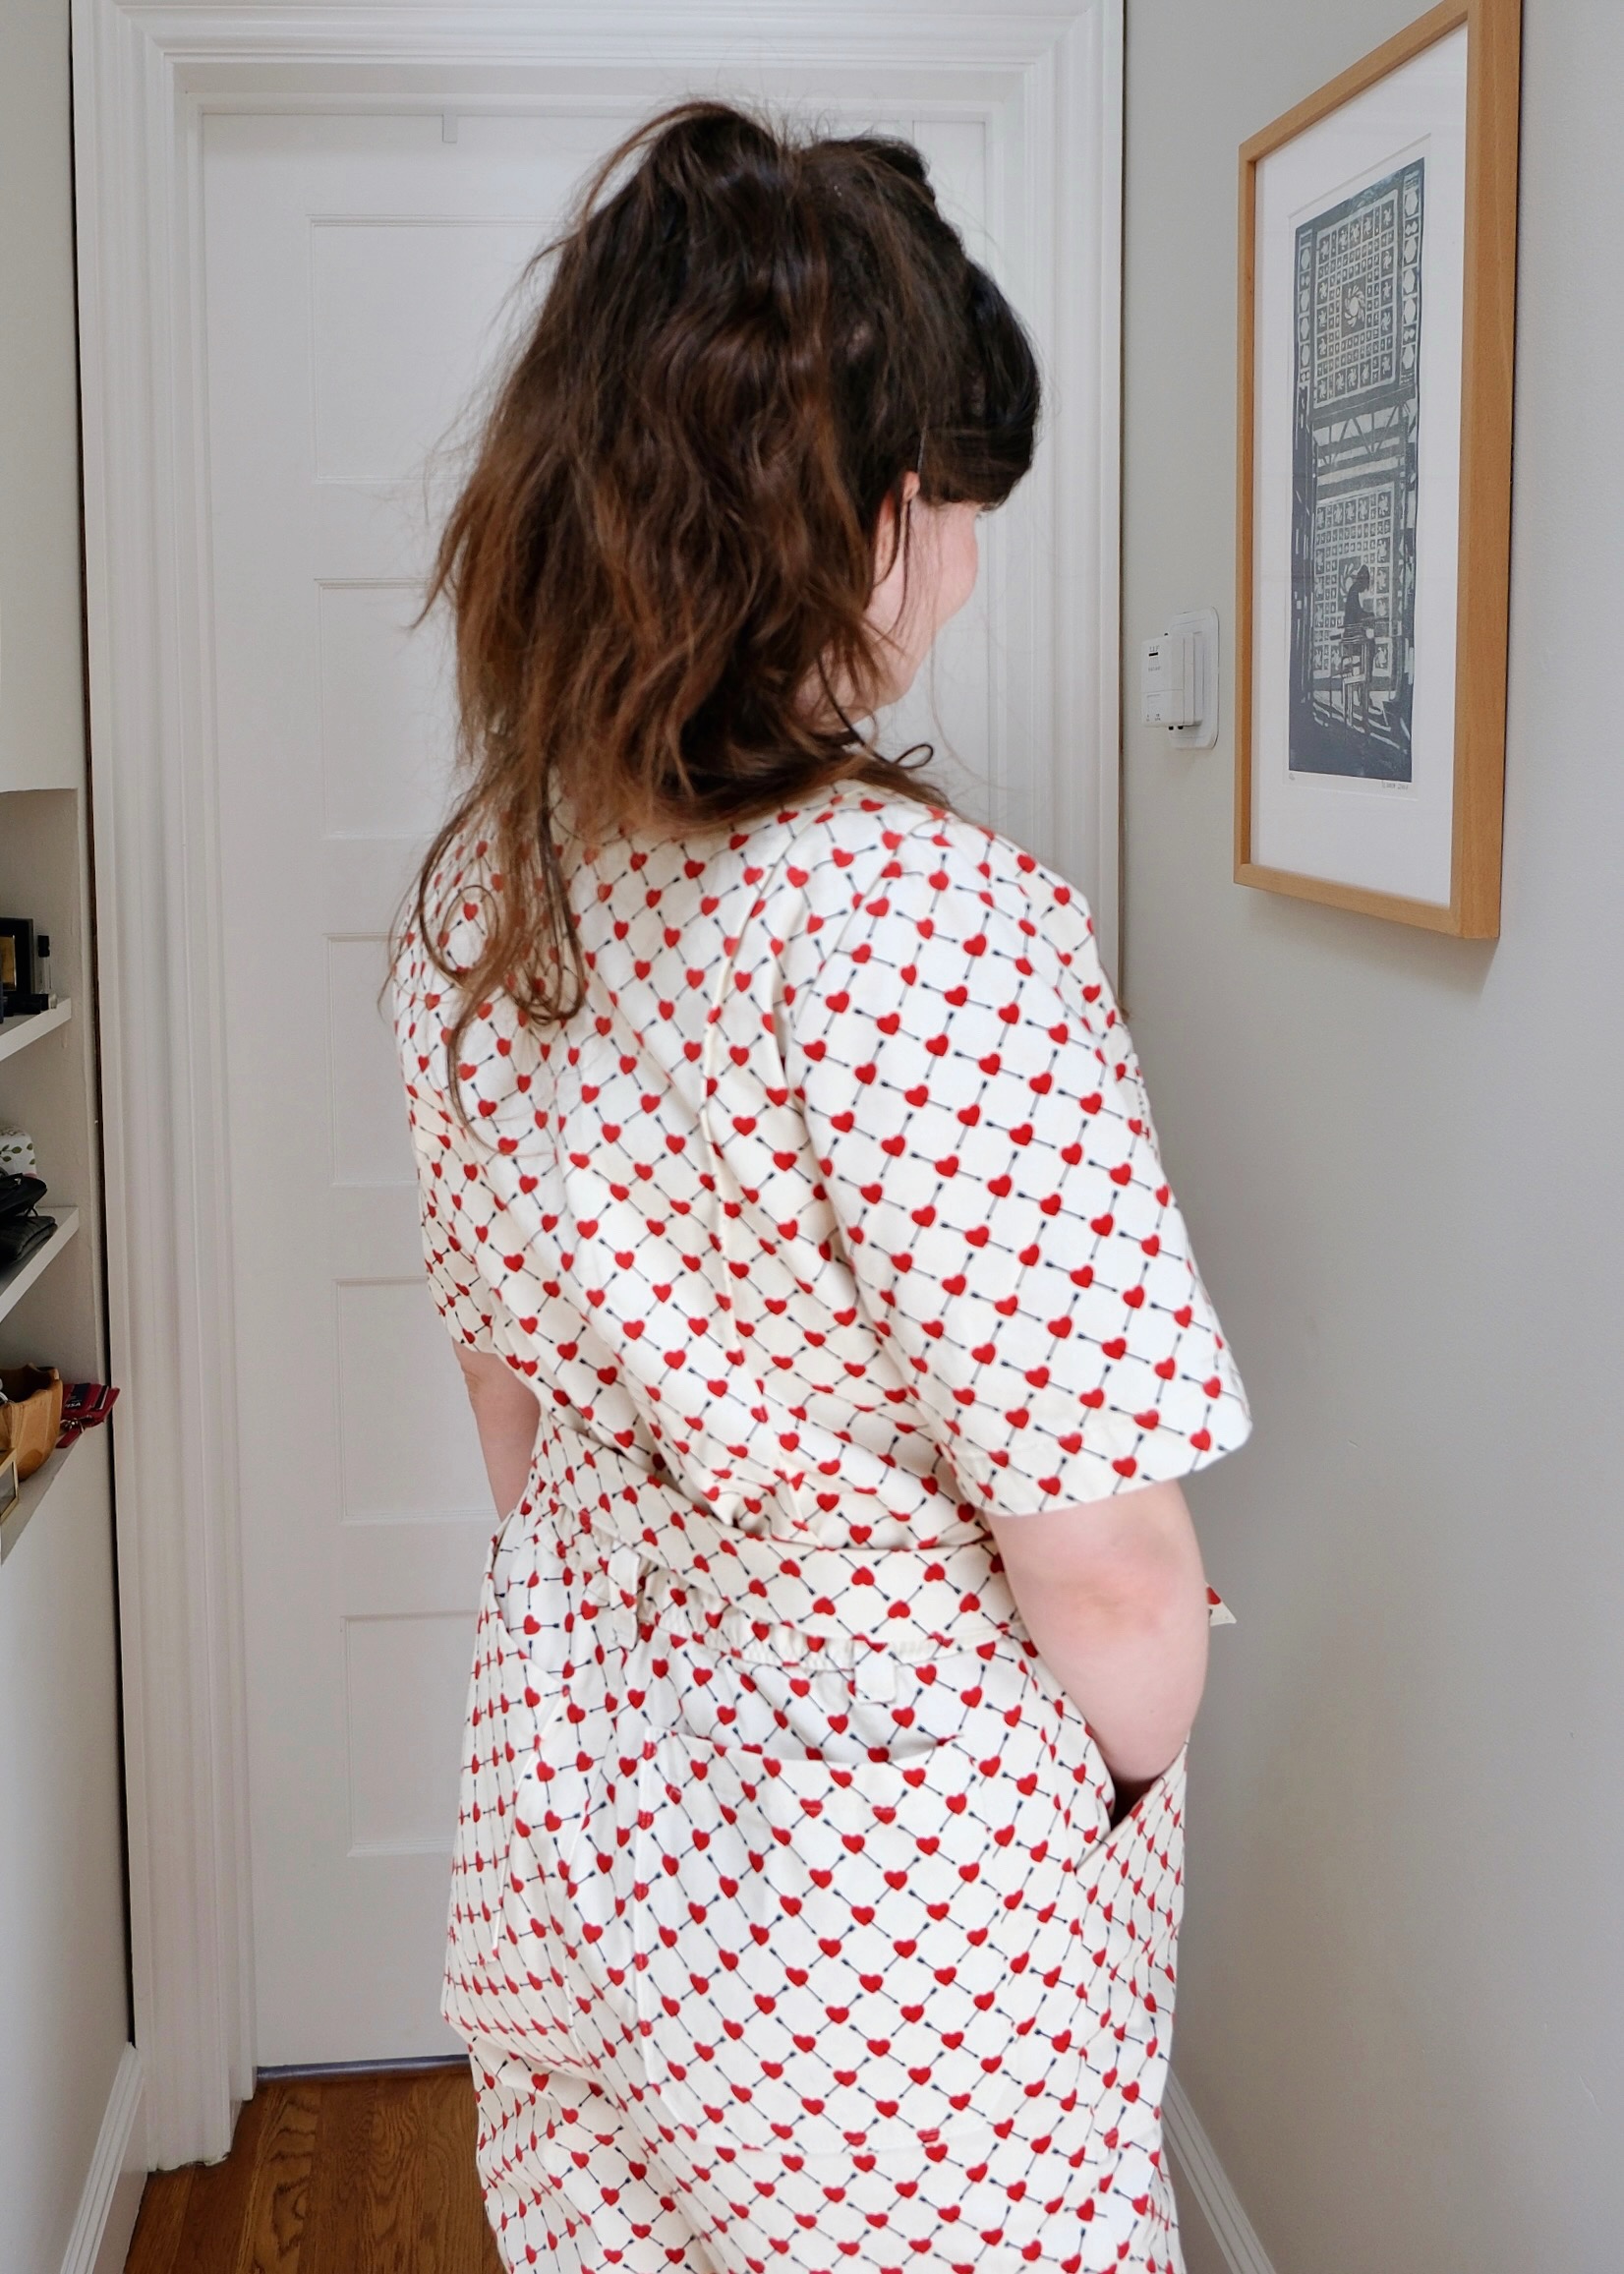
Also, it only took until just now that I realised I took these photos with the tie belt upside down and not threaded through the belt loops 😅
The sewing process was pretty slow, as there are lots of steps to follow and lots of precise topstitching! The instructions are fantastic and very thorough, and there is a sewalong series on the Closet Core Patterns blog if there are any steps you need particular help with. It was a really enjoyable sew and I felt the pattern challenged my sewing skills, without it ever becoming frustrating. I deviated from the cutting instructions in a few areas, like cutting the tie belt on the crosswise grain to allow for the print to repeat horizontally around my body, but I was pretty faithful in following the construction instructions. One of my favourite details is how the top edges of the front patch pockets form the belt loops, it is a really thoughtful touch! I was in a losing battle with my lining fabric at this point, though; I had chosen a quilting cotton that was apparently not tightly woven enough, so when I trimmed the seams allowances and tried to pull out a sharp corner, the lining immediately began to fray through the seam 😔 I had to do a quick repair on the fly, but the pocket corners definitely suffered as a result. I switched to a cotton lawn for the under collar and had much more success in turning a sharp collar point. As I had added bust and waist darts, I found that pinning my breast patch pockets in place over a tailor’s ham was useful in ensuring the pockets were moulded to the shape of the bodice.
I made sure to sew with a denim needle and switched between my 100-weight thread for seams and 70-weight thread for topstitching. I finished my seam allowance with a 4-thread overlock stitch throughout, although next time I could flat-fell my seams for a fancier finish.
There are a few tiny tweaks for the next time I sew this boilersuit:
- Remove an additional ¼” from the front crotch curve (Shorten Crotch Adjustment)
- Lower the rear pockets by ½”
- Potentially cuff the sleeve at a shorter length and topstitch in place (I like the look of these longer short sleeves, but I think the proportions are a bit too long for my body)
- Potentially remove the waist dart I created and replace it with a pleat at the waist, which would be a more relaxed fit and would honour the original fit intent for the bodice
- Make sure the crotch seam is trued; there was some hinkiness when I was joining the inseams, which I am chalking up to all the adjustments I made. Does anyone have any hints on ensuring a smooth intersection of these seams?
I am so thrilled with my finished boilersuit, as it really was worth all the effort in fitting and slow sewing! It is extremely comfortable to wear, which is the most important aspect of a jumpsuit, and the print is adorable. I wore it out to a recent gig to see Sir Woman and could both easily throw my hands in the air and get down low when dancing the night away, plus several people commented on how much they liked my outfit ♥️ This boilersuit really encapsulates how far I have come on my sewing journey since 2020 and I already have several more Blancas planned using fabrics in my stash!
Closet Core Patterns Blanca Flight Suit
Size 0 – 32
Full Bust: 31″- 60″
Waist: 24″- 53″
Hips: 33″- 63″
♥️
It’s awesome! I would not have thought to make this one in a print but the end results are great. Truly impressive pattern matching there too.
Thank you so much Catherine! 💕 I found your blog posts about the Blanca so helpful when I was sewing this and I just adore your ochre version — I definitely need to make another version in a solid colour 😊
This turned out so well! It is definitely a testament to your current skill level, as only someone who had learned a lot could make those various fit adjustments. I sometimes have slight wonkiness at the crotch join as well. I wish I had a good insight for you, but I don’t. Cute fabric and I think the sleeves look good as you have them or shorter. Both would work!
Thank you Lisa, that’s so kind of you to say 💕 The fabric is super cute, it just makes me smile when I wear it!
The wonkiness at the crotch join will haunts us both by the sounds of it! I think I need to spend some time researching how to true up these seams correctly in the future…