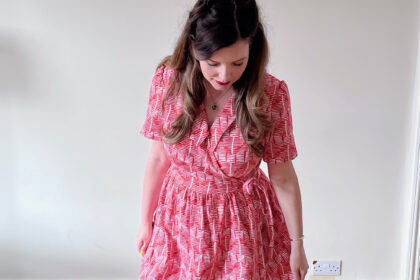
[Things have been extremely challenging lately on a personal level; I am pulling this post from my drafts so this blog doesn’t end up dead for several more weeks. Sewing has been such a comfort to me in difficult times — throughout the pandemic and the lockdowns, my long-distance marriage and the immigration process, and so many other occasions — yet right now, I do not know when I will feel like sewing/writing/posting again. I hope things will begin to improve at some point and that my joy in creating garments and sharing them here will return].
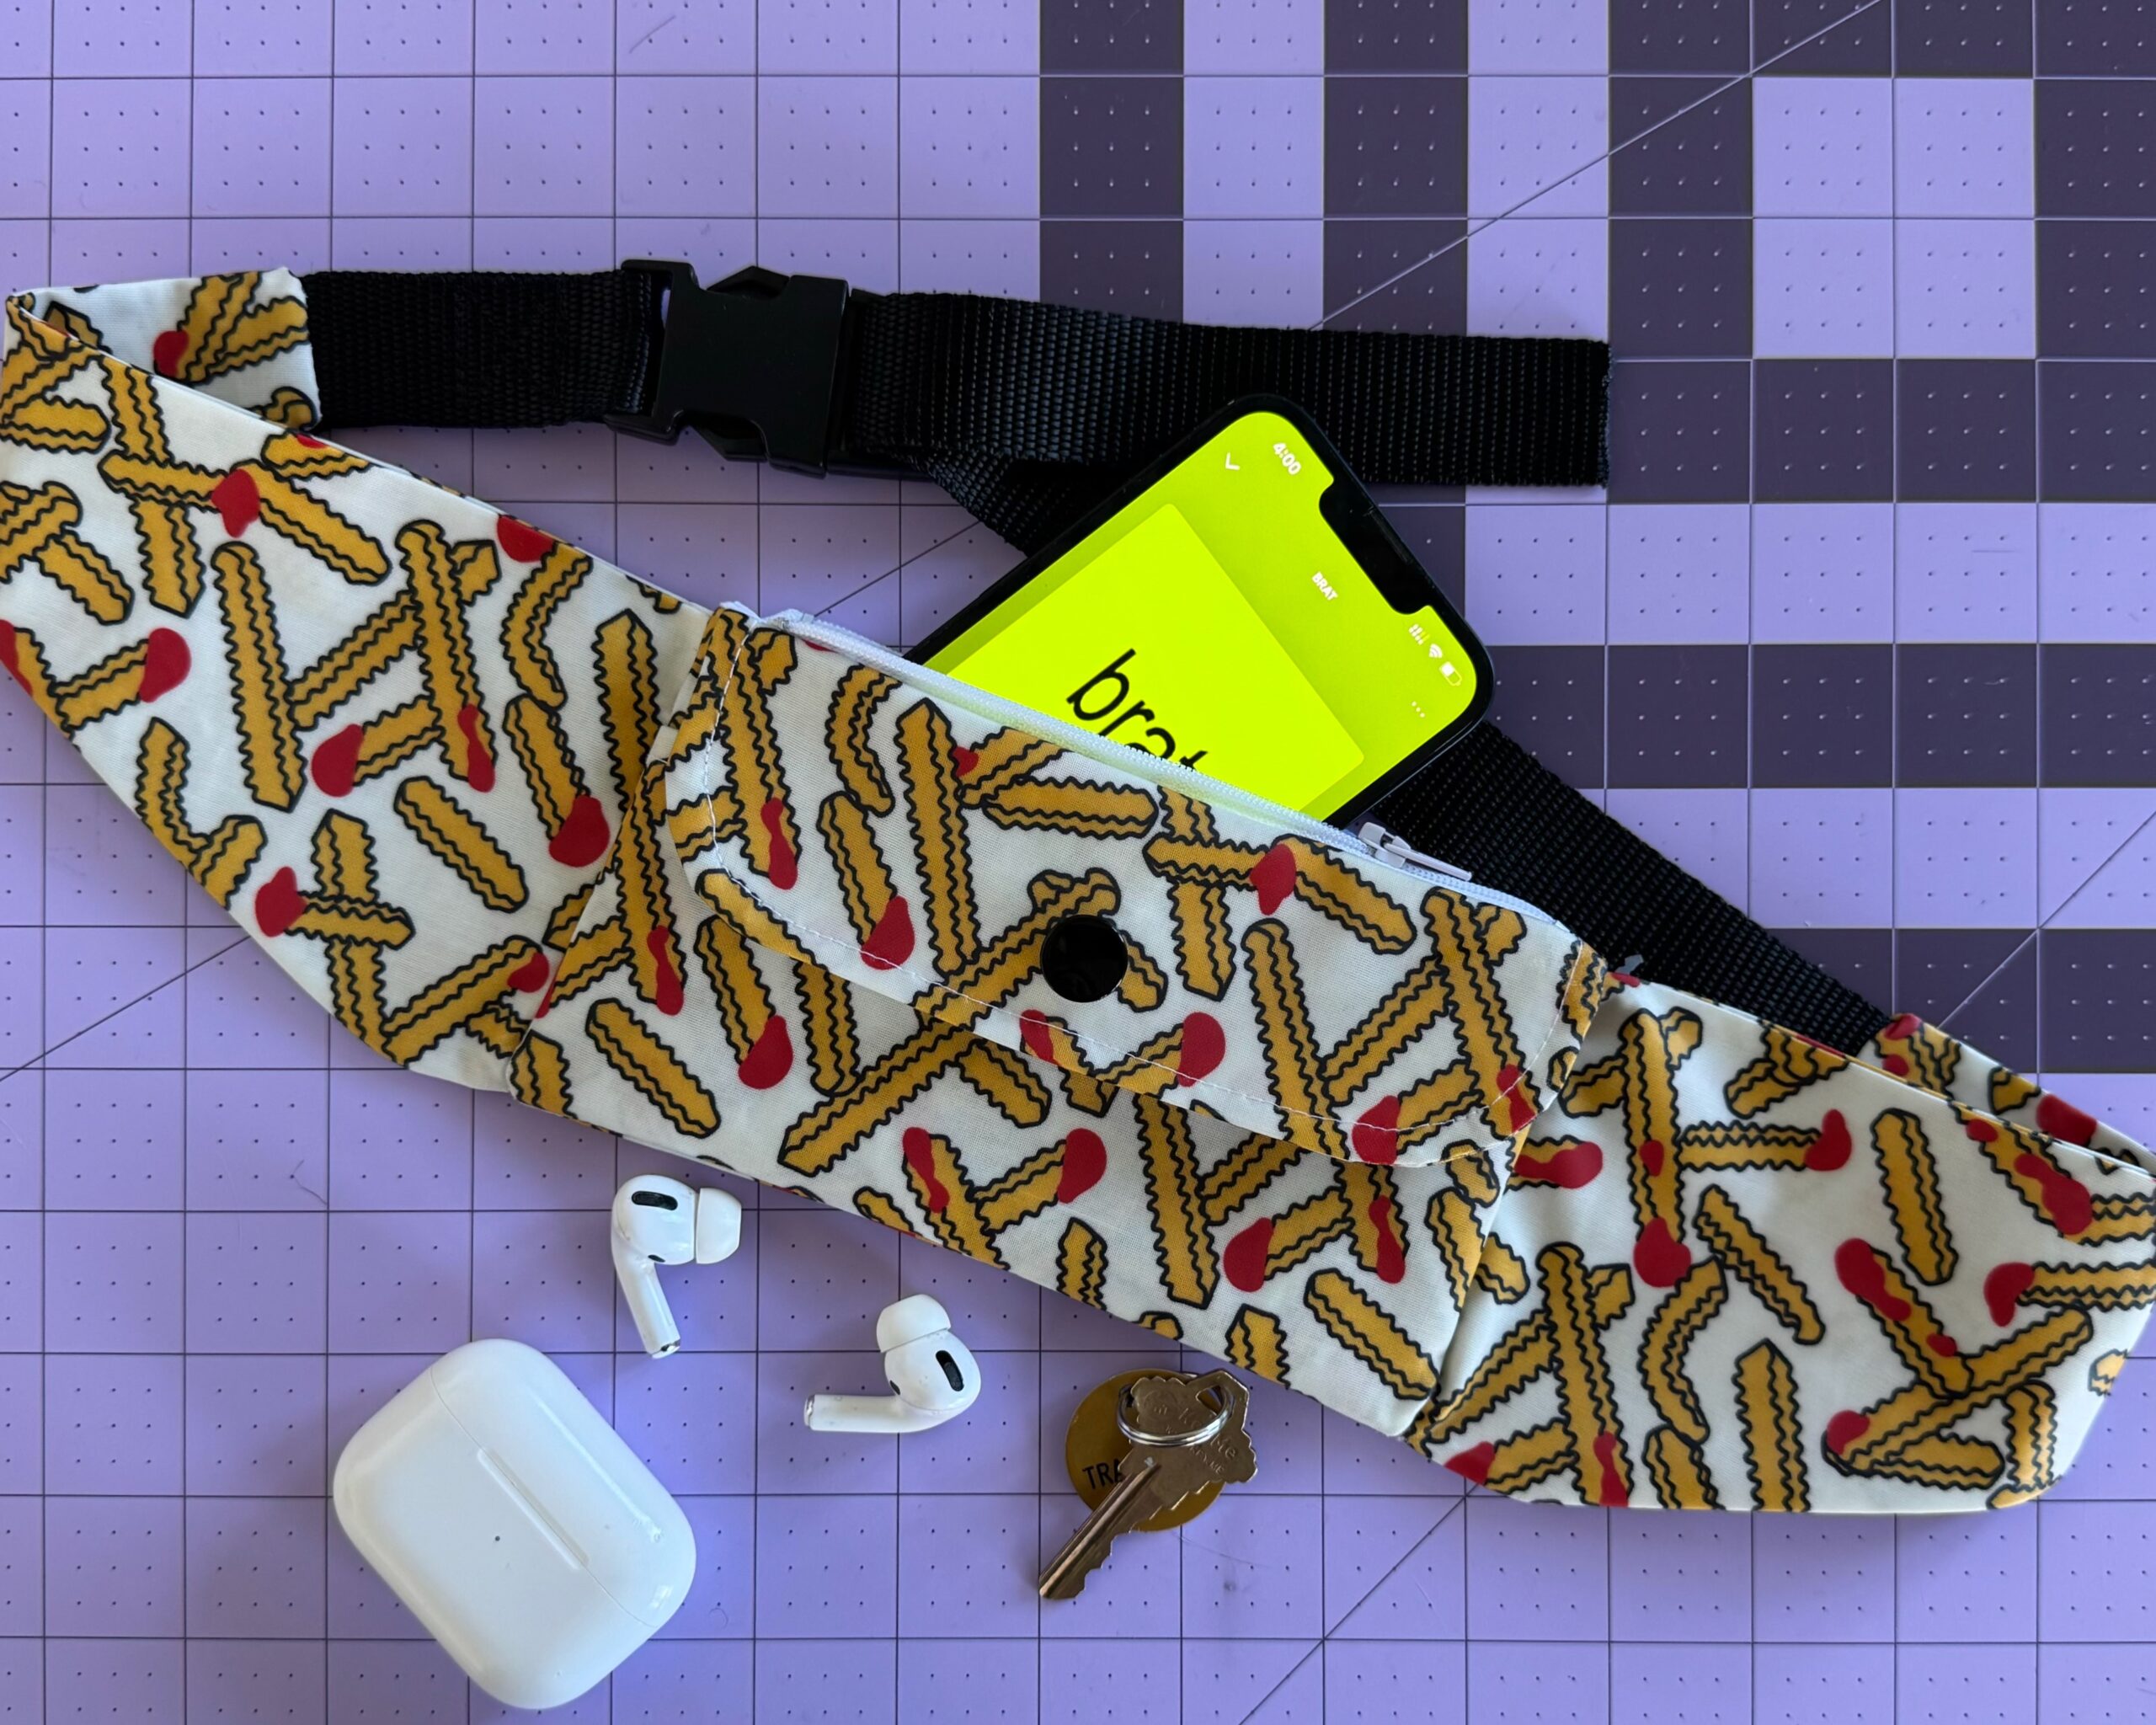
Since moving to San Francisco in the summer, Simon and I have been going on runs along the coast, which have been on occasion rather misty and damp! I decided to make a handy running belt to keep my phone, headphones and keys safe, so I hacked the basic shape of the Friday Pattern Co Bernie Bag to create this version. I used this laminated cotton from Stonemountain & Daughter Fabrics, which encapsulates my “I would much prefer to be eating fries right now” attitude to exercise 😅
Want to make one of your own? Read on to follow the tutorial!
Supplies:
- 0.3 metres or 0.3 yards [all fabric widths] of a waterproof fabric
I used laminated cotton, which is covered with a water-resistant PU coating, but you could also use nylon, ripstop or soft shell - 0.2 metres or 1/4 yard [all fabric widths] of a lightweight lining fabric
I used a cotton lawn, but most lightweight, non-stretch wovens would also work - A 25mm/1″ clip buckle
- Minimum 1 metre/yard* of 25mm/1″ wide webbing
You will need at least 6″ + half of your total waist measurement, plus a little extra to ensure you have enough - Friday Pattern Co Bernie Belt Bag sewing pattern
This is available as a standalone pattern, but it comes included with the Friday Pattern Co Bernadette Skirt (which is what I purchased)
Before you start sewing:
- Sewing with waterproof or water-repellant fabrics can be tricky. Use a Microtex needle and a walking foot on your machine to make your life easier!
- Avoid using pins and instead, use clips to hold your fabric together. If you do use pins, make sure to only pin within the seam allowances.
- Avoid pressing if you fear your fabric will melt. I pressed my fabric on very low heat with no steam and used an organza pressing cloth to protect the fabric.
Draft the additional pattern piece:
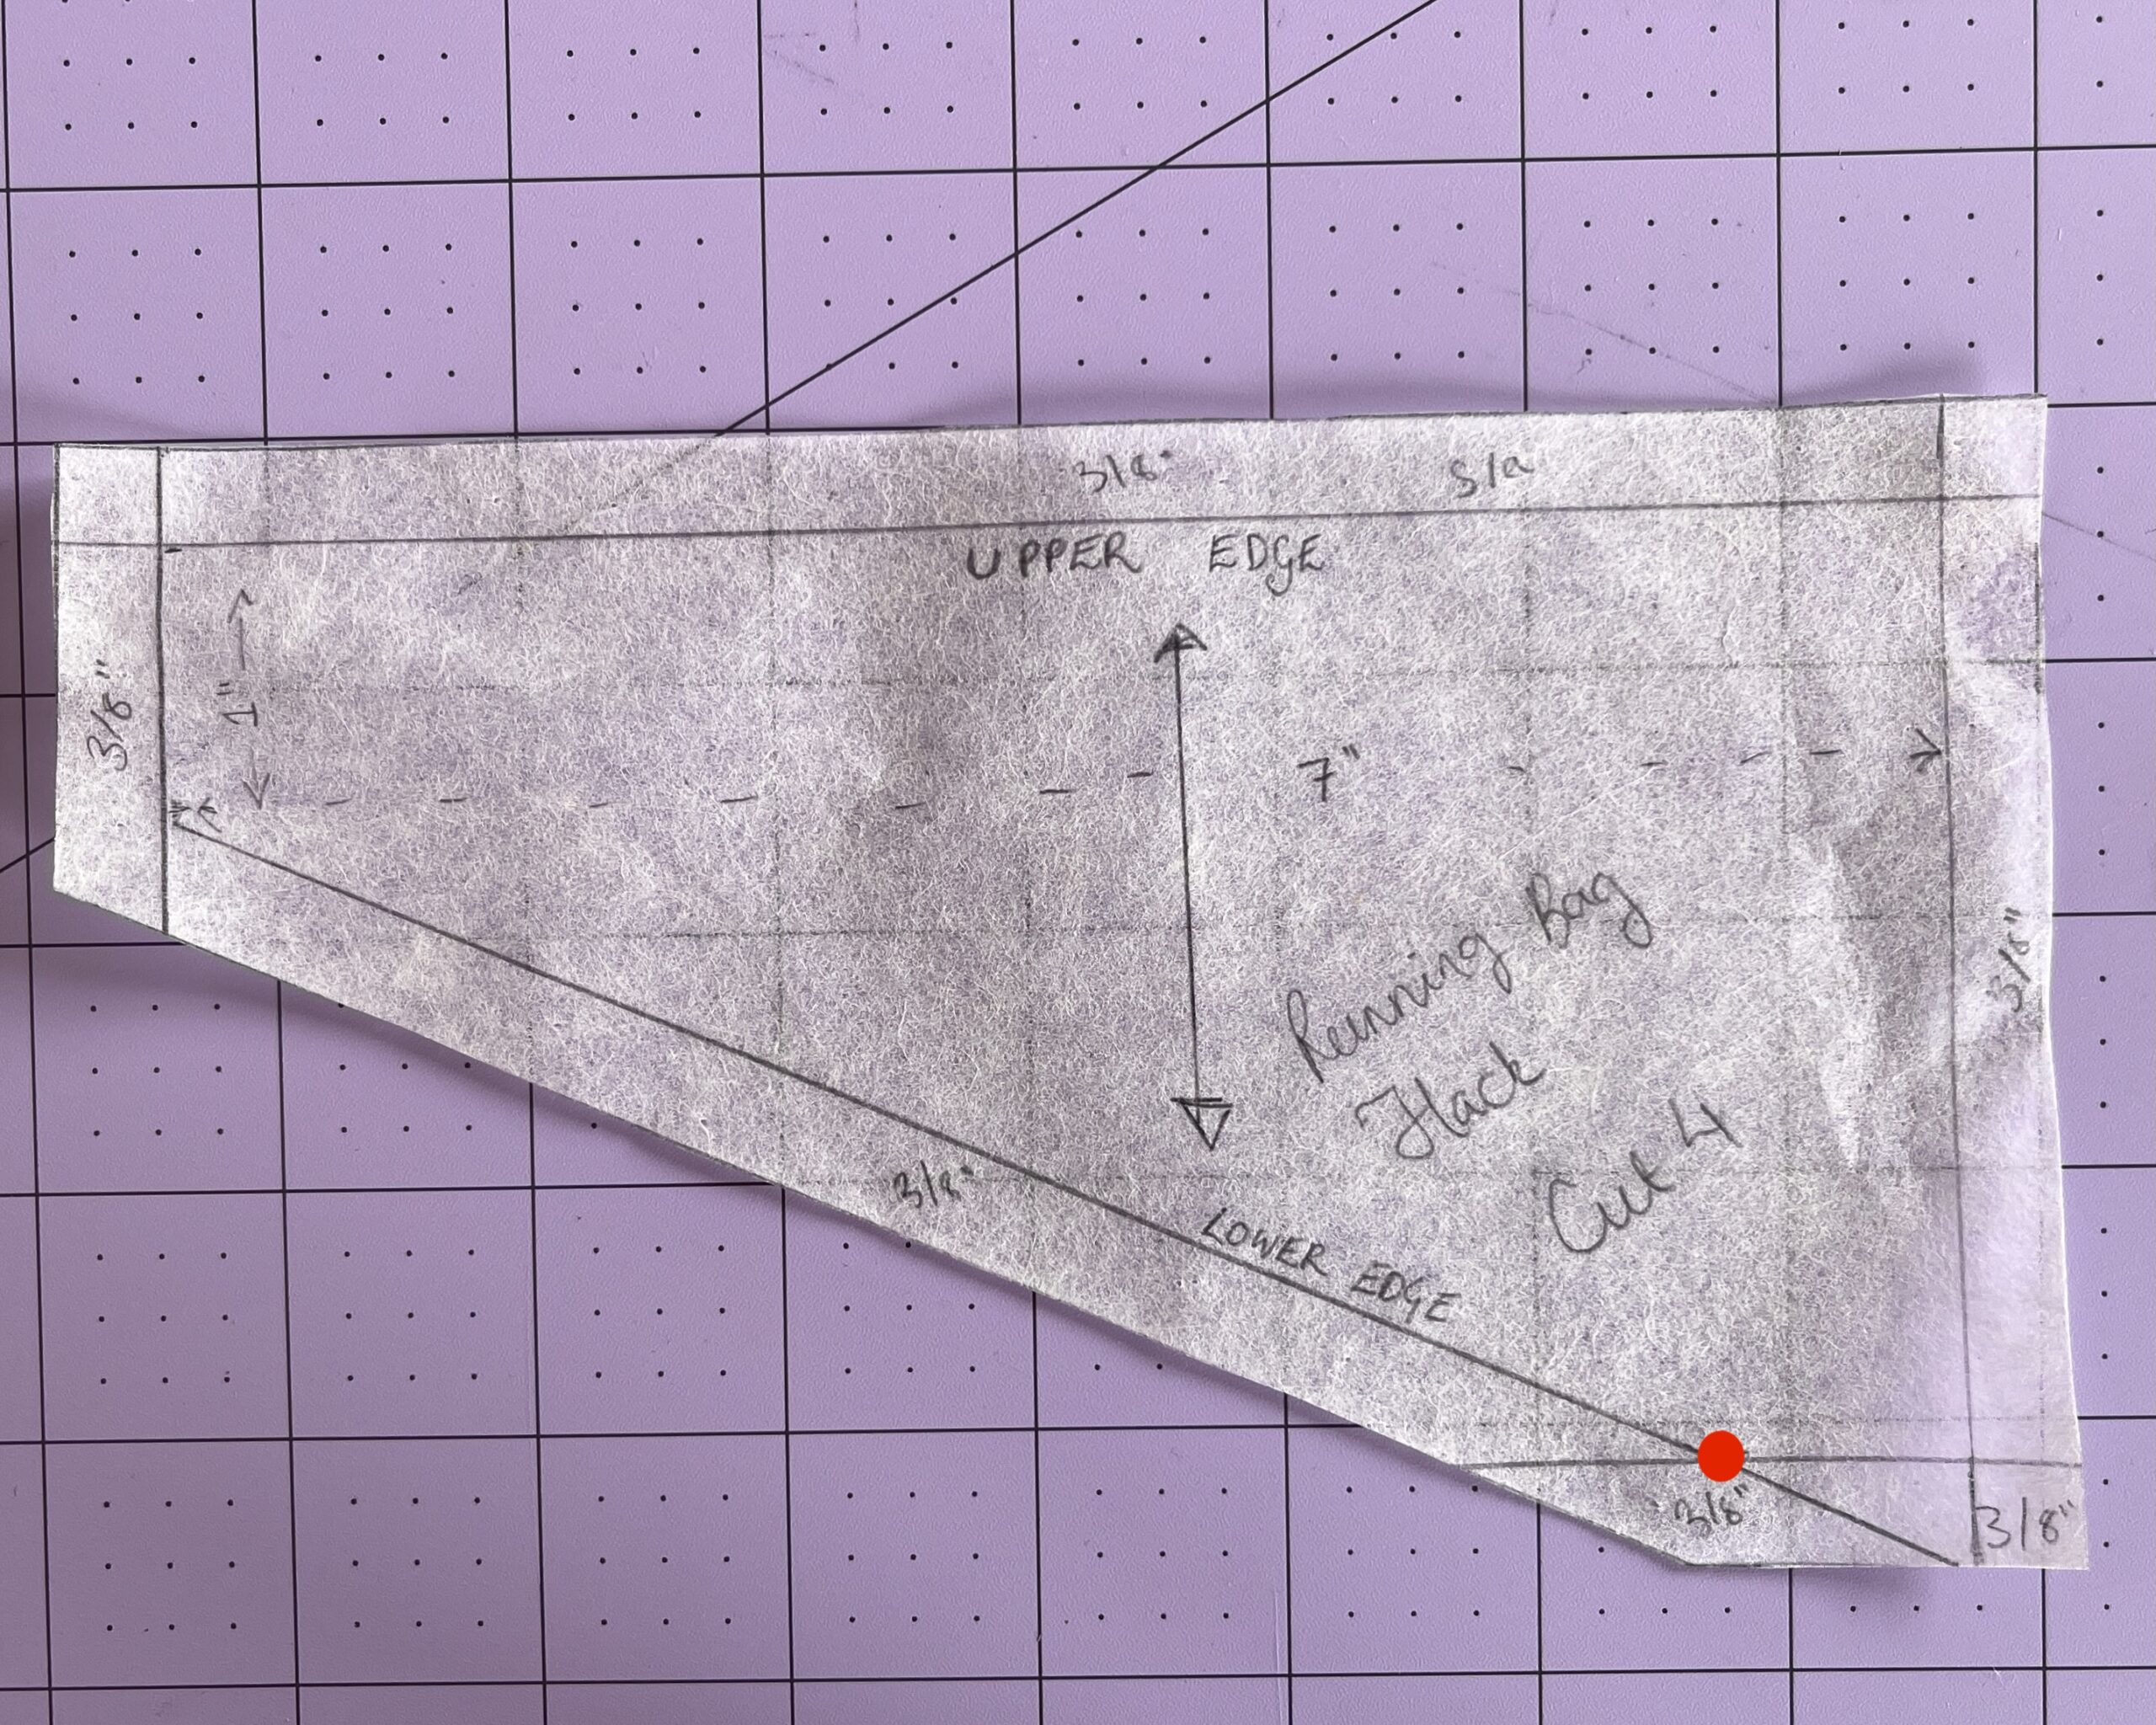
Using the Main Bag pattern piece, mark the 3/8″ seam allowance on the upper notched edge and the 3/8″ seam allowance on the lower unnotched edge.


Draft your wing extensions as follows on a piece of pattern paper:
- Draw one vertical line from the top edge to the lower edge excluding seam allowances (Line A)
- Draw one horizontal line from the top end of Line A and make this 7″ long (Line B)
- Draw one vertical line from the end of Line B and make this 1″ long (Line C)
- Draw one horizontal line from the bottom end of Line A and make this 1″ long (Line D)
- Connect the end of Line C and Line D with a horizontal line (Line E)
- Add in 3/8″ seam allowances to all sides
- Add in a dot at the pivot point where Line D and Line E intersect (marked in red in the image below) and your grainline
Tutorial:
- Cut out the following pieces only:
- Bag: cut 2 in your waterproof fabric and cut 2 in your lining fabric
- Pocket: cut 1 in your waterproof fabric
- Flap: cut 2 in your waterproof fabric
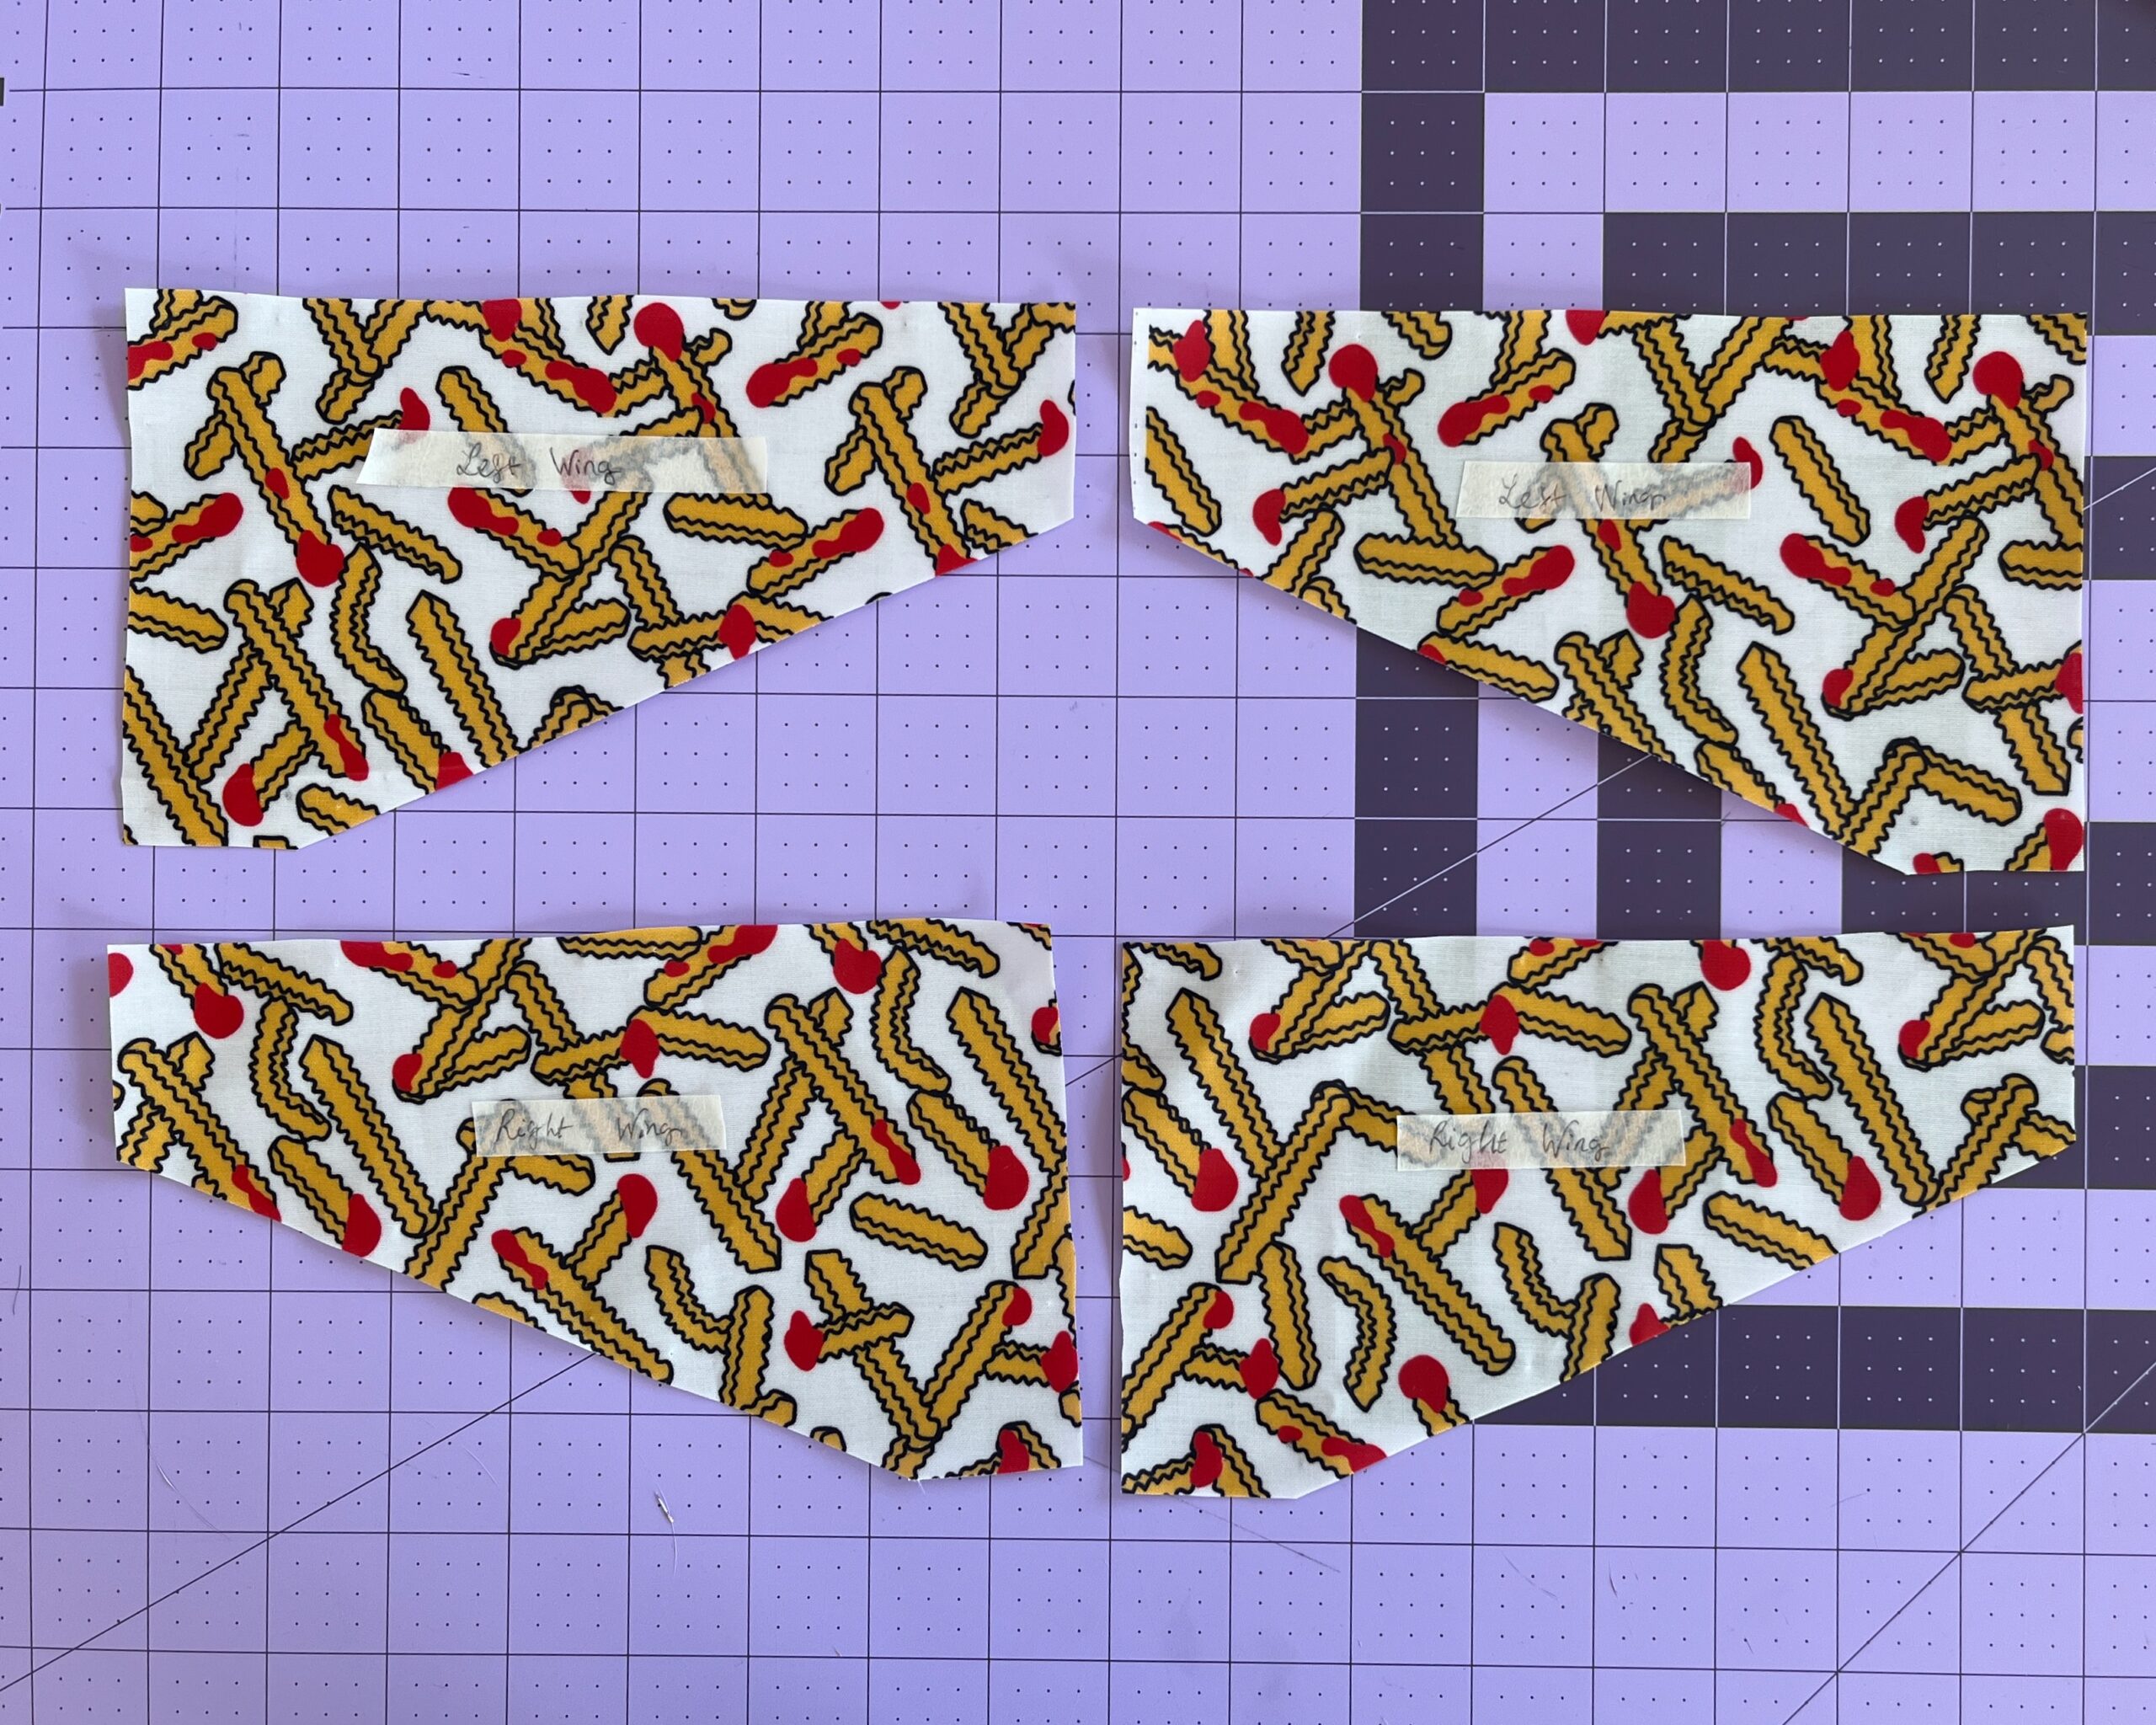
- Wing extensions: cut 4 in your waterproof fabric and label 2 “Left Wing” and 2 “Right Wing”
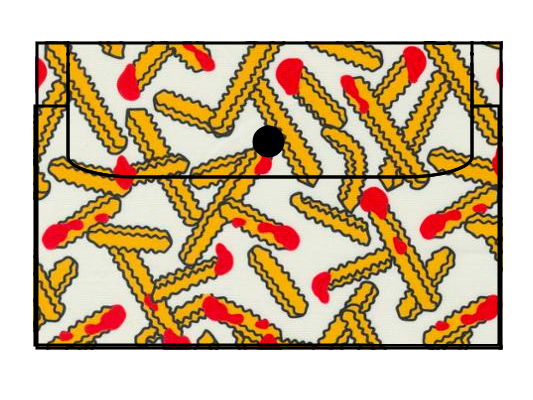
- Follow the Friday Pattern Co instructions to construct the main part of the Bernie Bag, stopping before you need to add the lining. You should have your Front Bag Piece, with the Pocket and Flap attached. You should have attached your button or snap at this point. (I forgot to take a picture of this step!)
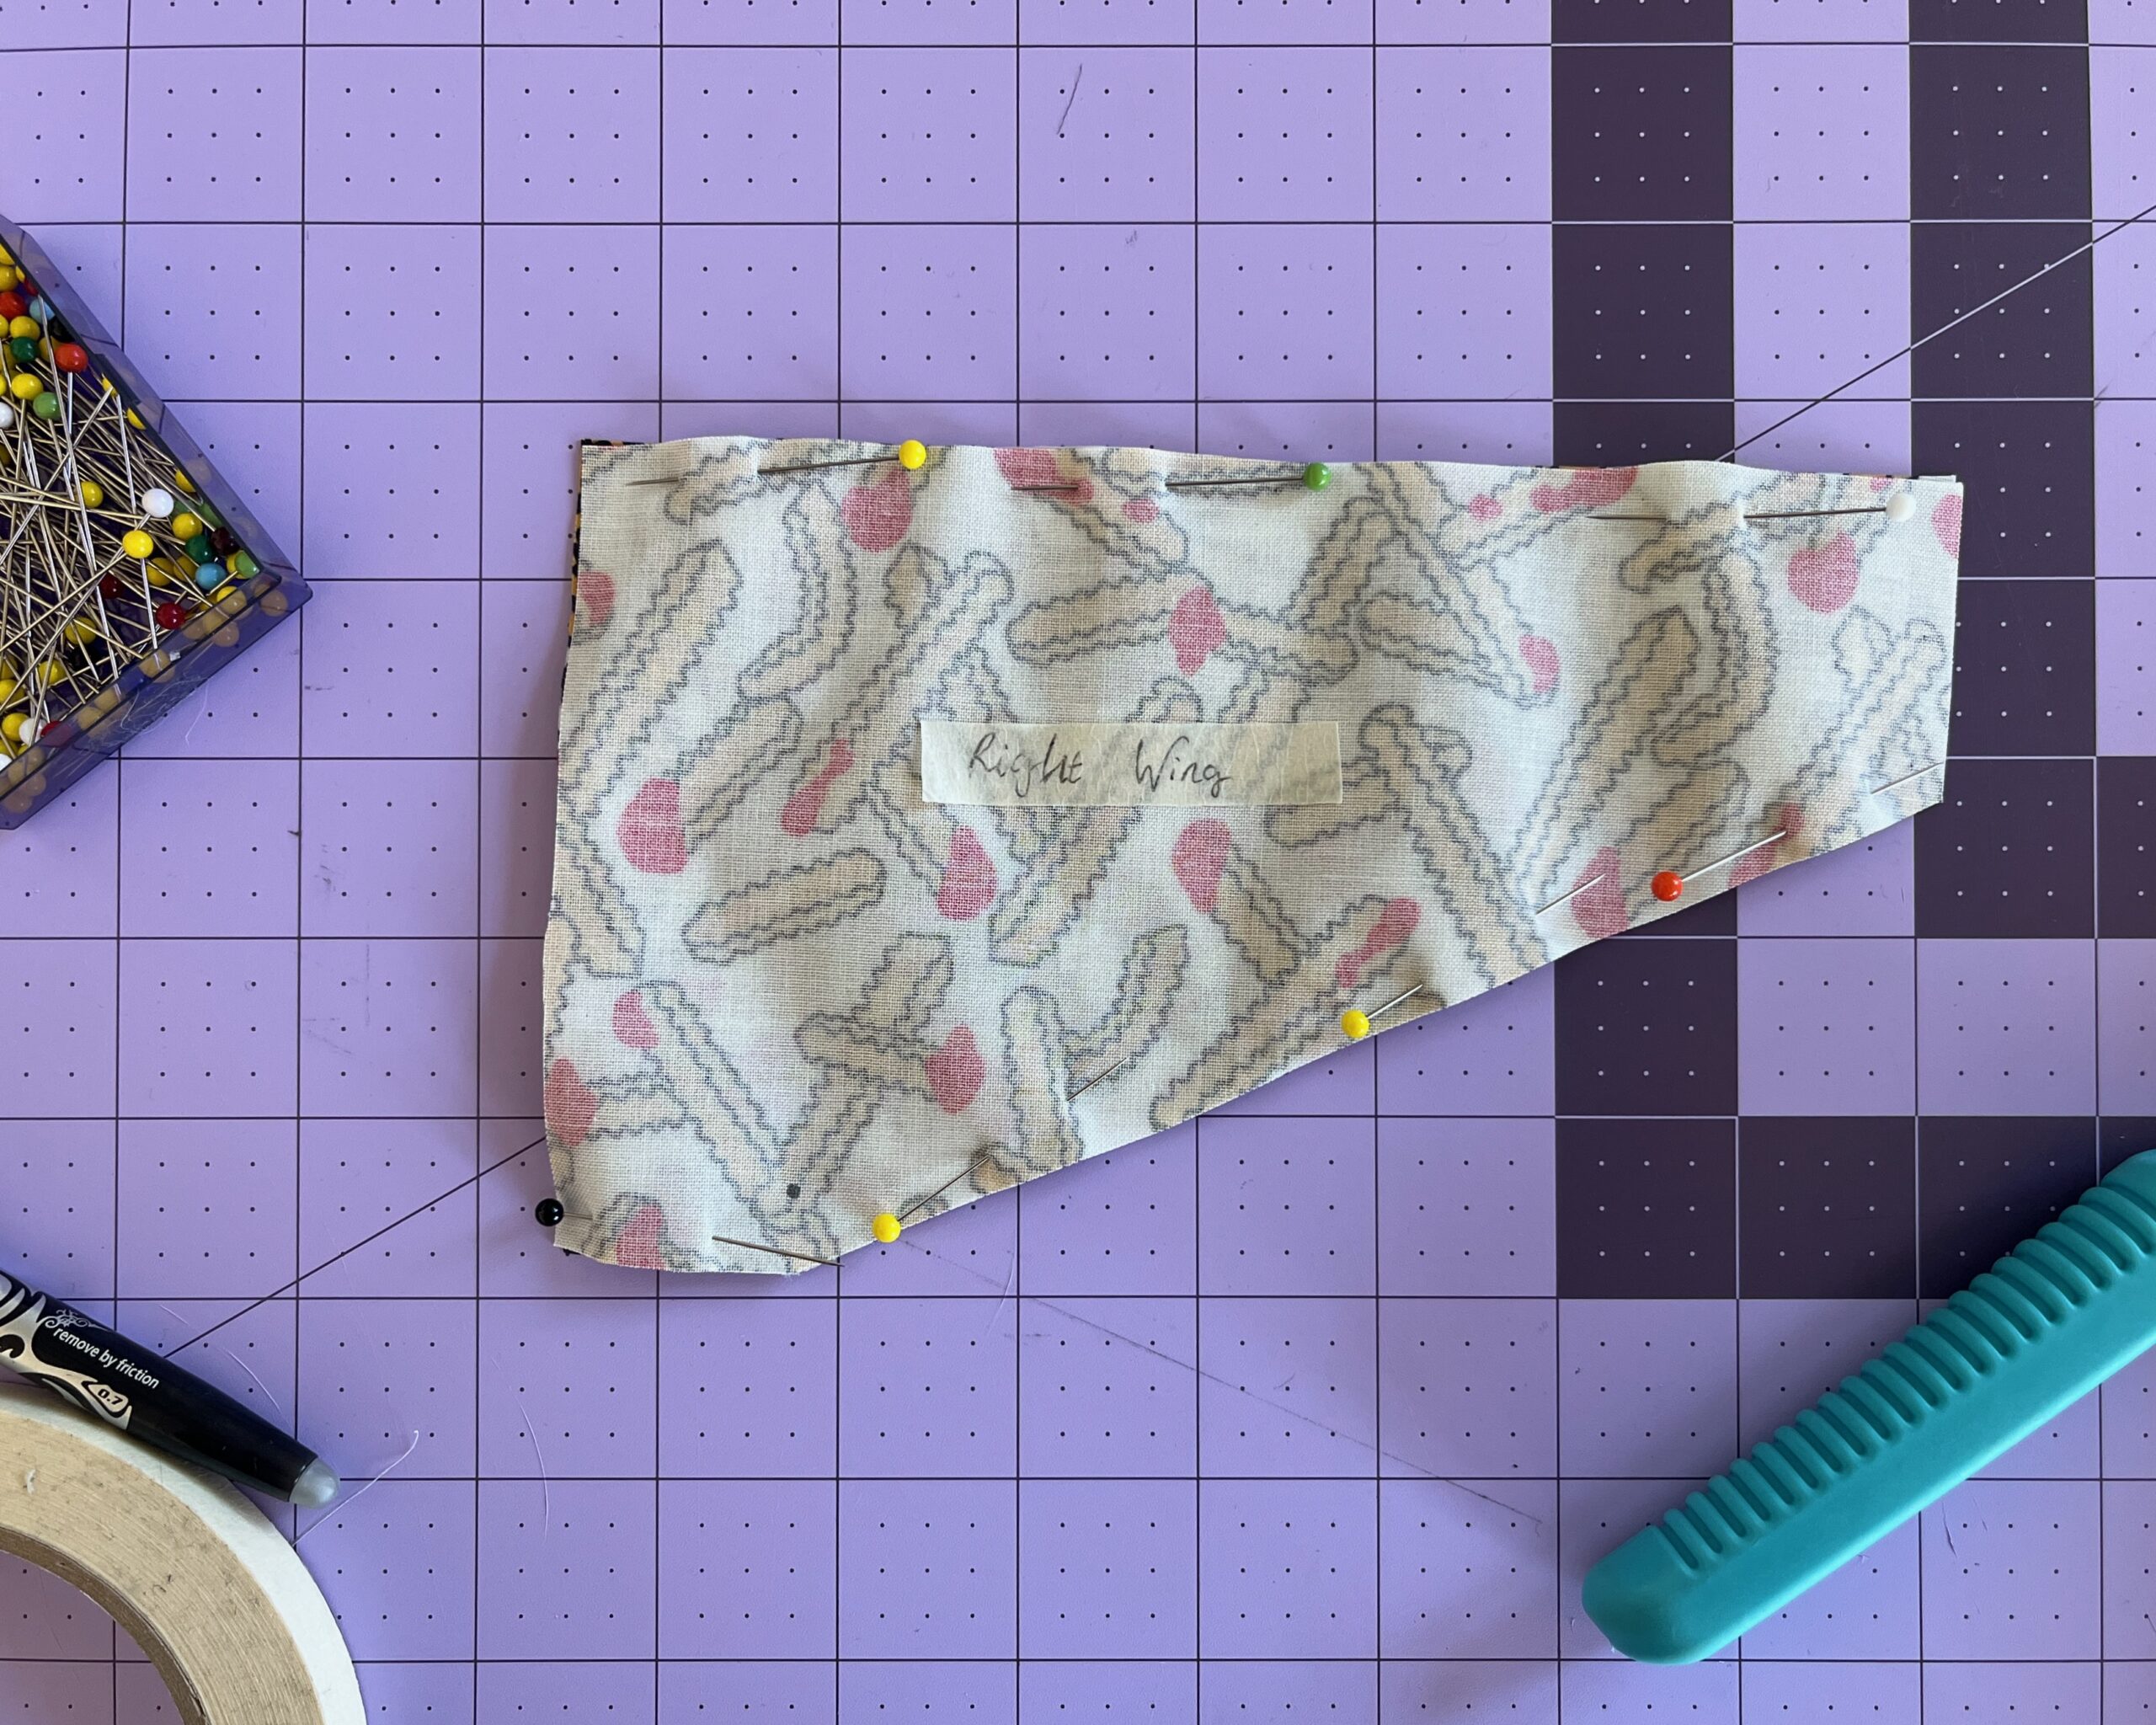
- Starting with your Right Wing Extension, place the two pieces right sides together. Stitch the upper edge using a 3/8” seam allowance. Stitch the lower edge using a 3/8″ seam allowance, pivoting at the dot.
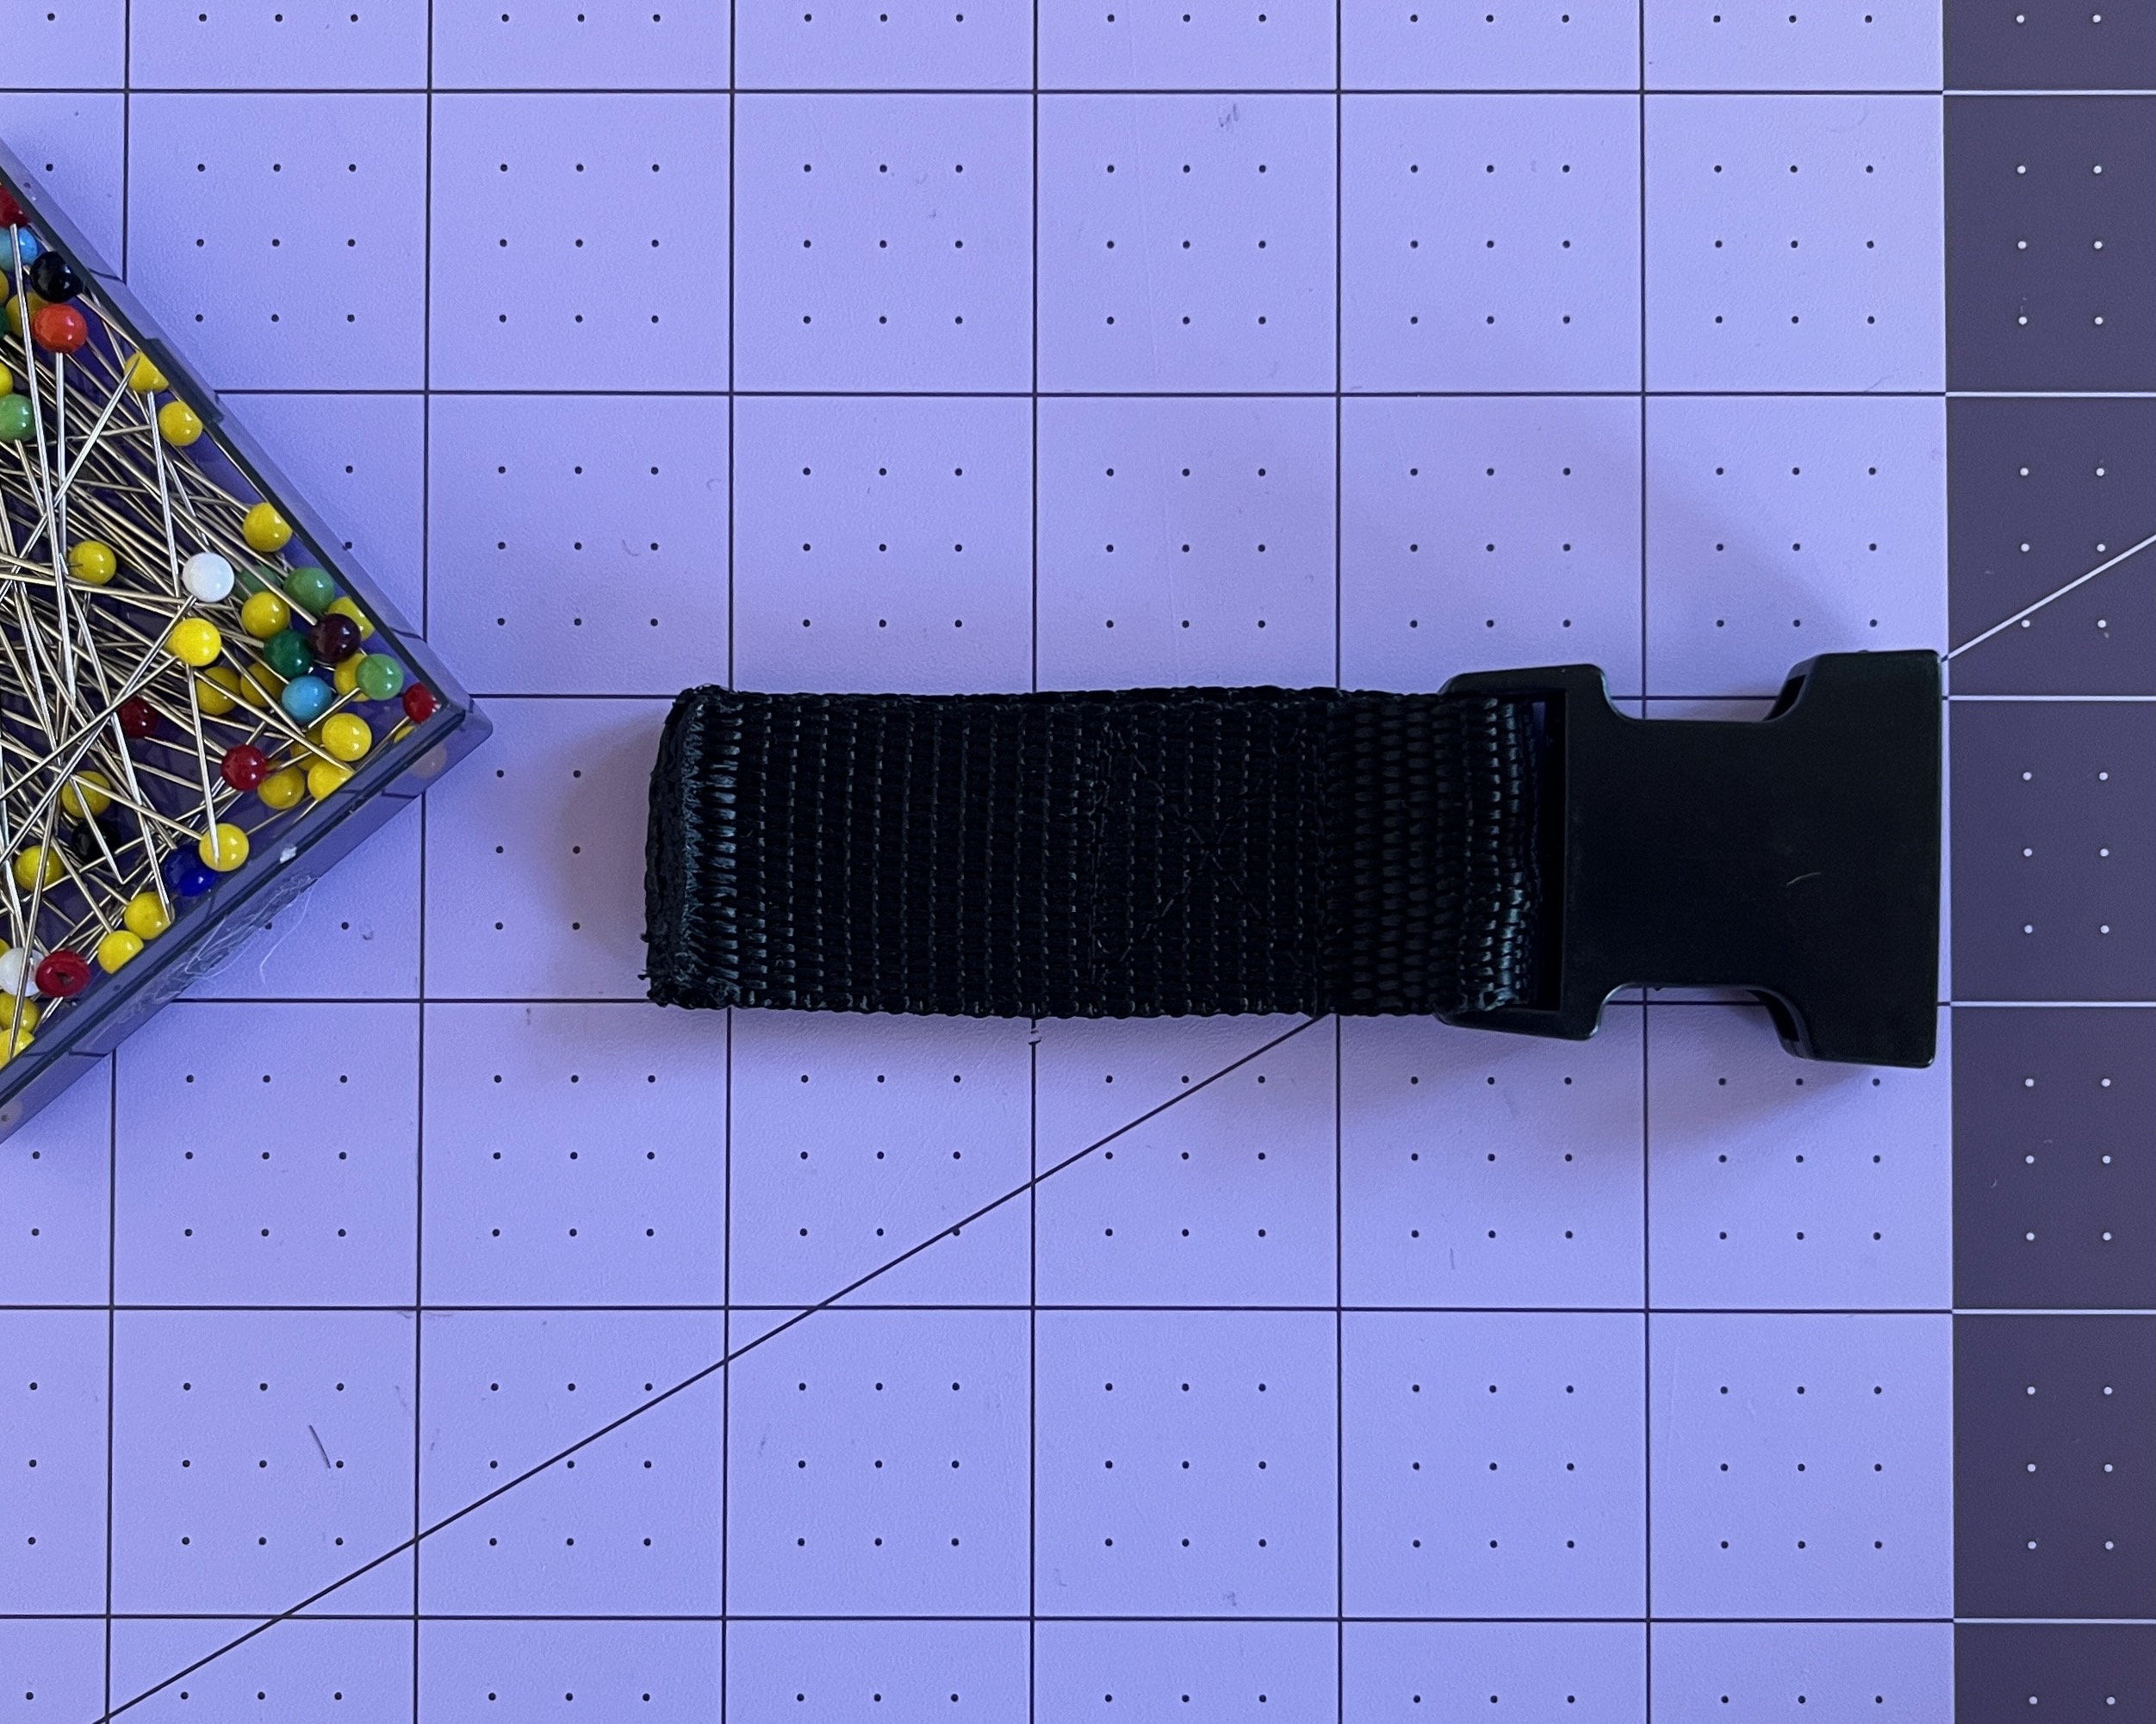
- Cut a 6” section of webbing and loop the female side of the buckle onto the webbing at exactly halfway. Fold the strap back on itself and reinforce stitching to keep the buckle in place.
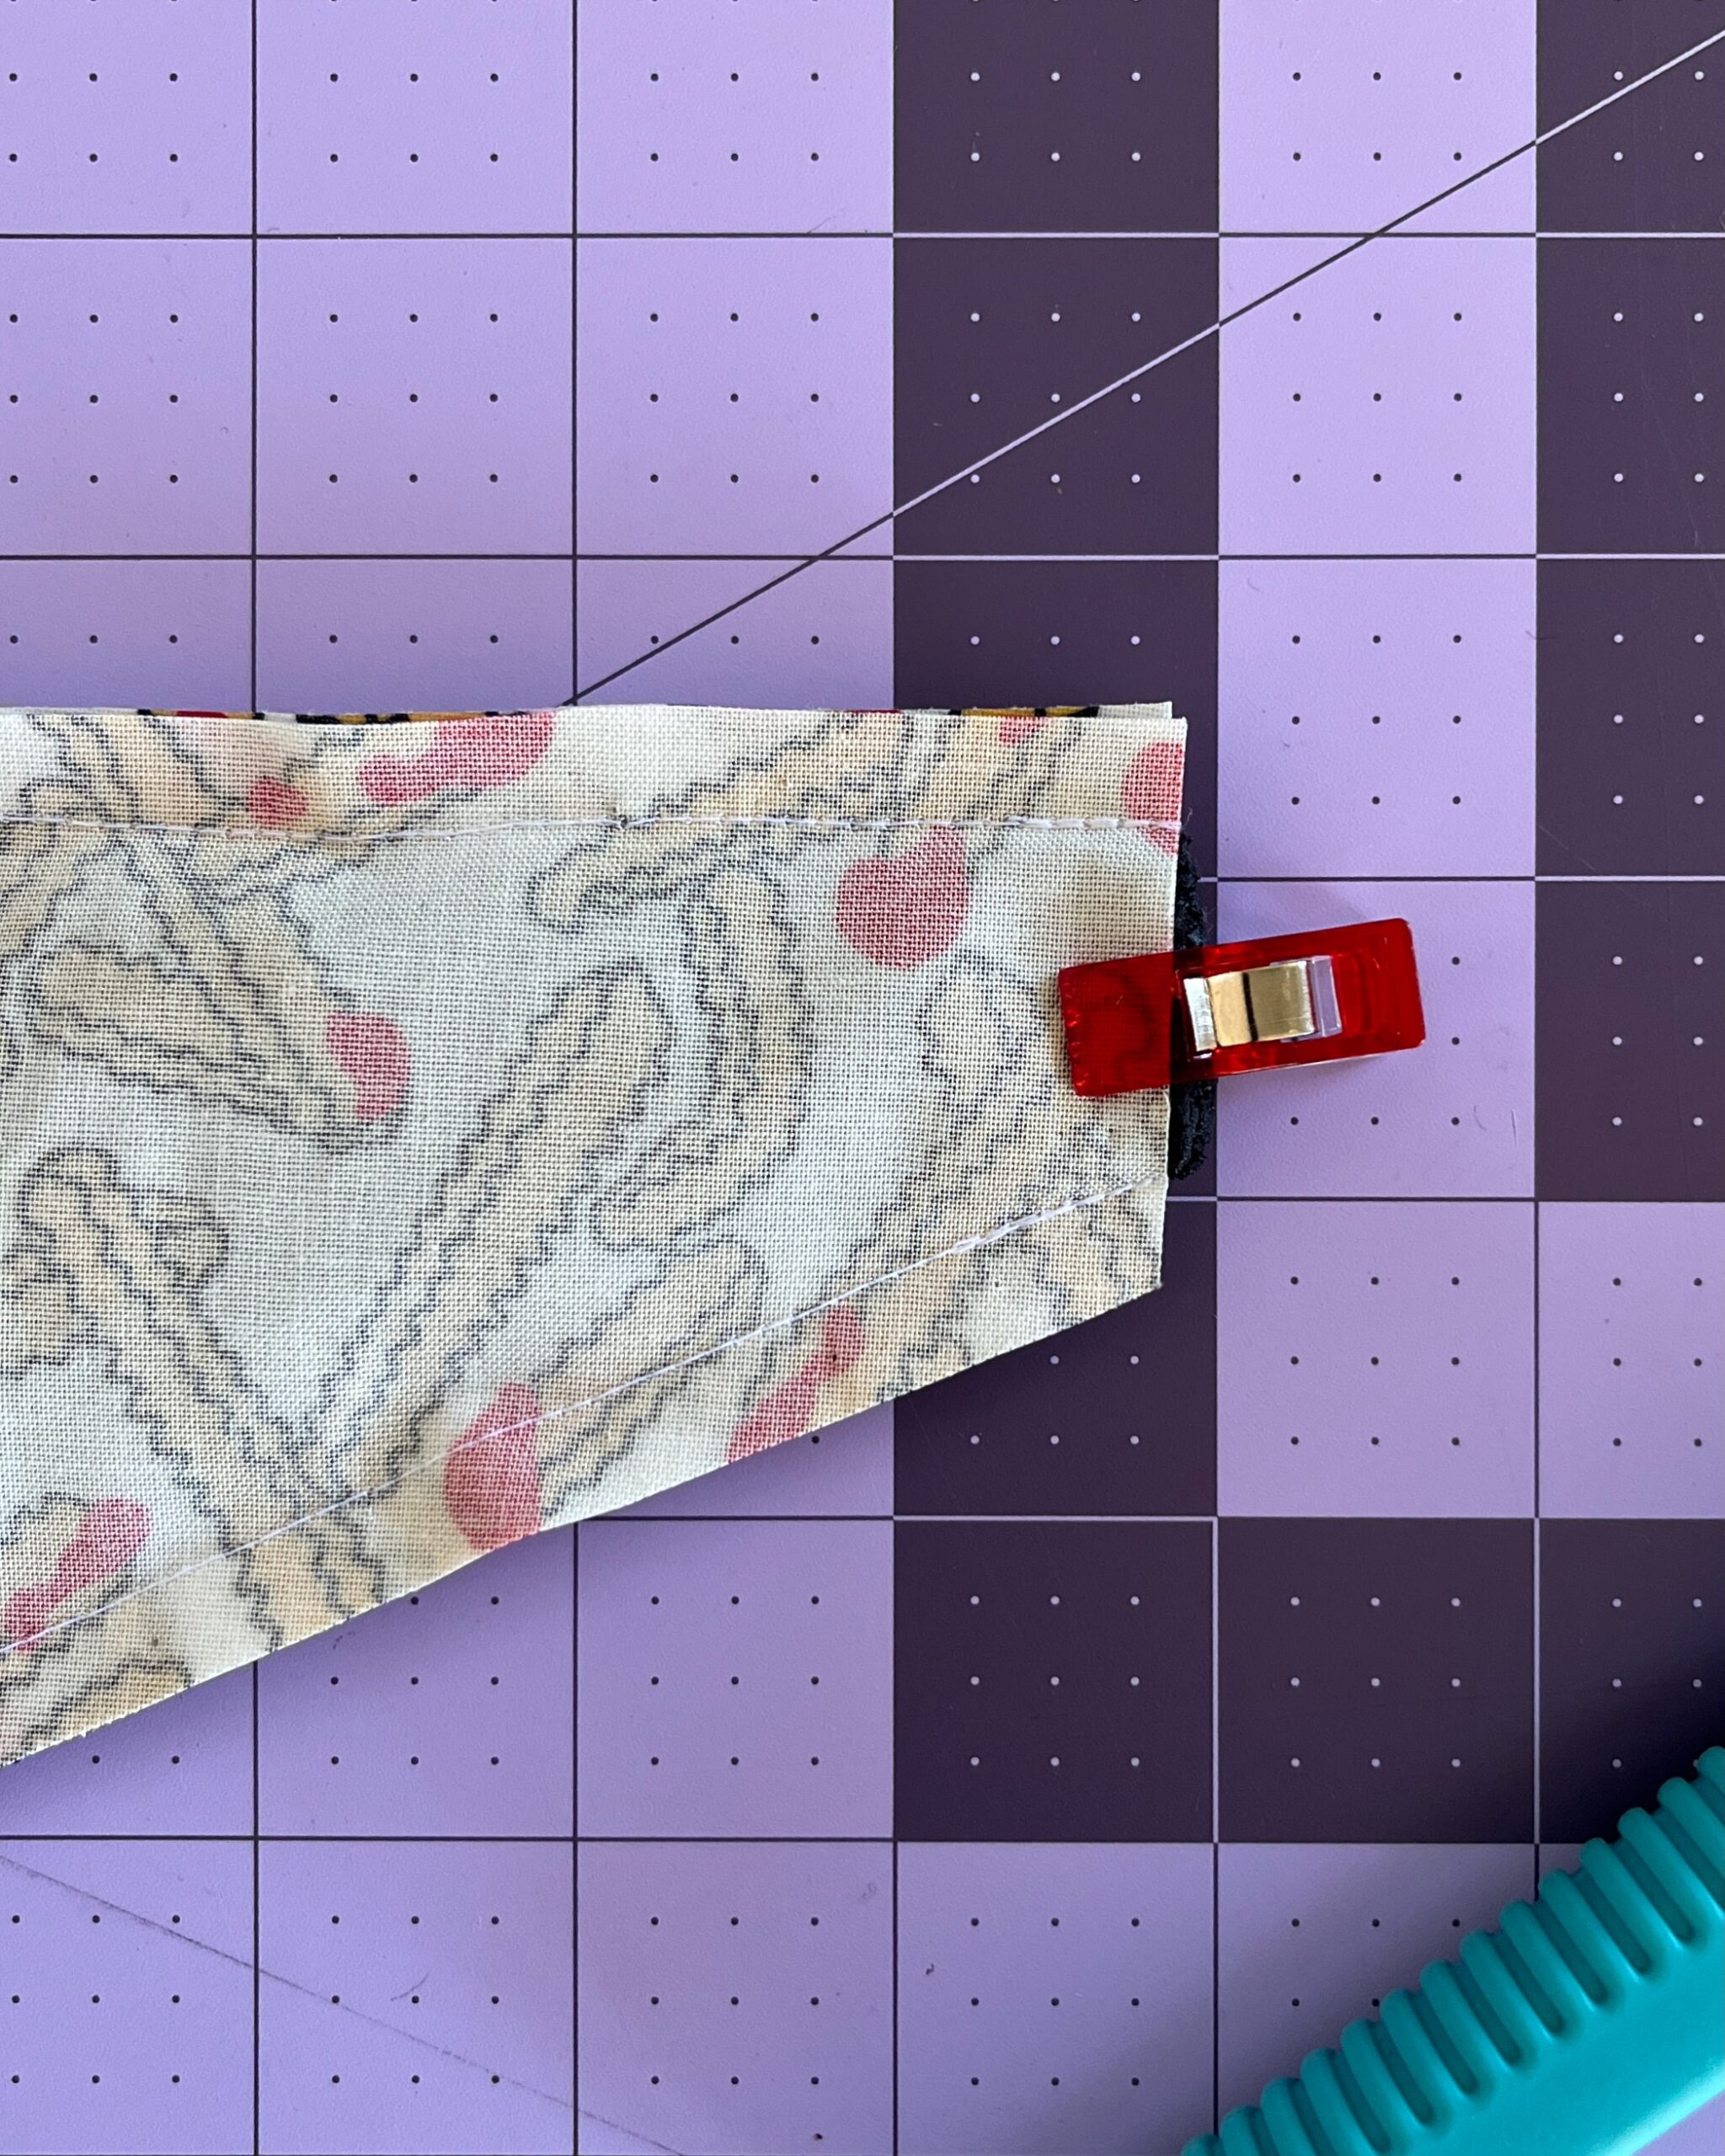
- Slide the webbing and buckle into the Right Wing Extension, between your previous two lines of stitching. With the raw edge of the webbing aligning with the raw short edge of the extension, stitch into place using a 3/8” seam allowance. Reinforce stitching.
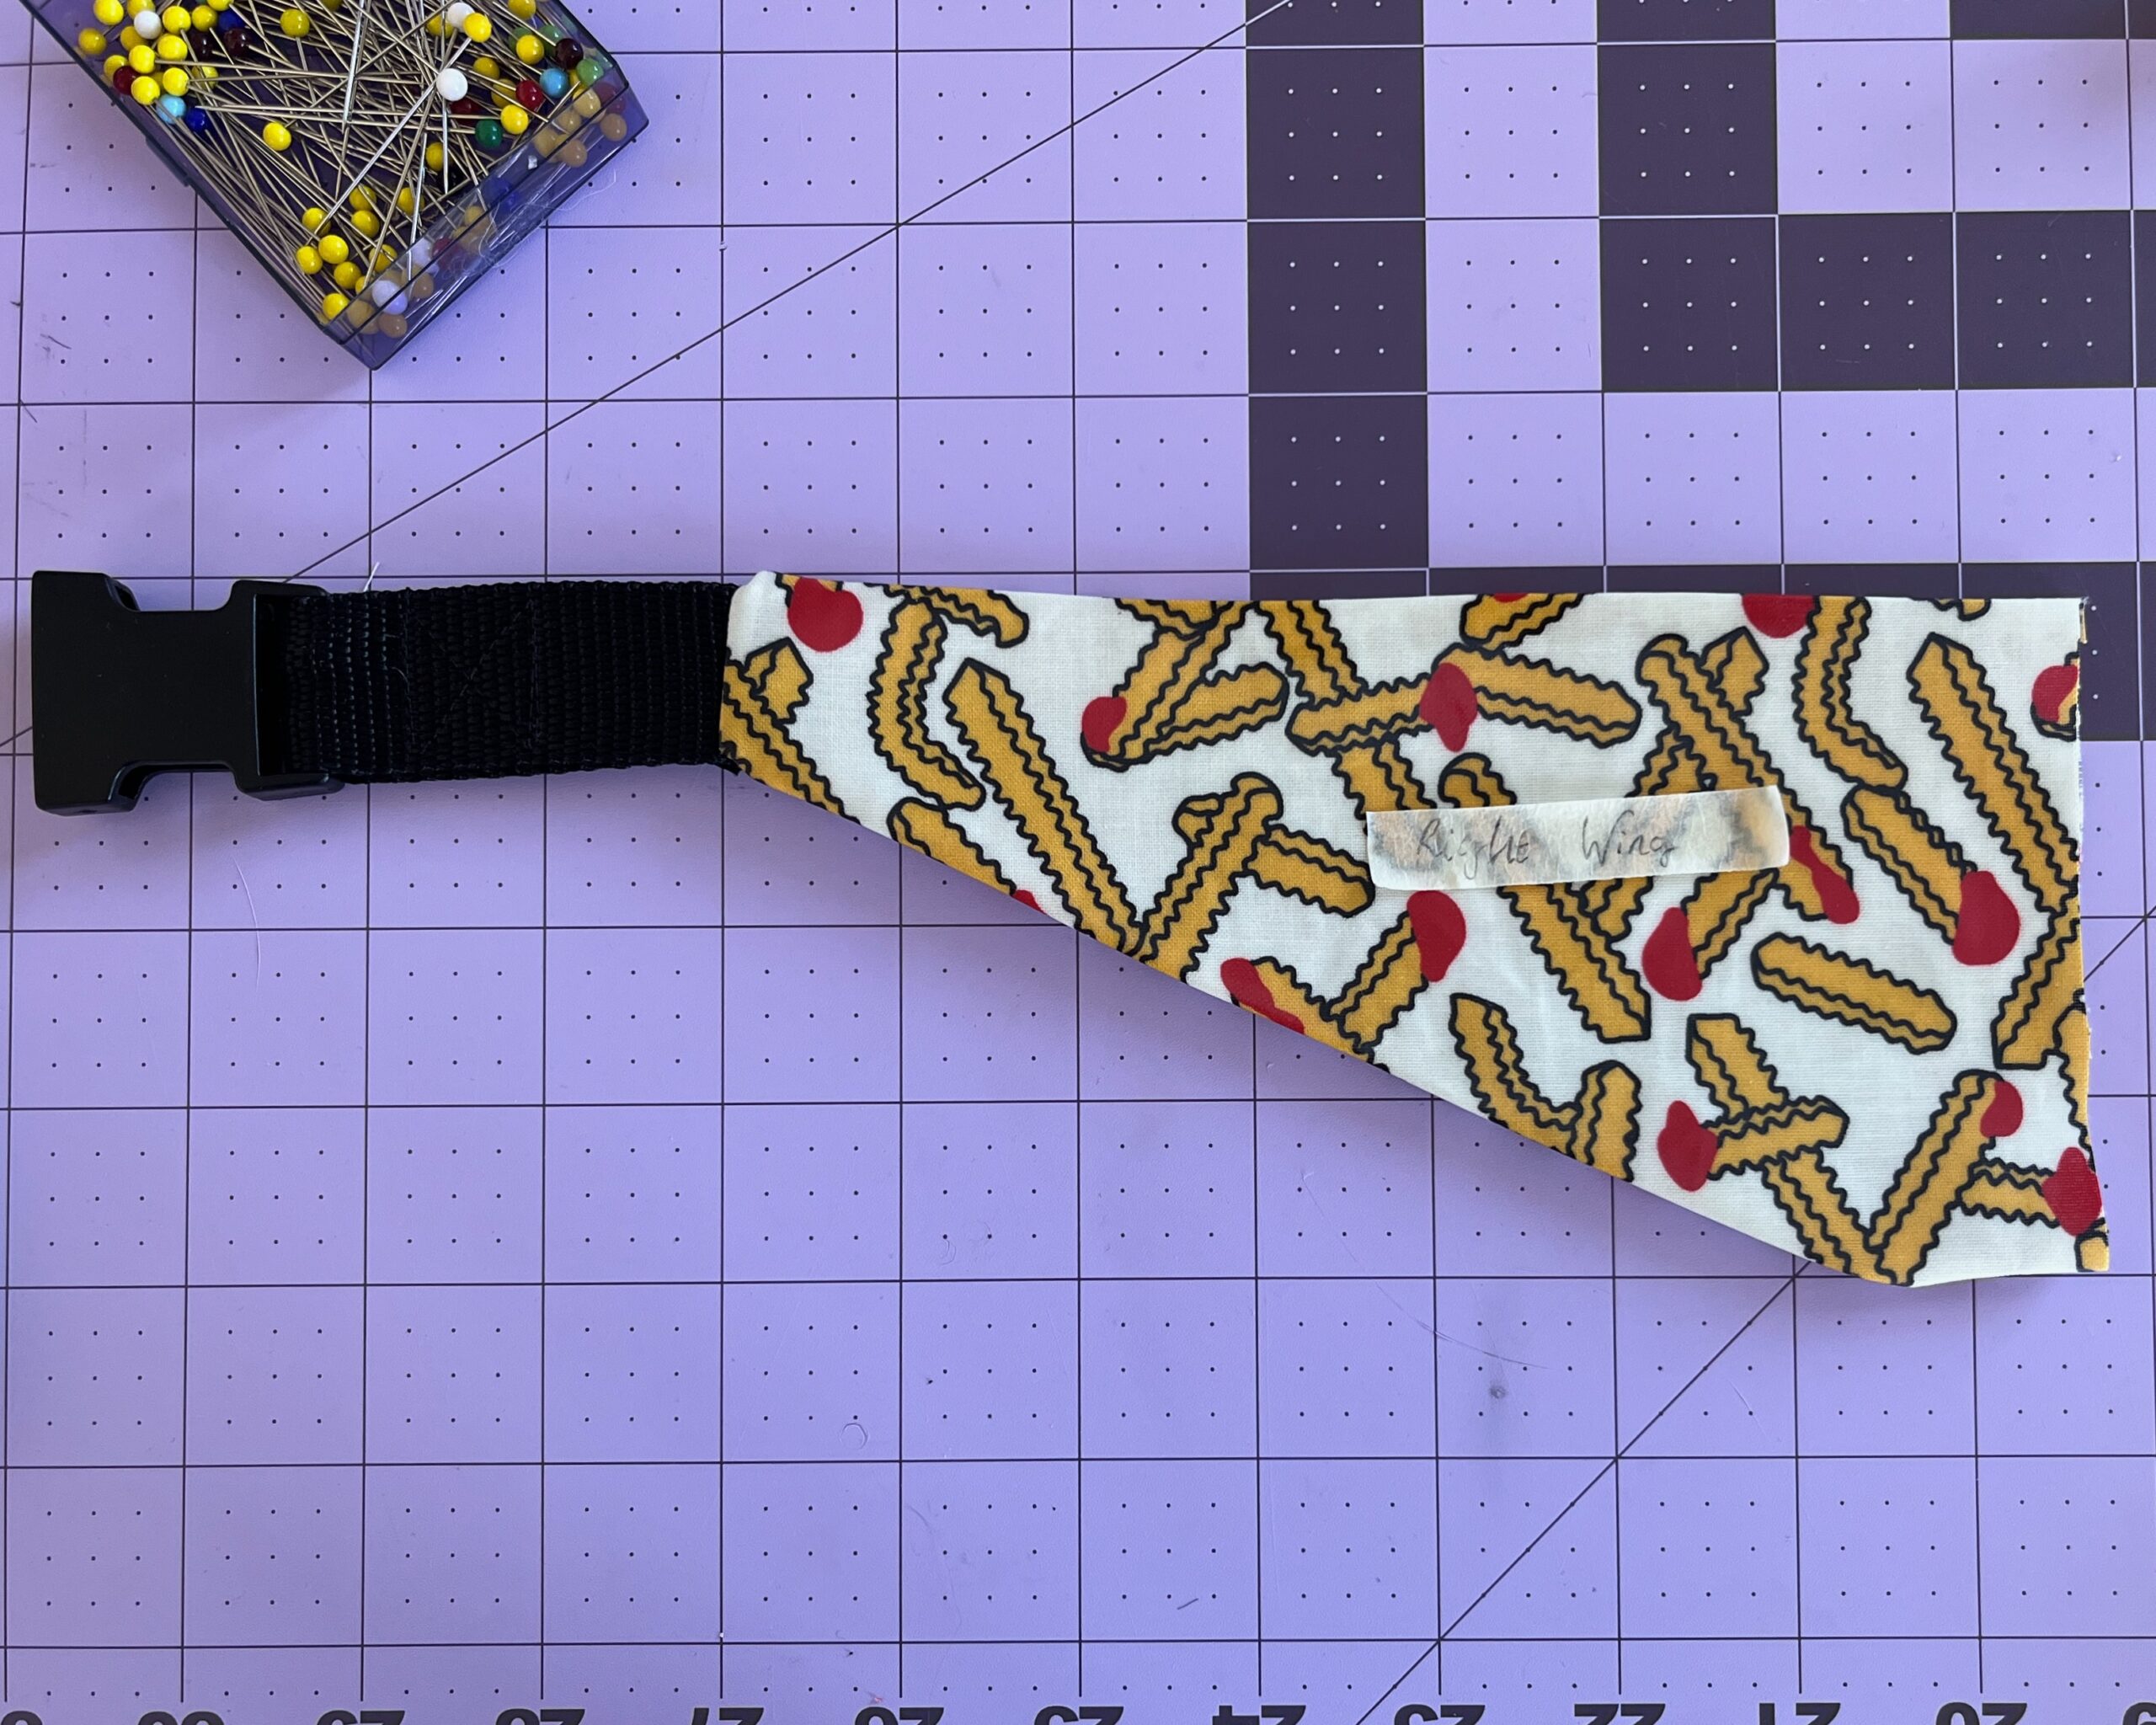
- Clip and trim the seam allowance and turn the right side out. Baste the unstitched edge wrong sides together using a 1/4″ seam allowance. This is to help secure the layers from shifting around when later sewing the bag up.
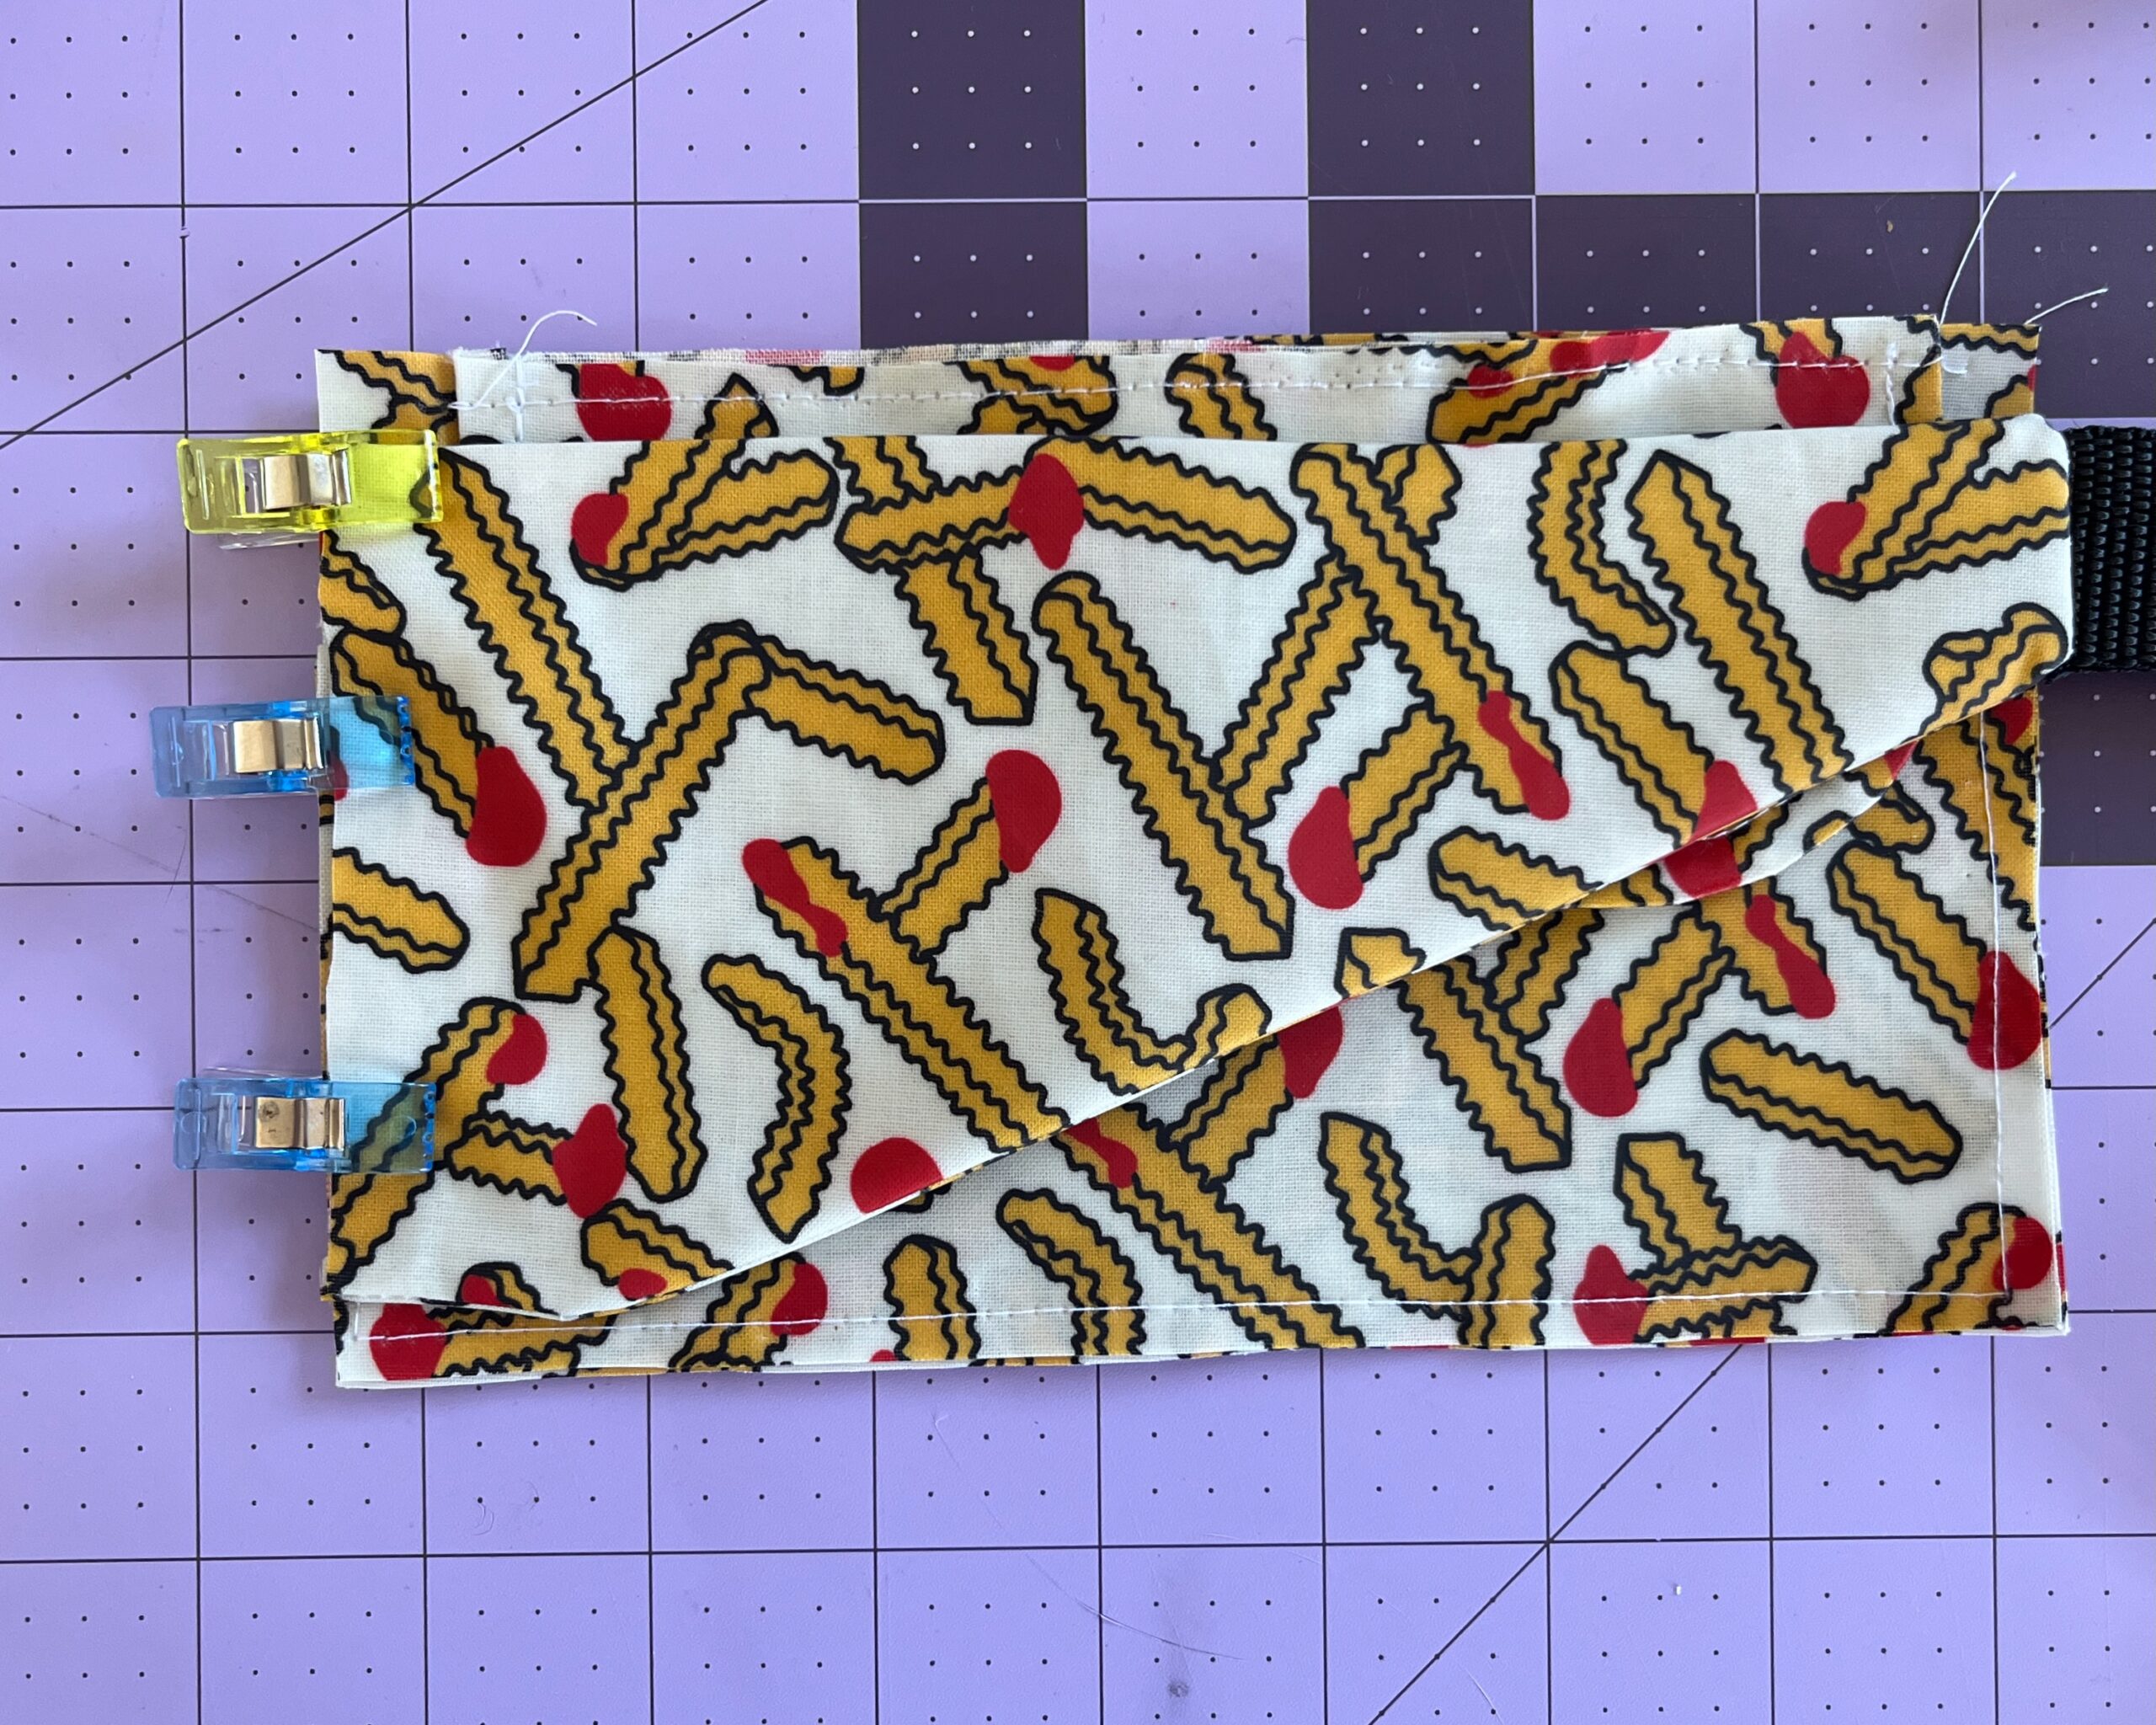
- Pin your Right Wing Extension to your partly assembled Bernie bag on the right side edge, right sides facing. Make sure you have a 3/8″ gap at the upper edge and a 3/8″ gap at the lower edge. Baste.
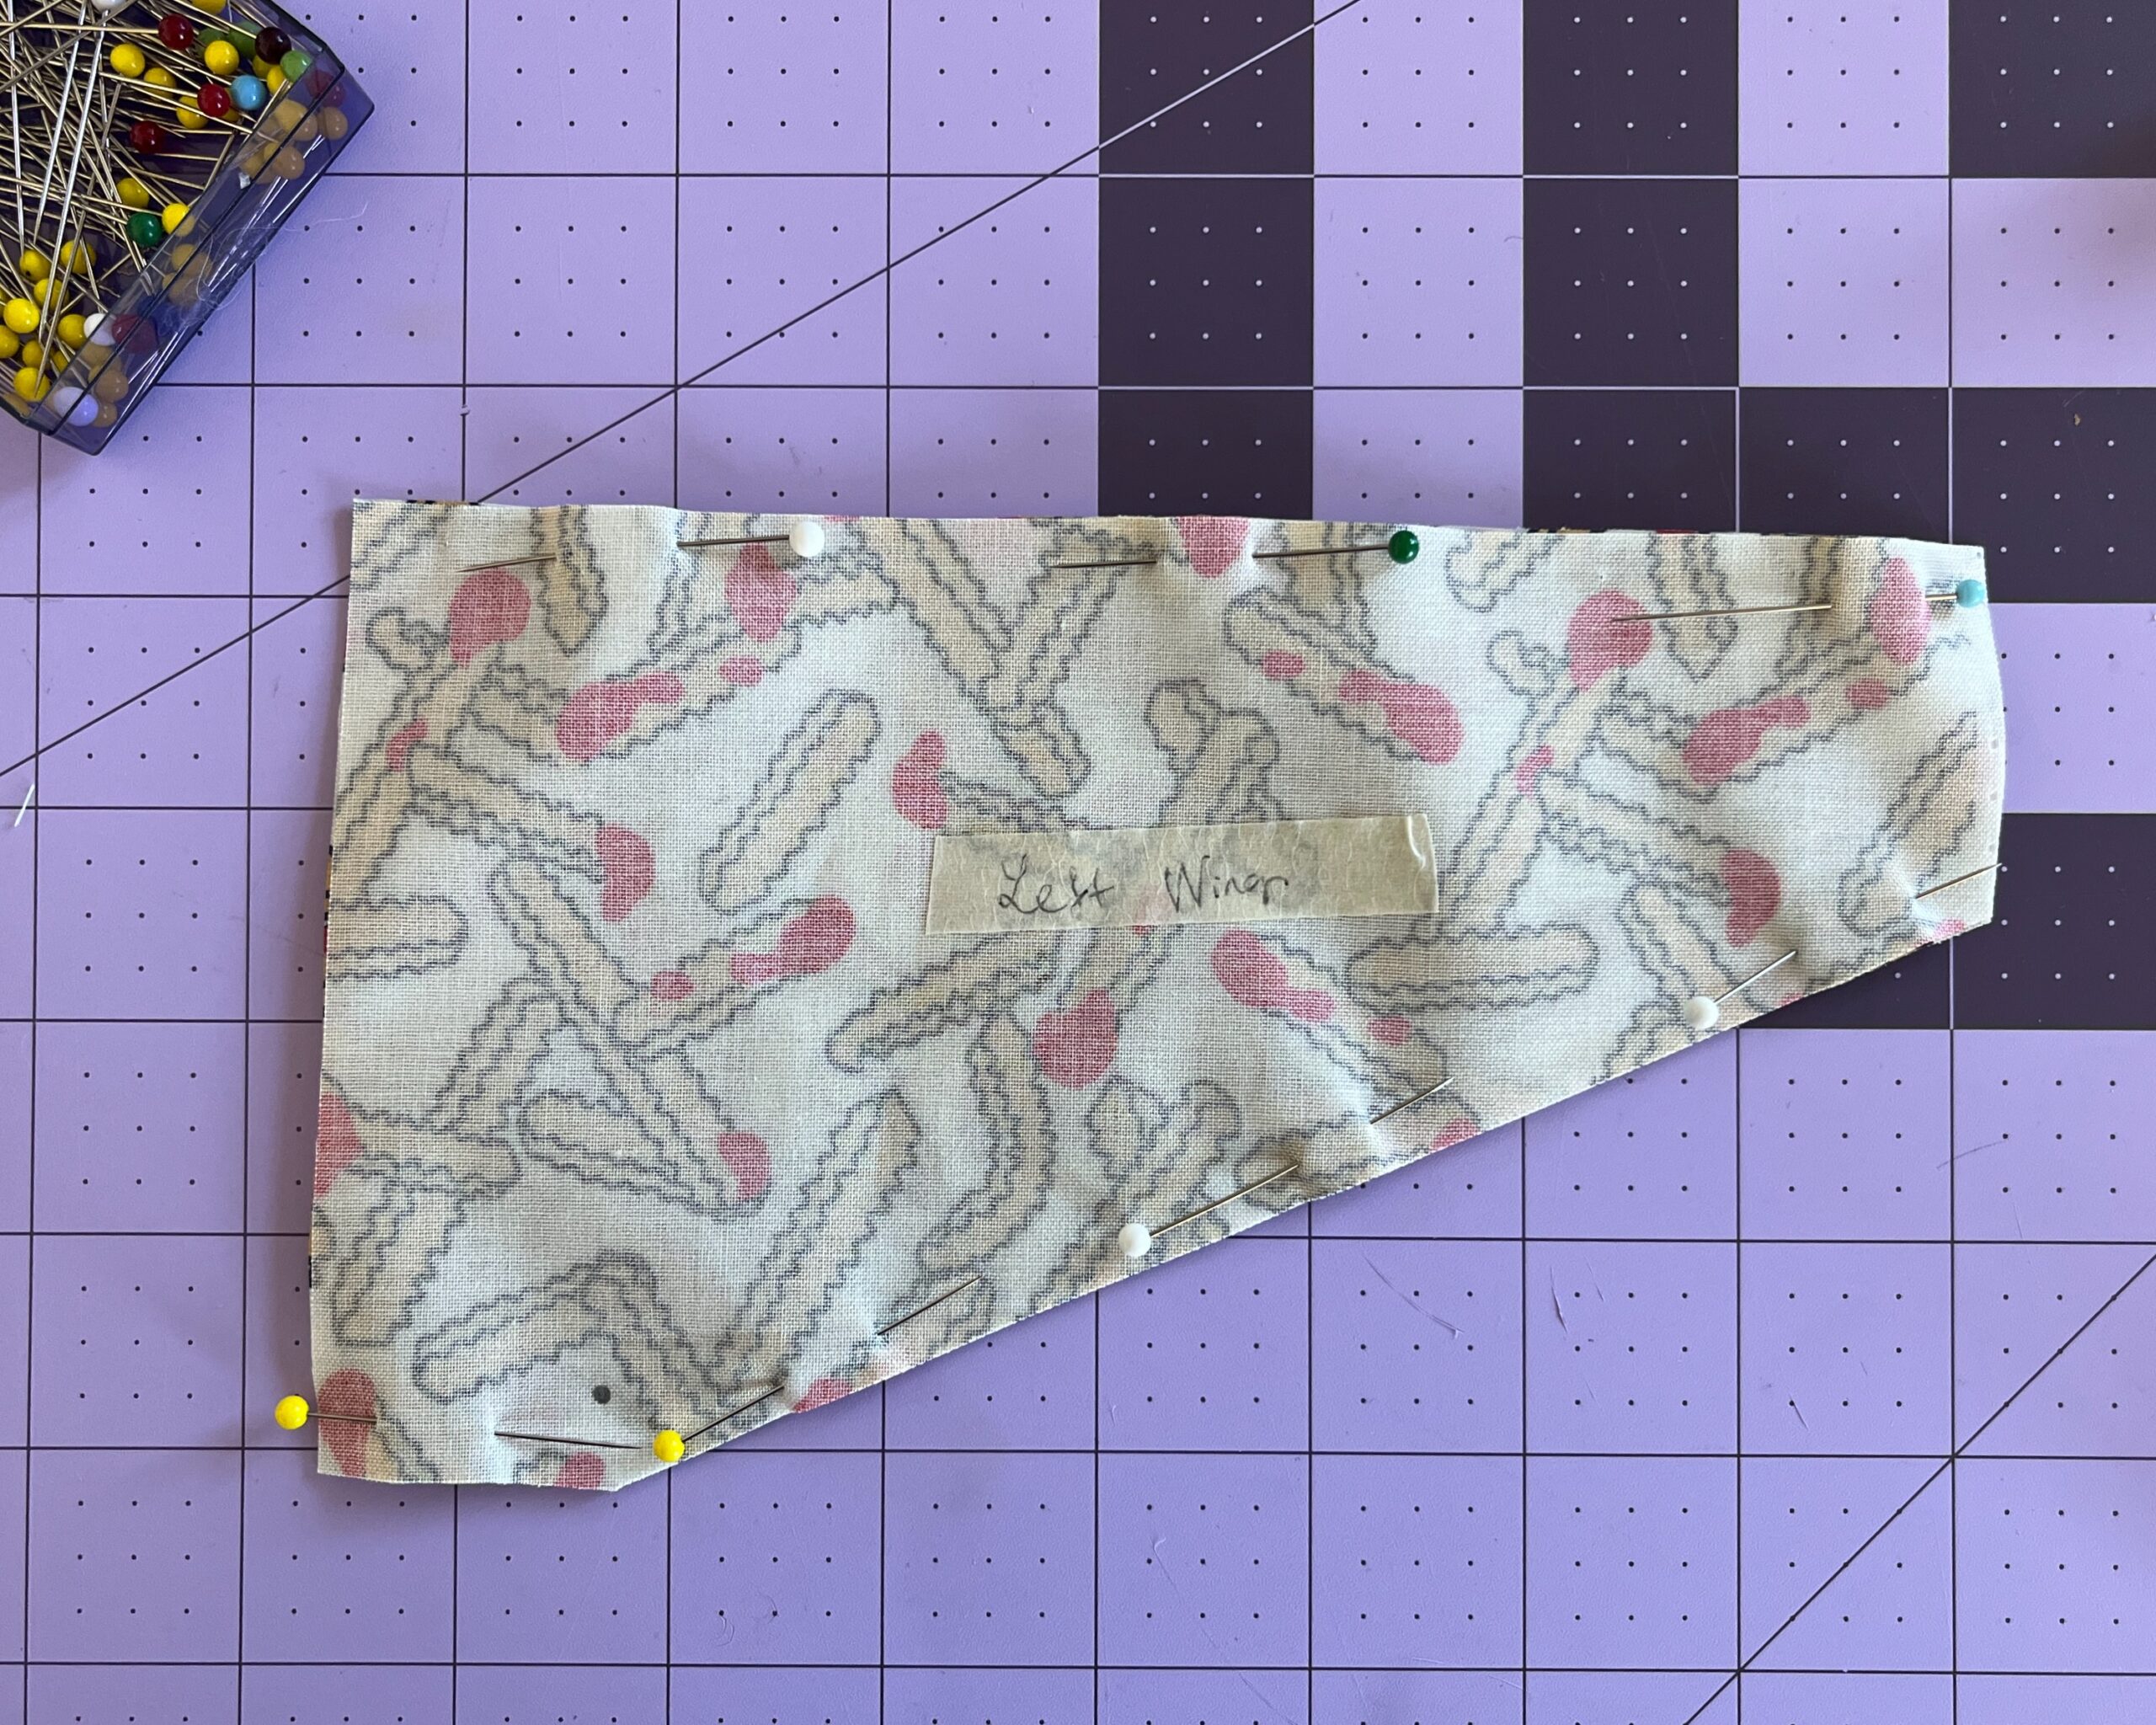
- Next, let’s move on to the Left Wing Extension! Place the two pieces right sides together. Stitch the upper edge using a 3/8” seam allowance. Stitch the lower edge using a 3/8″ seam allowance, pivoting at the dot.
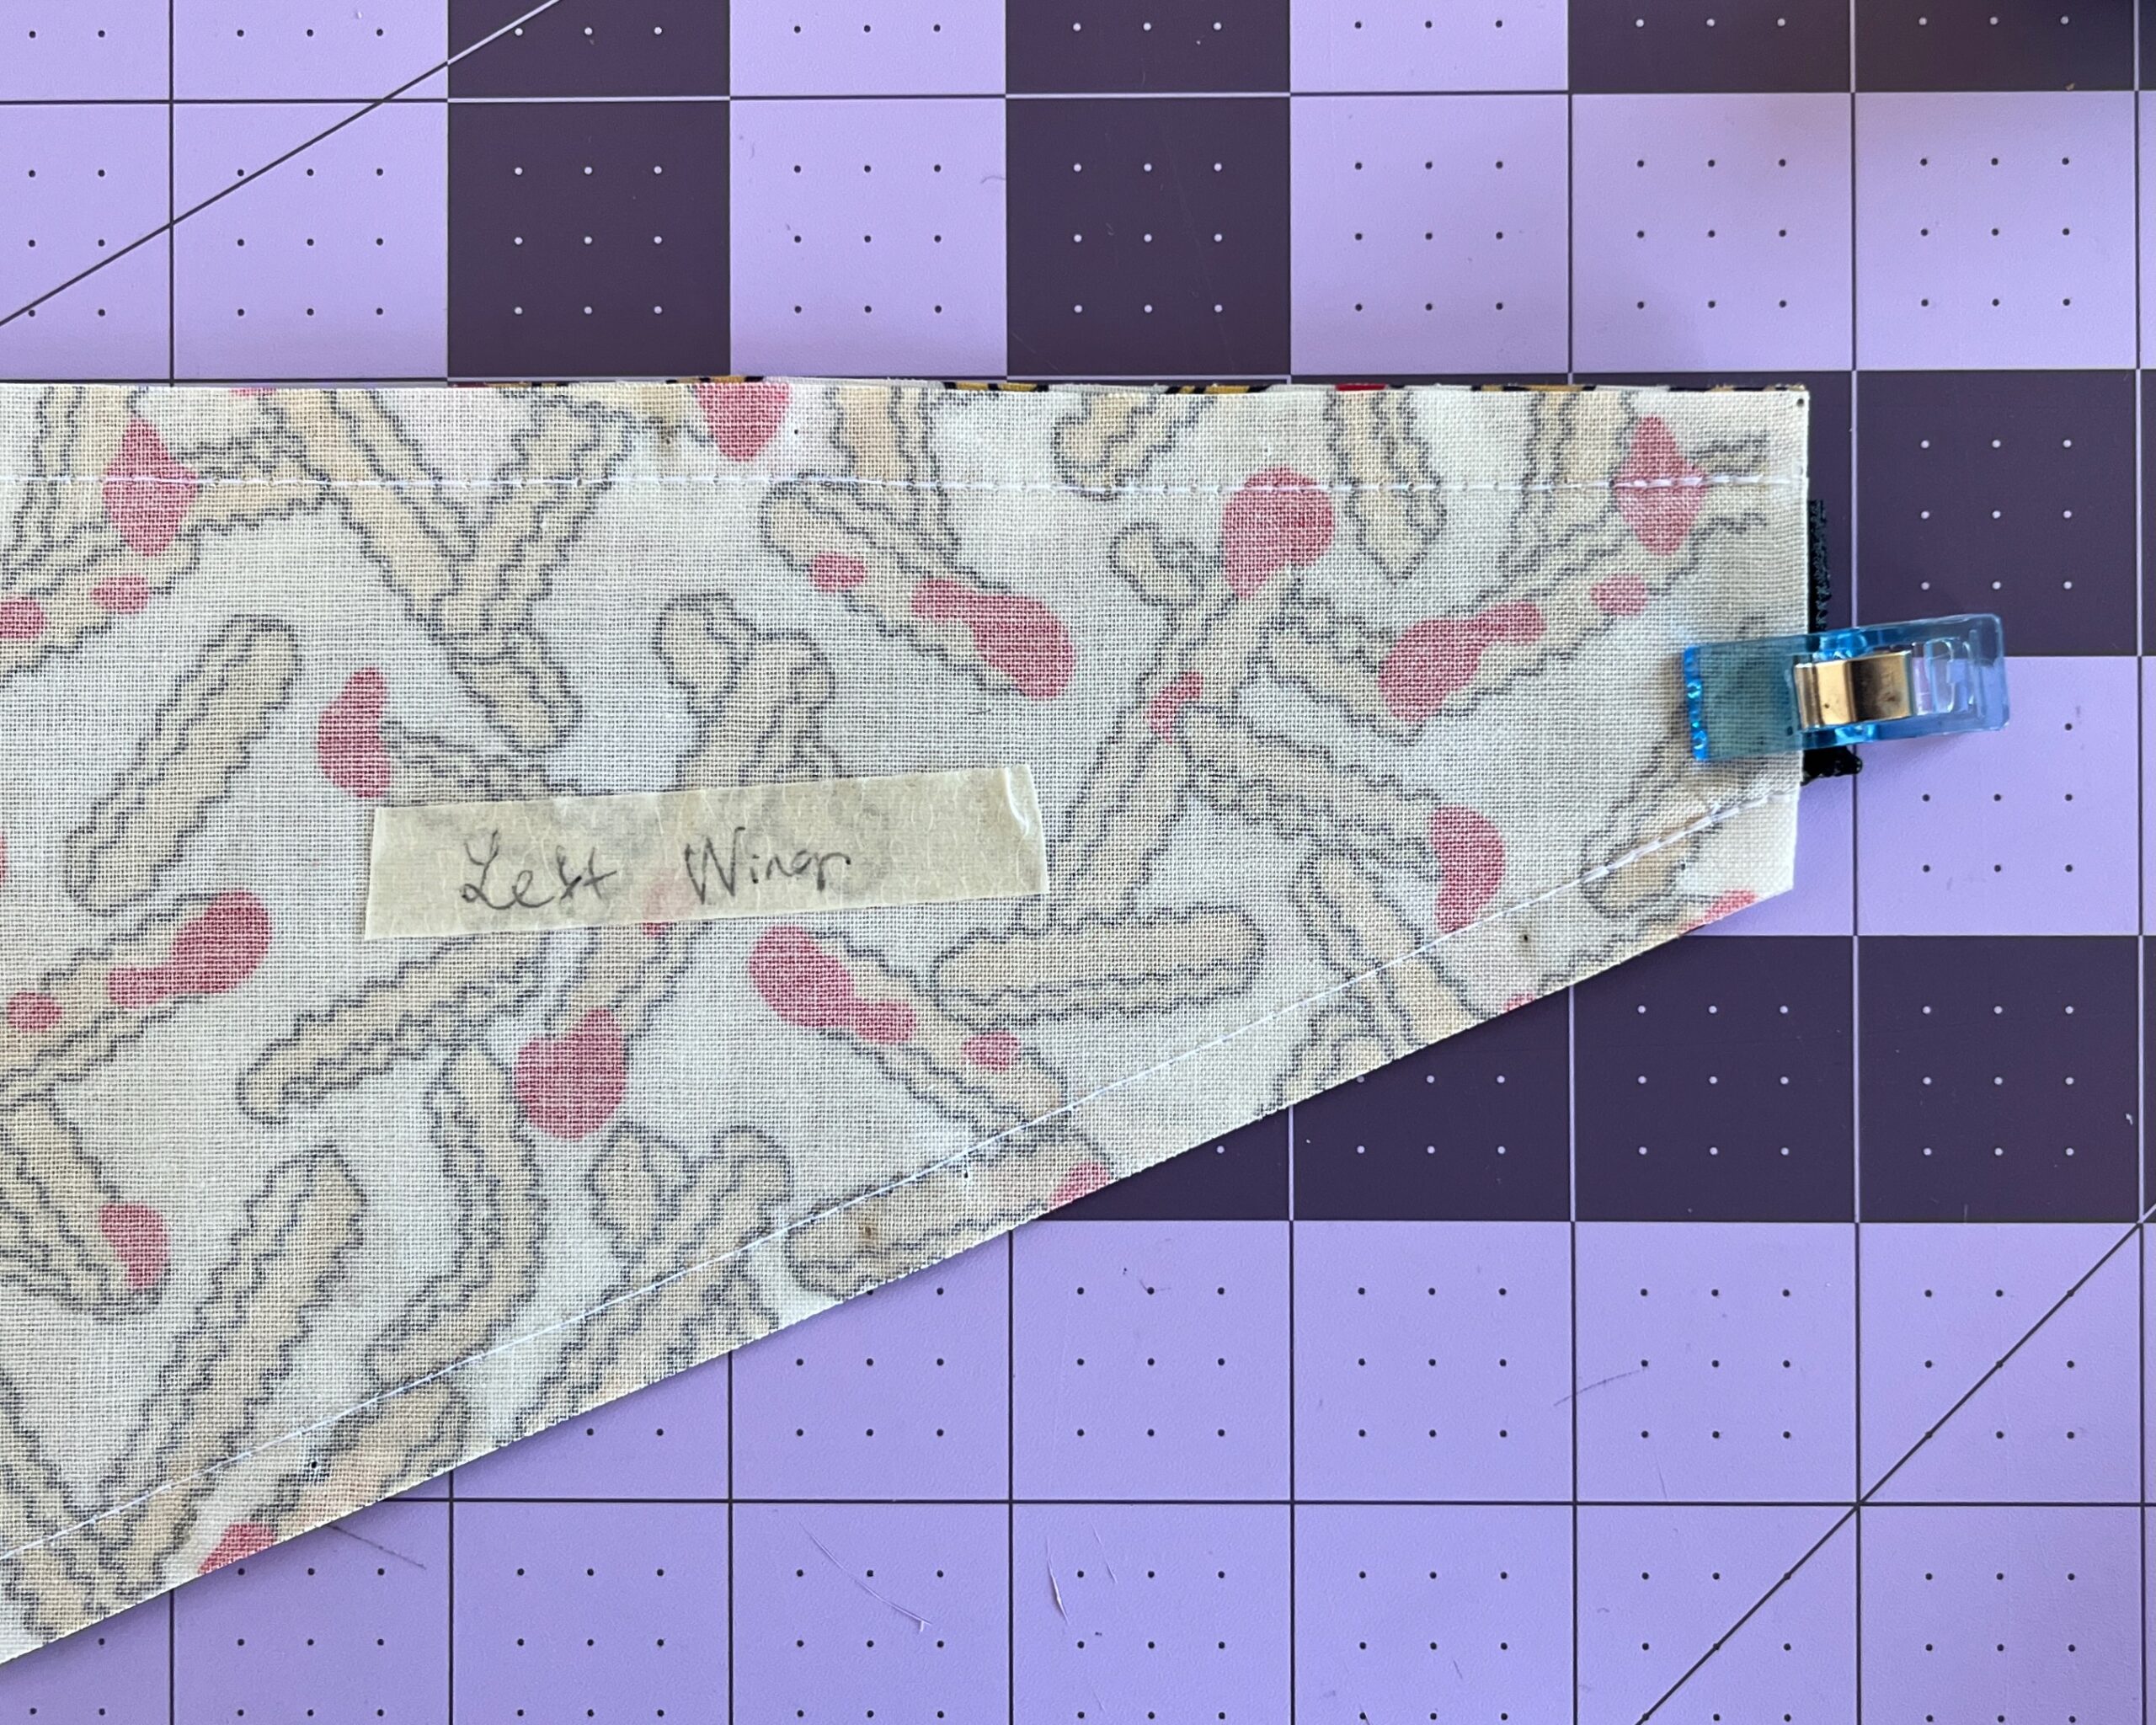
- Cut a piece of webbing which is approximately half of your total waist measurement. Slide the webbing into the Left Wing Extension, between your previous two lines of stitching. You shouldn’t create a loop this time; instead, keep the webbing flat. With the raw edge of the webbing aligning with the raw short edge of the extension, stitch into place using a 3/8” seam allowance. Reinforce stitching.
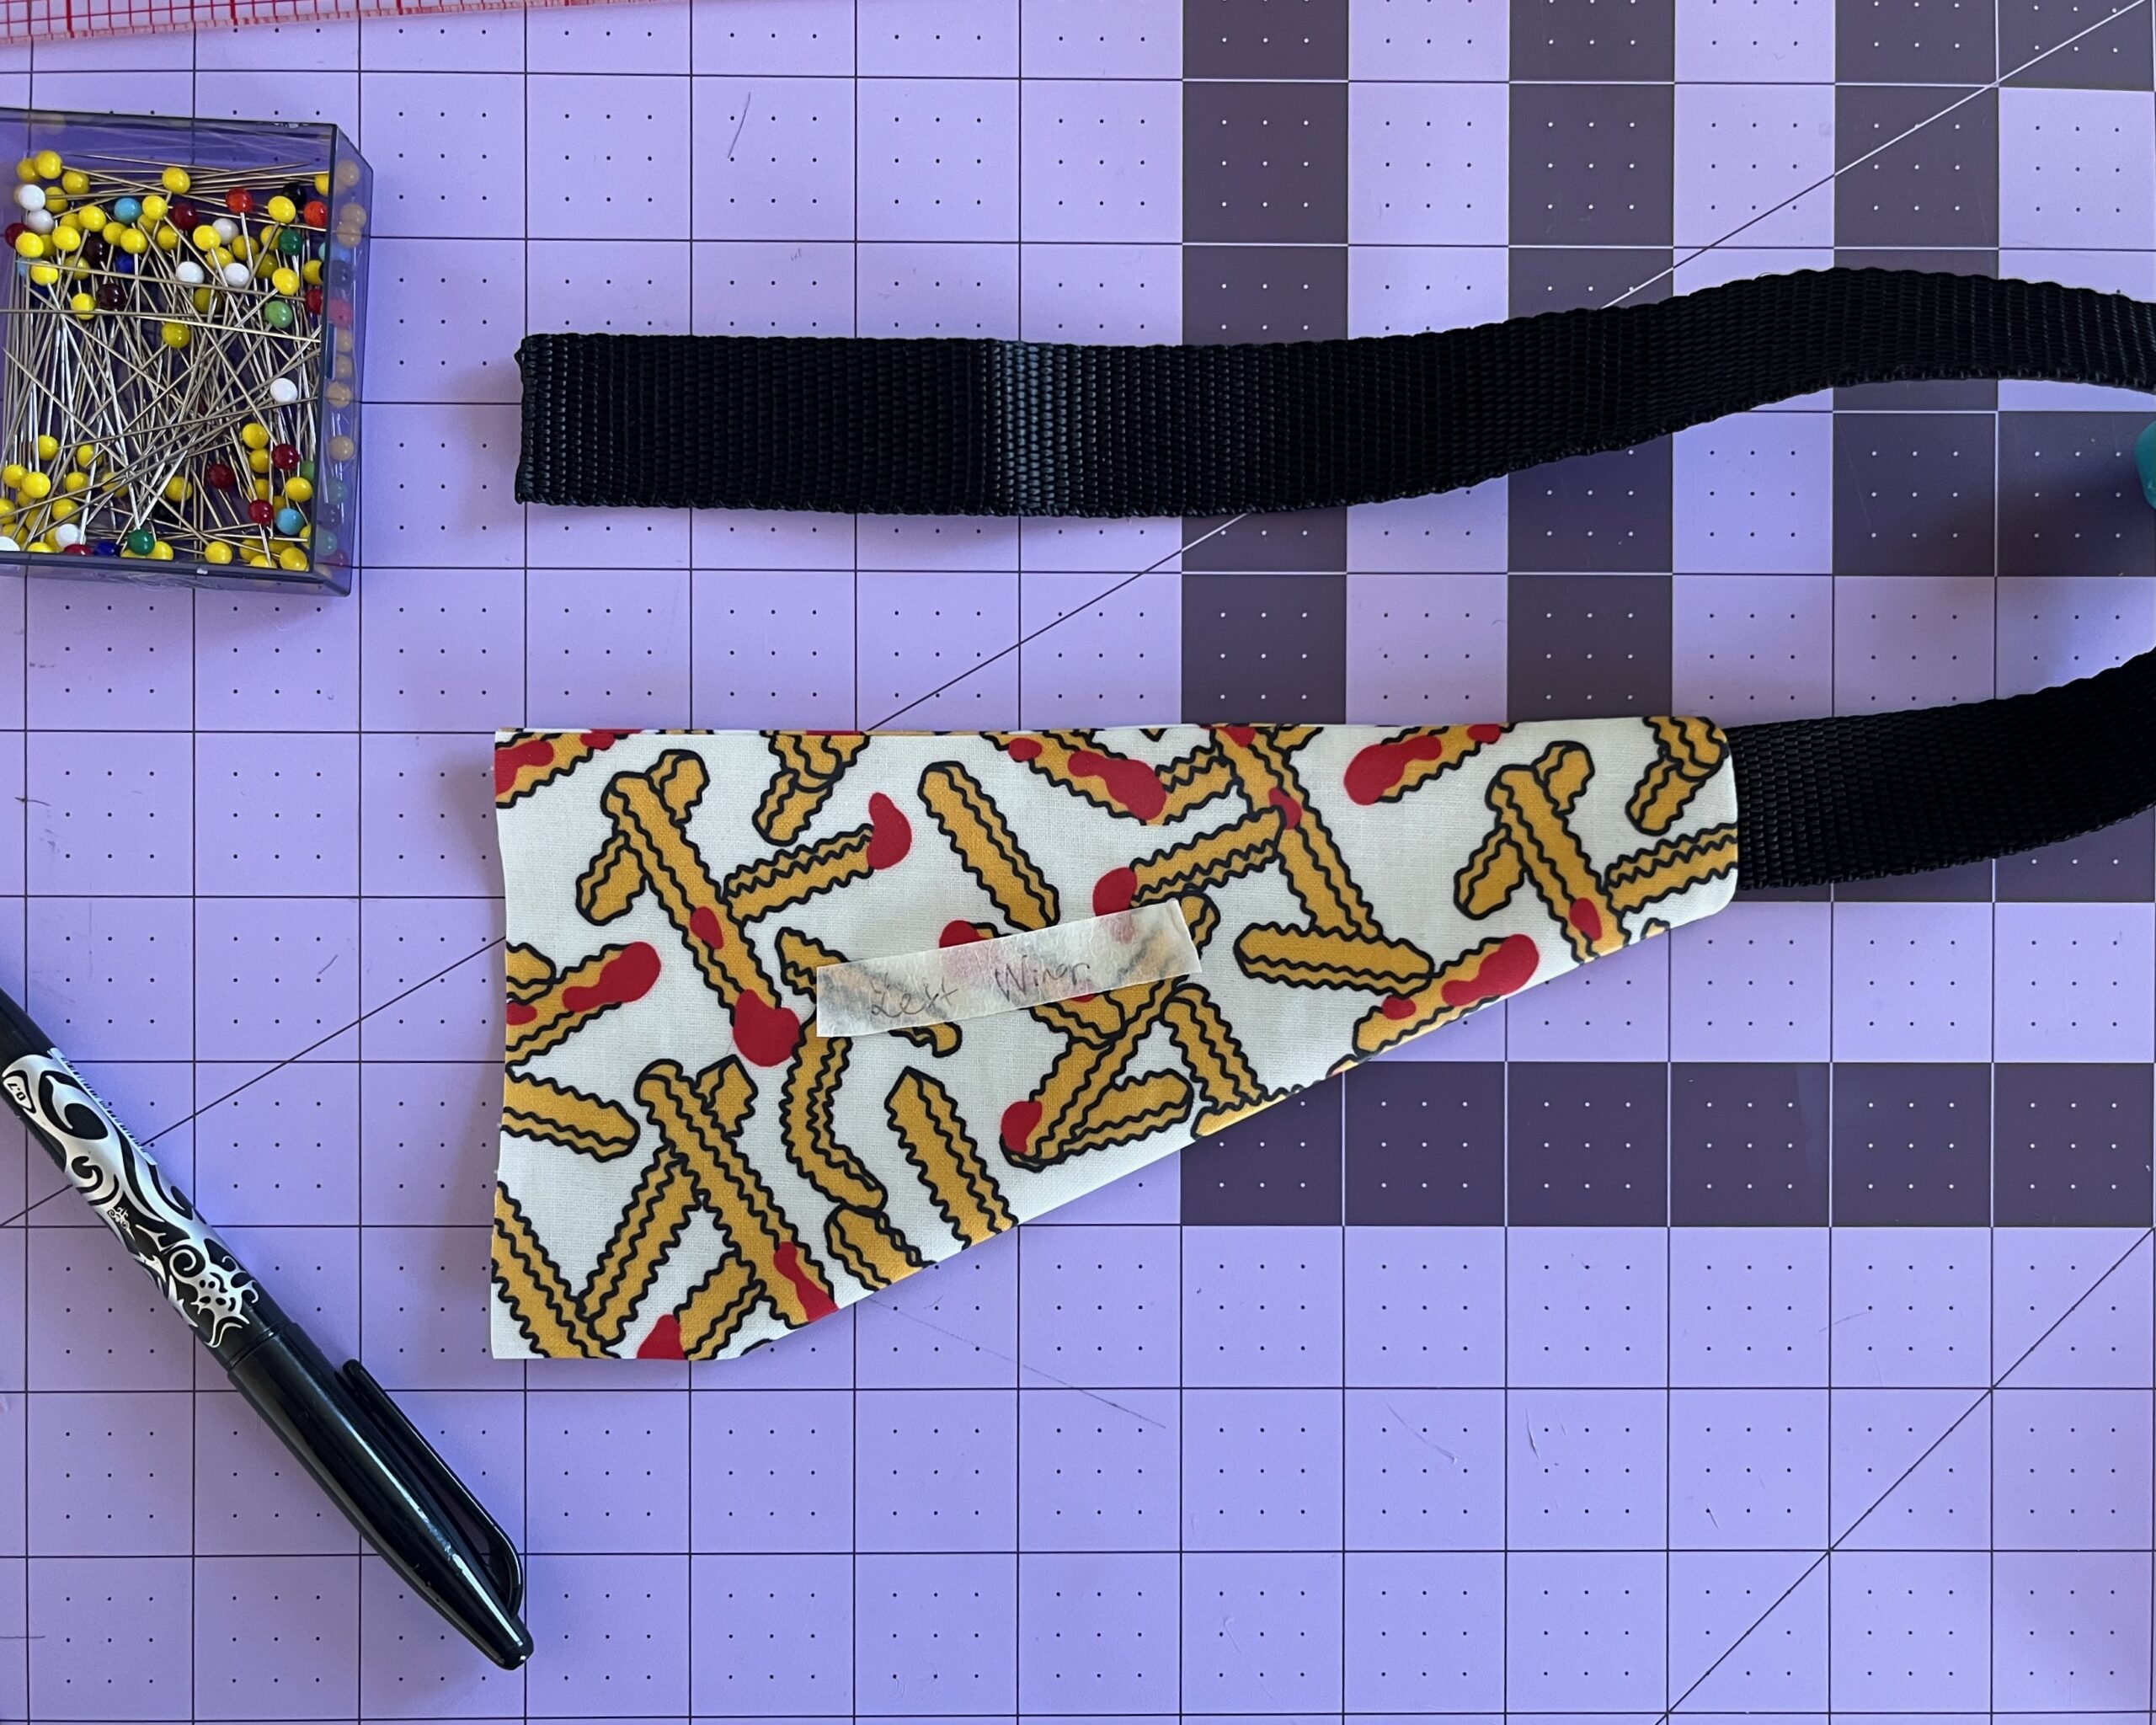
- Clip and trim the seam allowance and turn the right side out. Baste the unstitched edge wrong sides together using a 1/4″ seam allowance.
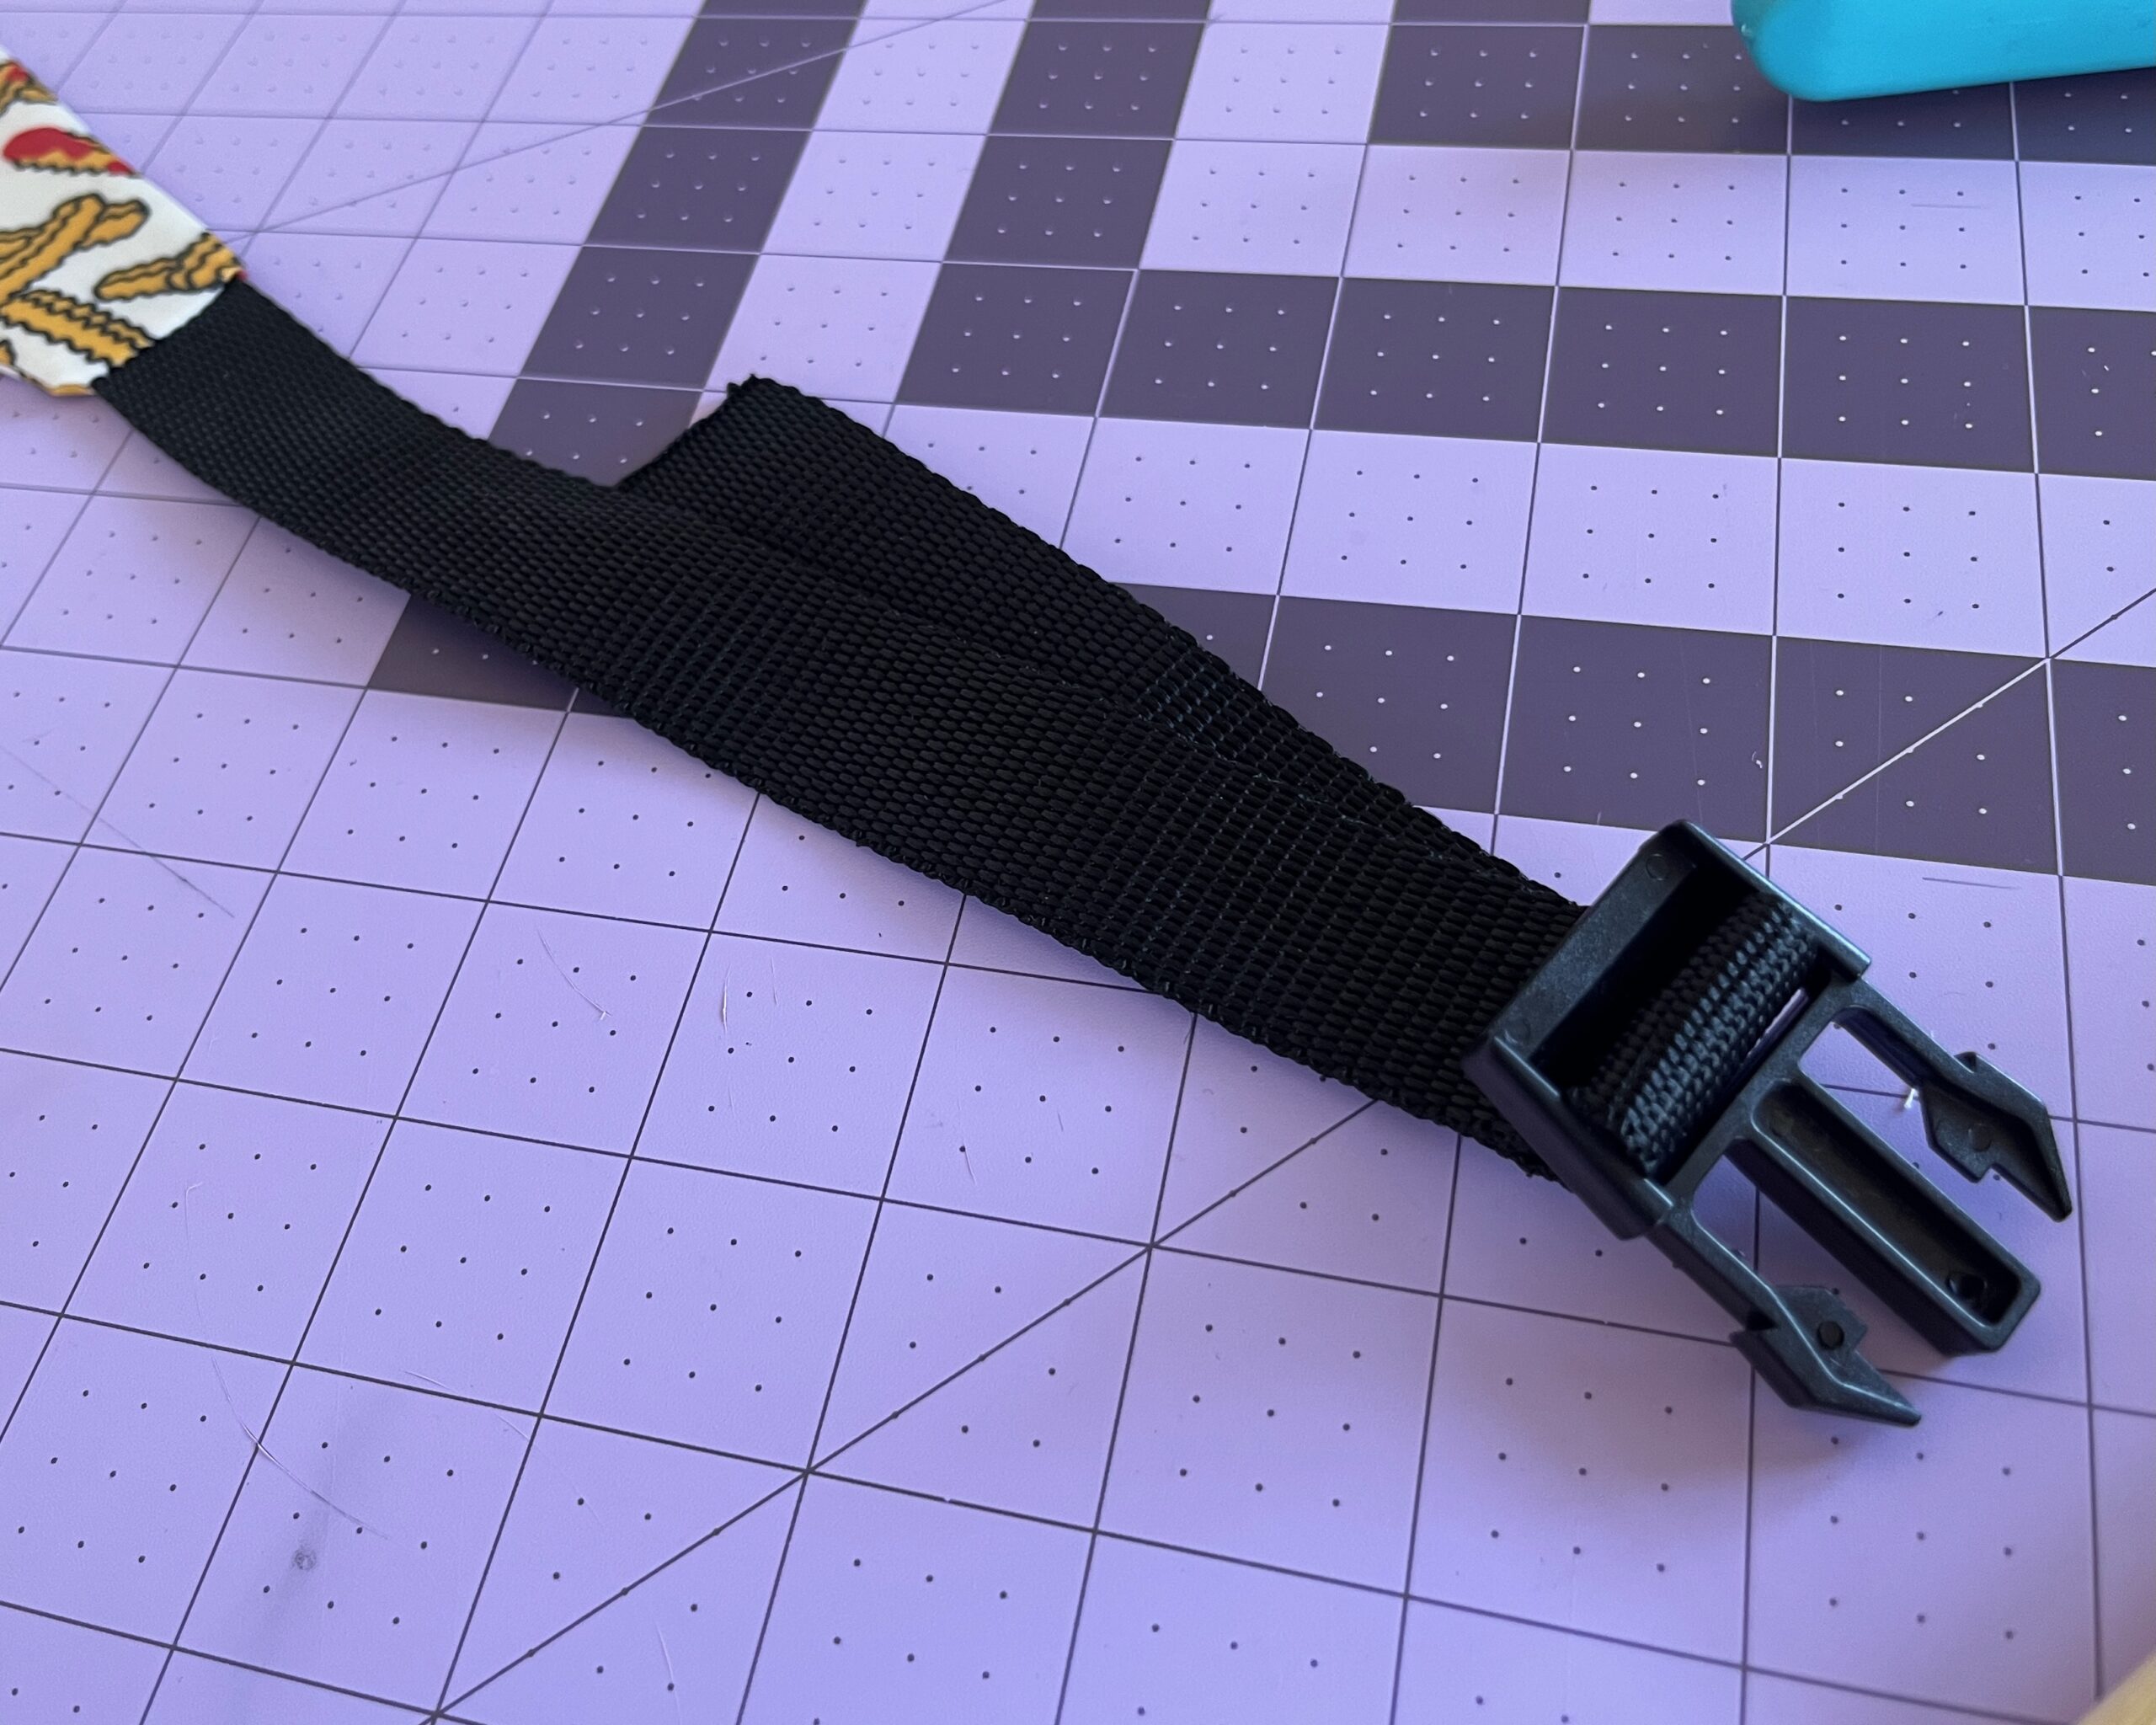
- Slide the webbing through the male clip from the bottom and loop over the middle bar.
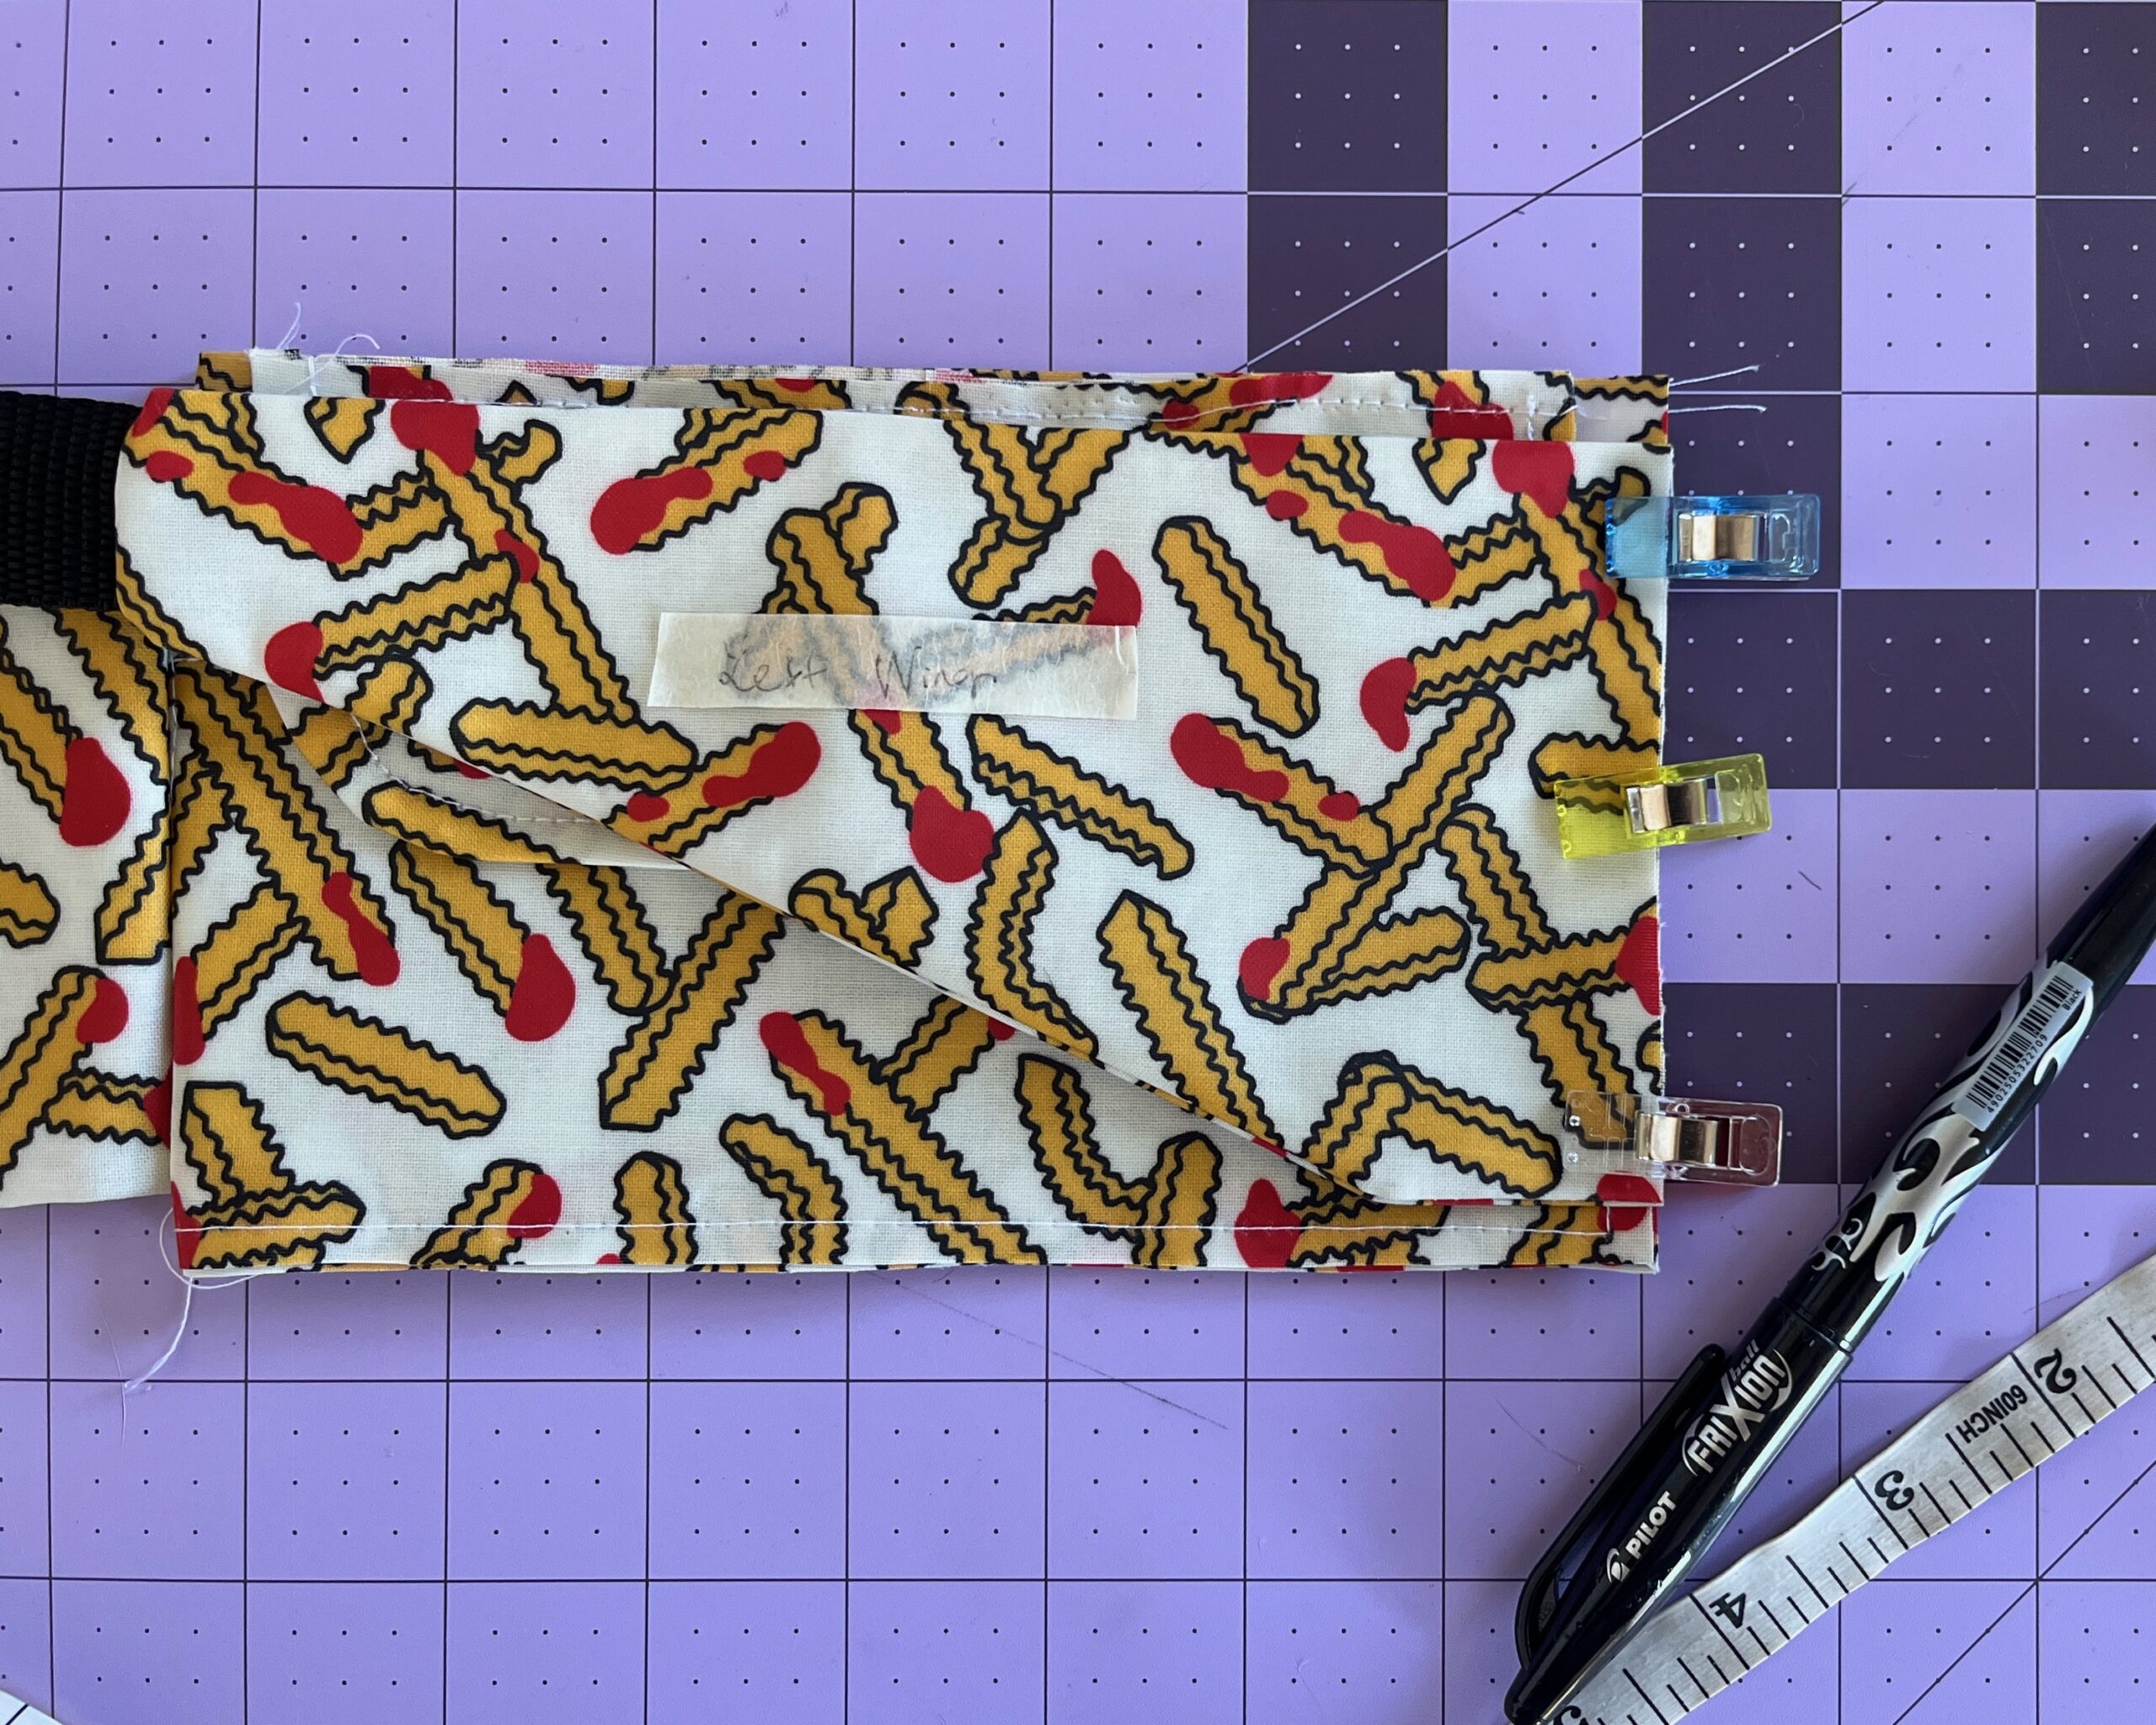
- Pin your Left Wing Extension to your partly assembled Bernie bag on the left side edge, right sides facing. Make sure you have a 3/8″ gap at the upper edge and a 3/8″ gap at the lower edge. Baste.
Now is a good time to try on the bag around your waist and adjust the tightness using the adjustable clip. Use a lighter to briefly melt the end of the webbing to avoid fraying.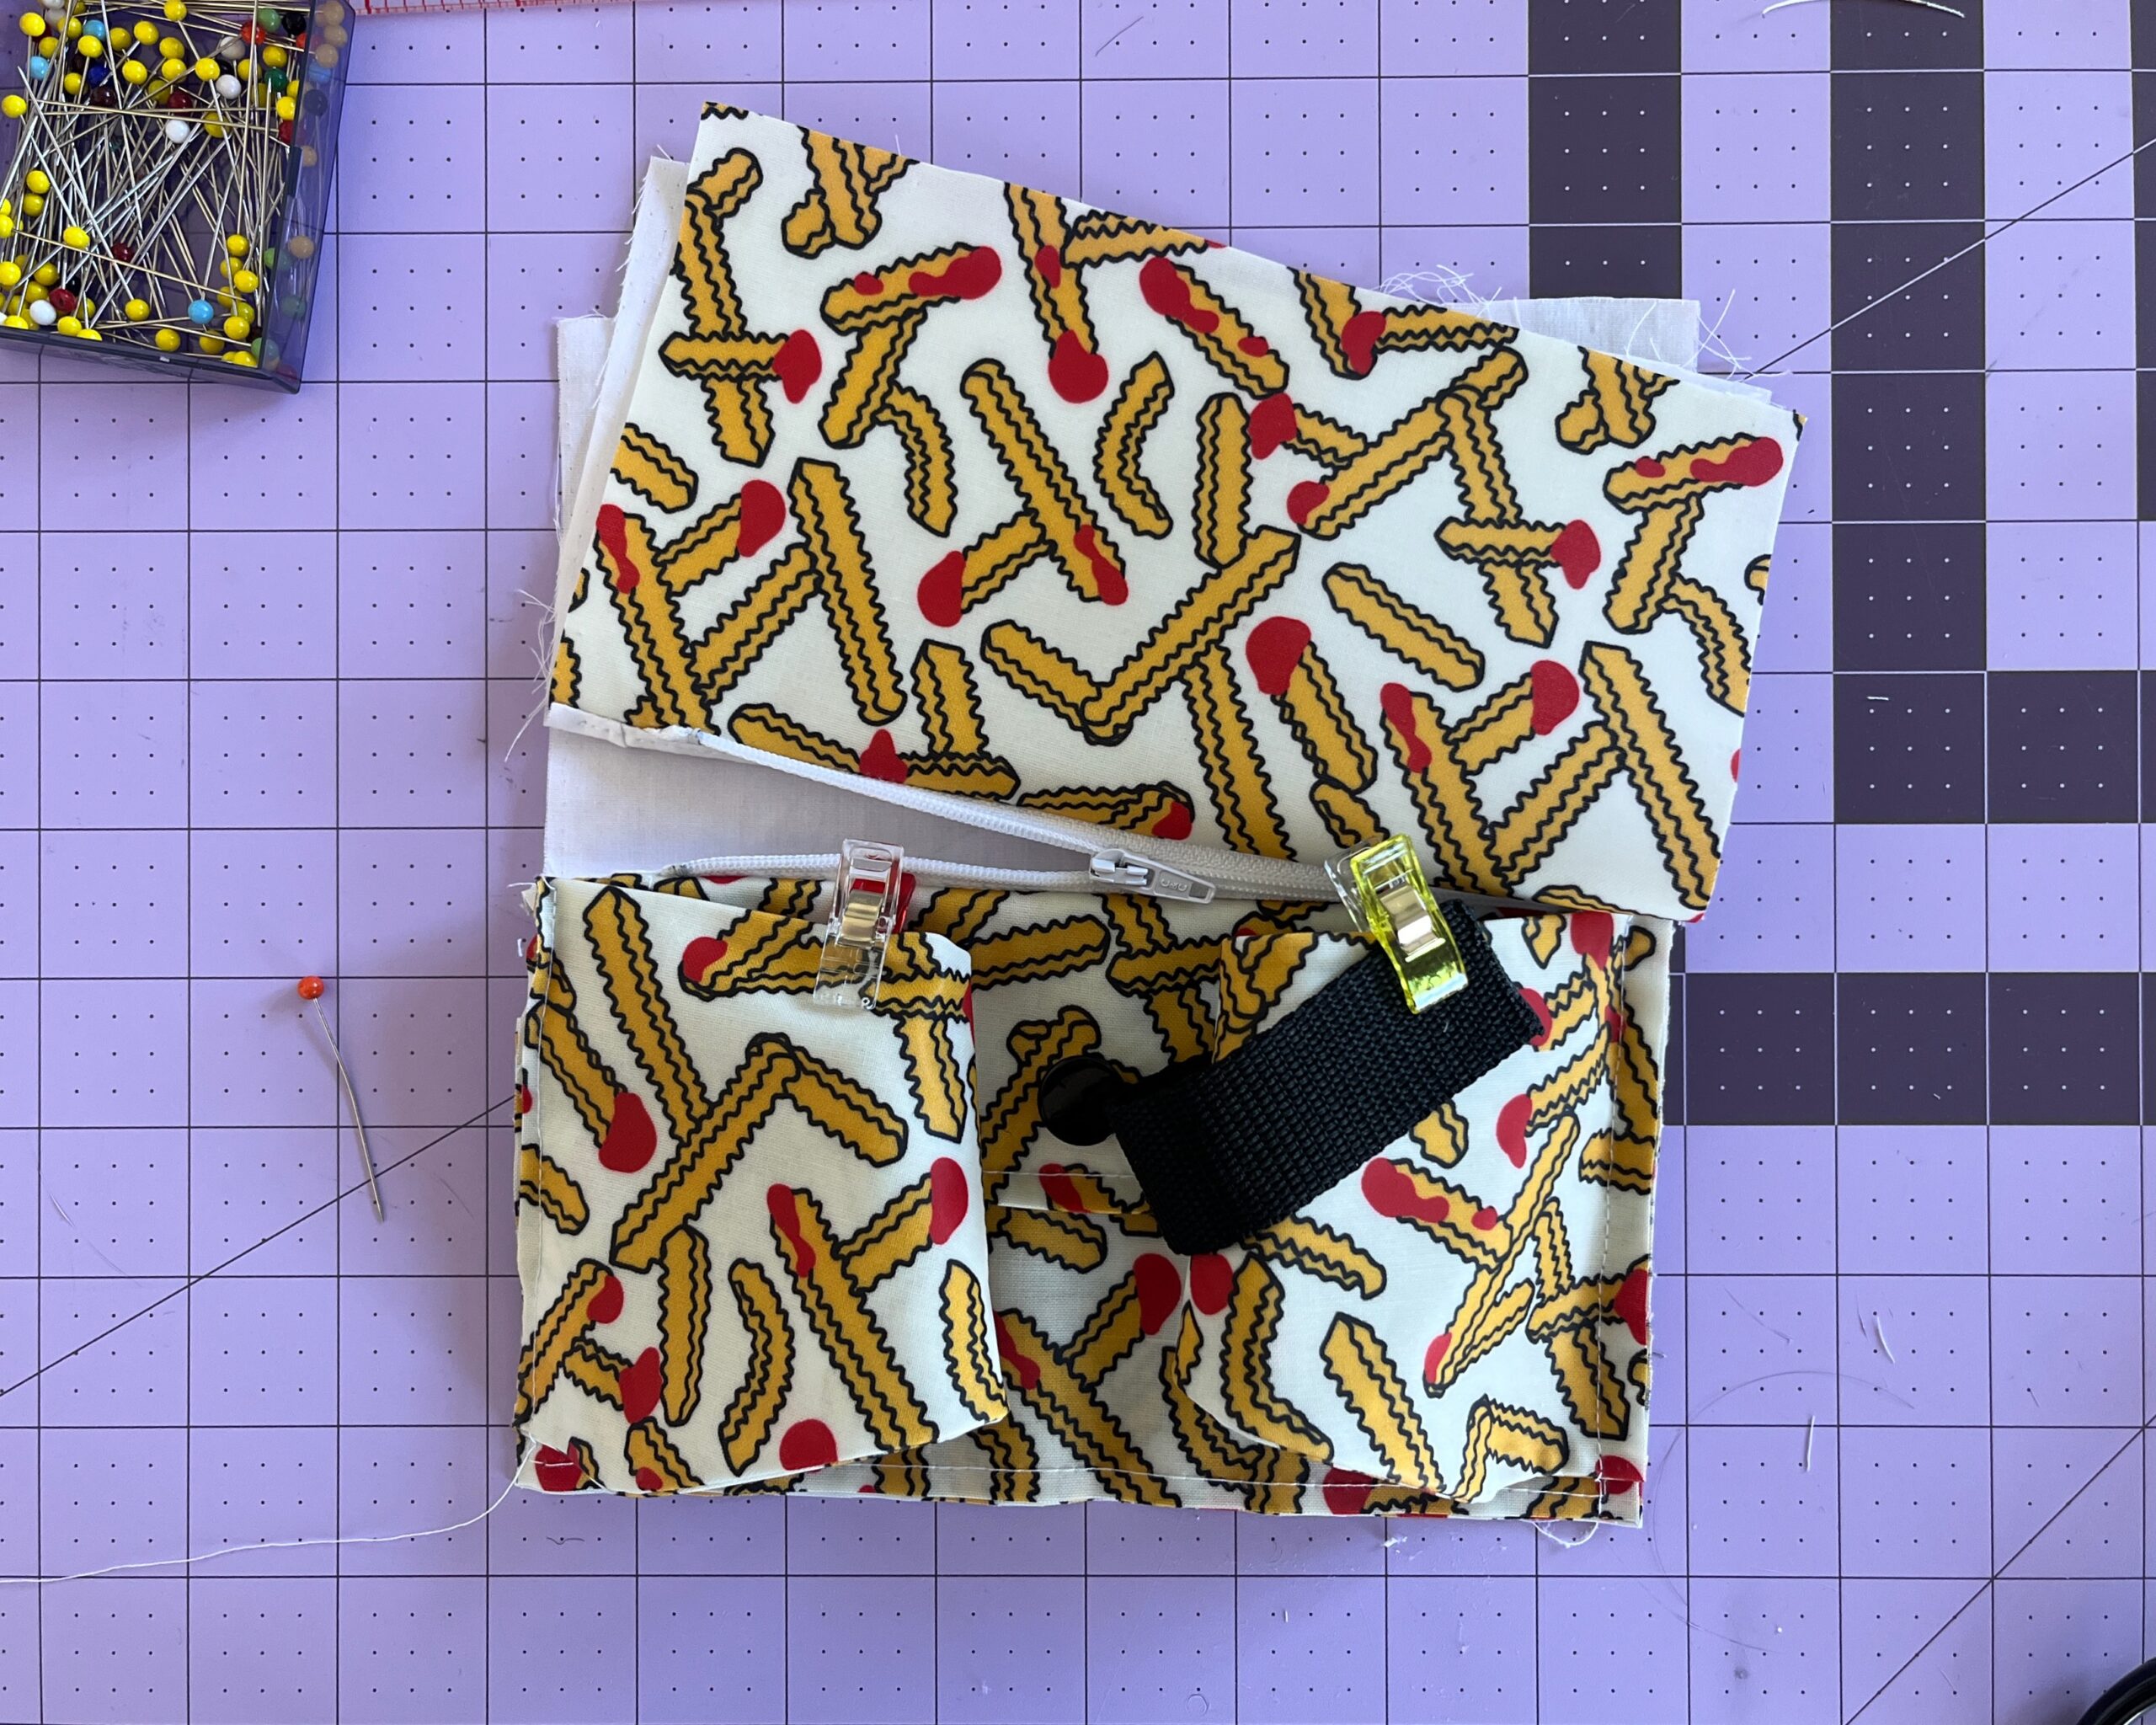
- Follow the remaining Friday Pattern Co instructions to insert the zipper, and to attach the lining and the back bag section. Make sure you roll your extensions out of the way and ensure you don’t catch them when sewing the side seams together.

- Clip your seam allowances, turn right side out and press. Clip around your waist and enjoy your exercise!
[N.B. brat summer is still not over in our house, even though my German husband perks up his ears every time and hopefully asks about bratwurst whenever I mention it]
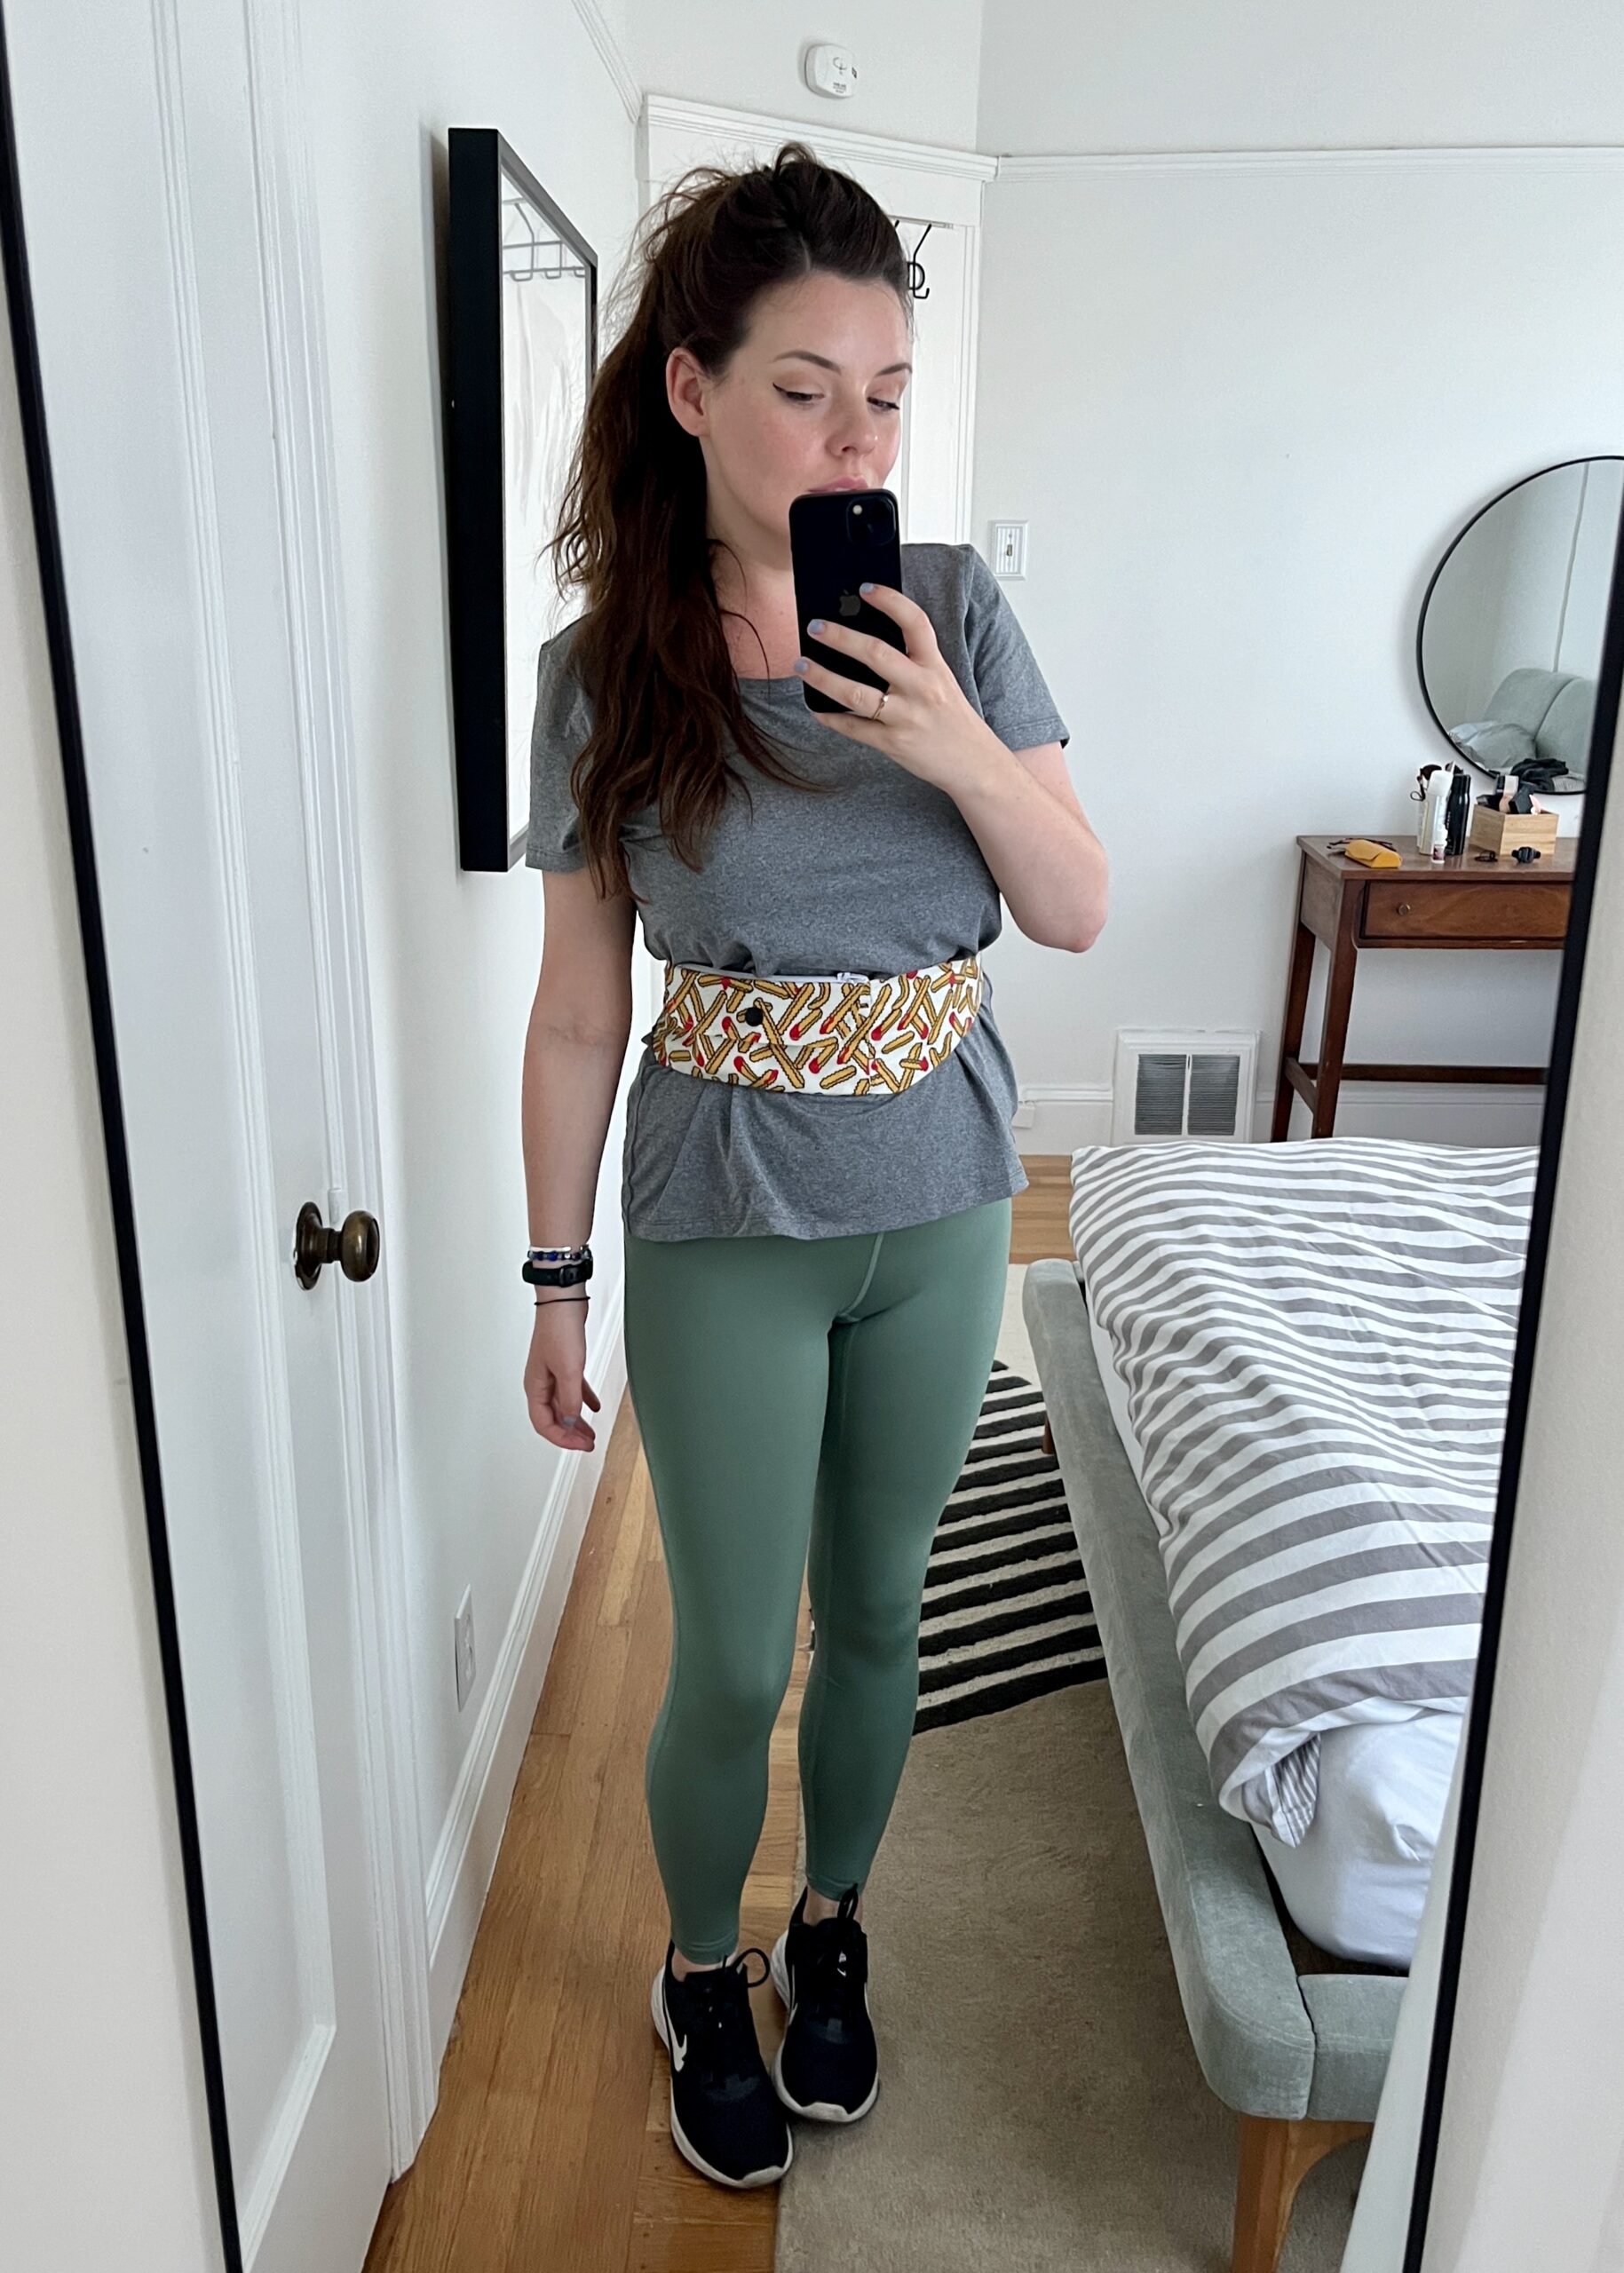
I am so happy with my Bernie running belt bag; it stays in place and is secure, and I don’t have to worry about anything falling out of my pockets when I run! I have some further hack ideas for this bag — maybe you could use a longer piece of webbing to create a crossbody running belt bag, or even switch up the dimensions to make a larger belt bag for carrying essentials at a festival. Either way, let me know if you make your own version — I would love to see it 😊

