I have got quite a few weddings to attend next month, so I decided that my #MinervaMake for July should both tick the wedding-guest-worthy attire box and the summer-heatwave-appropriate box ☀️ Minerva gifted me 3.5m of this botanical cotton sateen and I searched my pattern stash for a dress pattern that would work with this bold print — head over to Minerva to read up my blog post or scroll down for more details and photos!
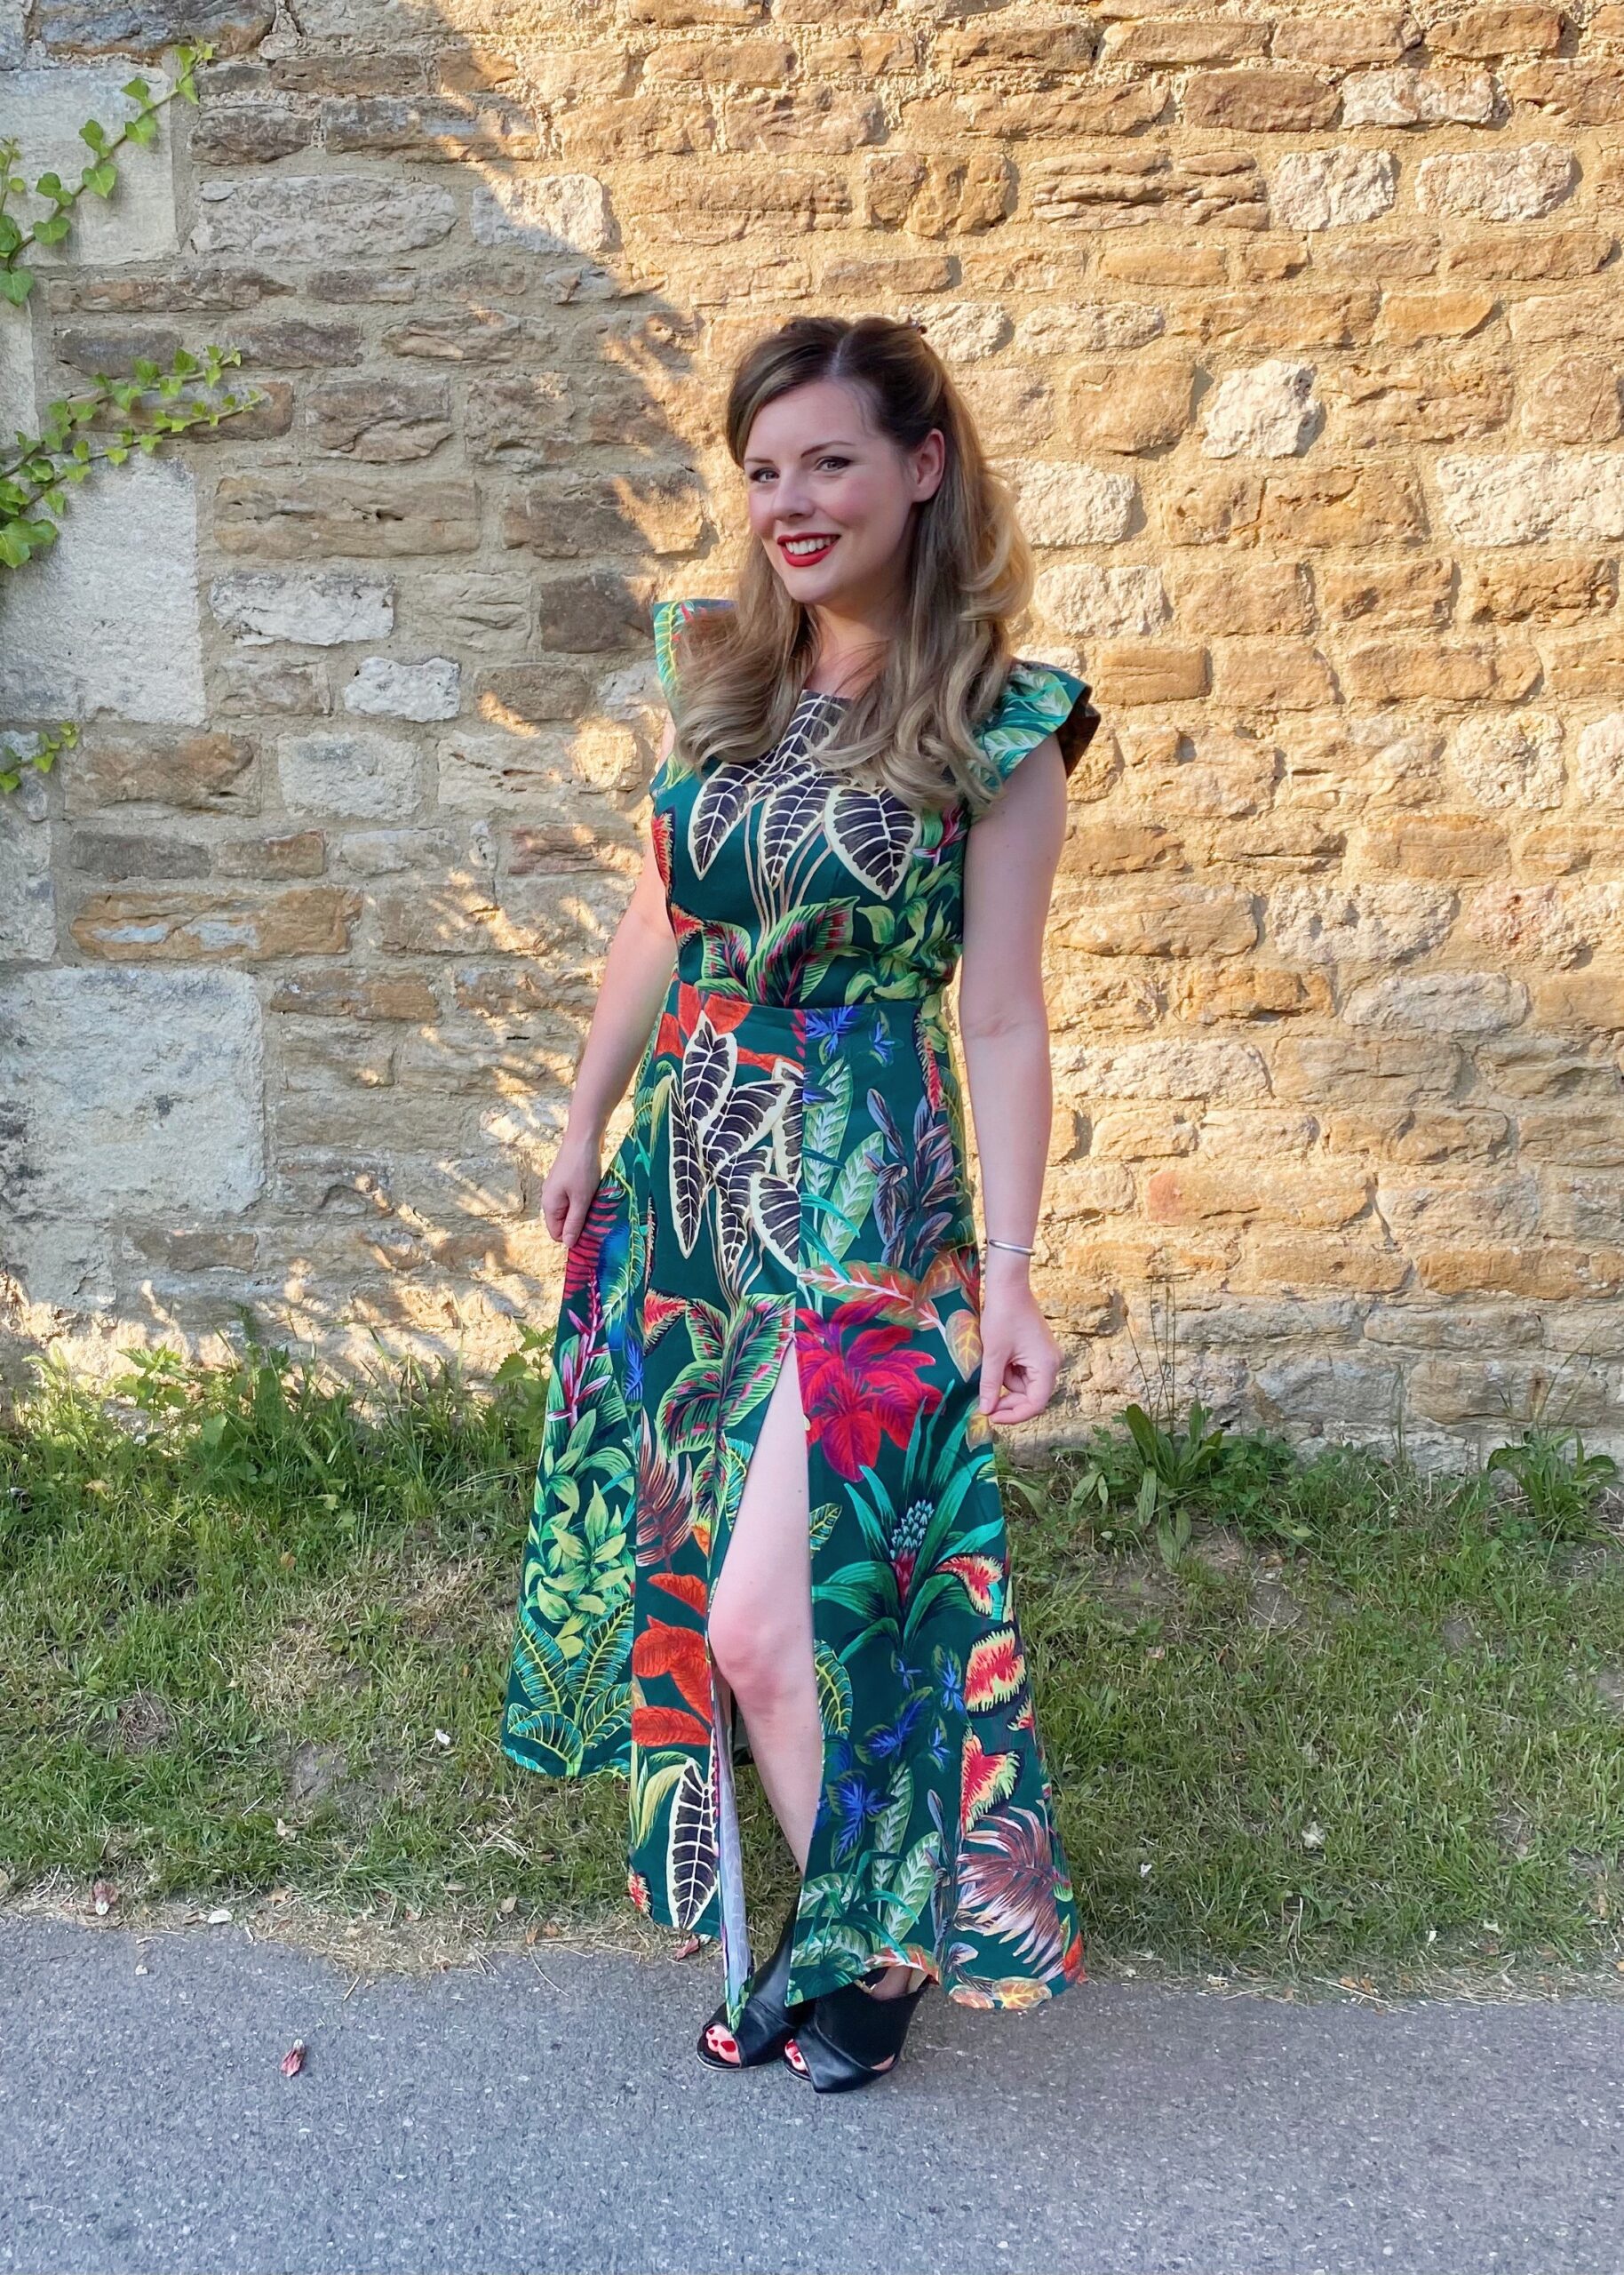
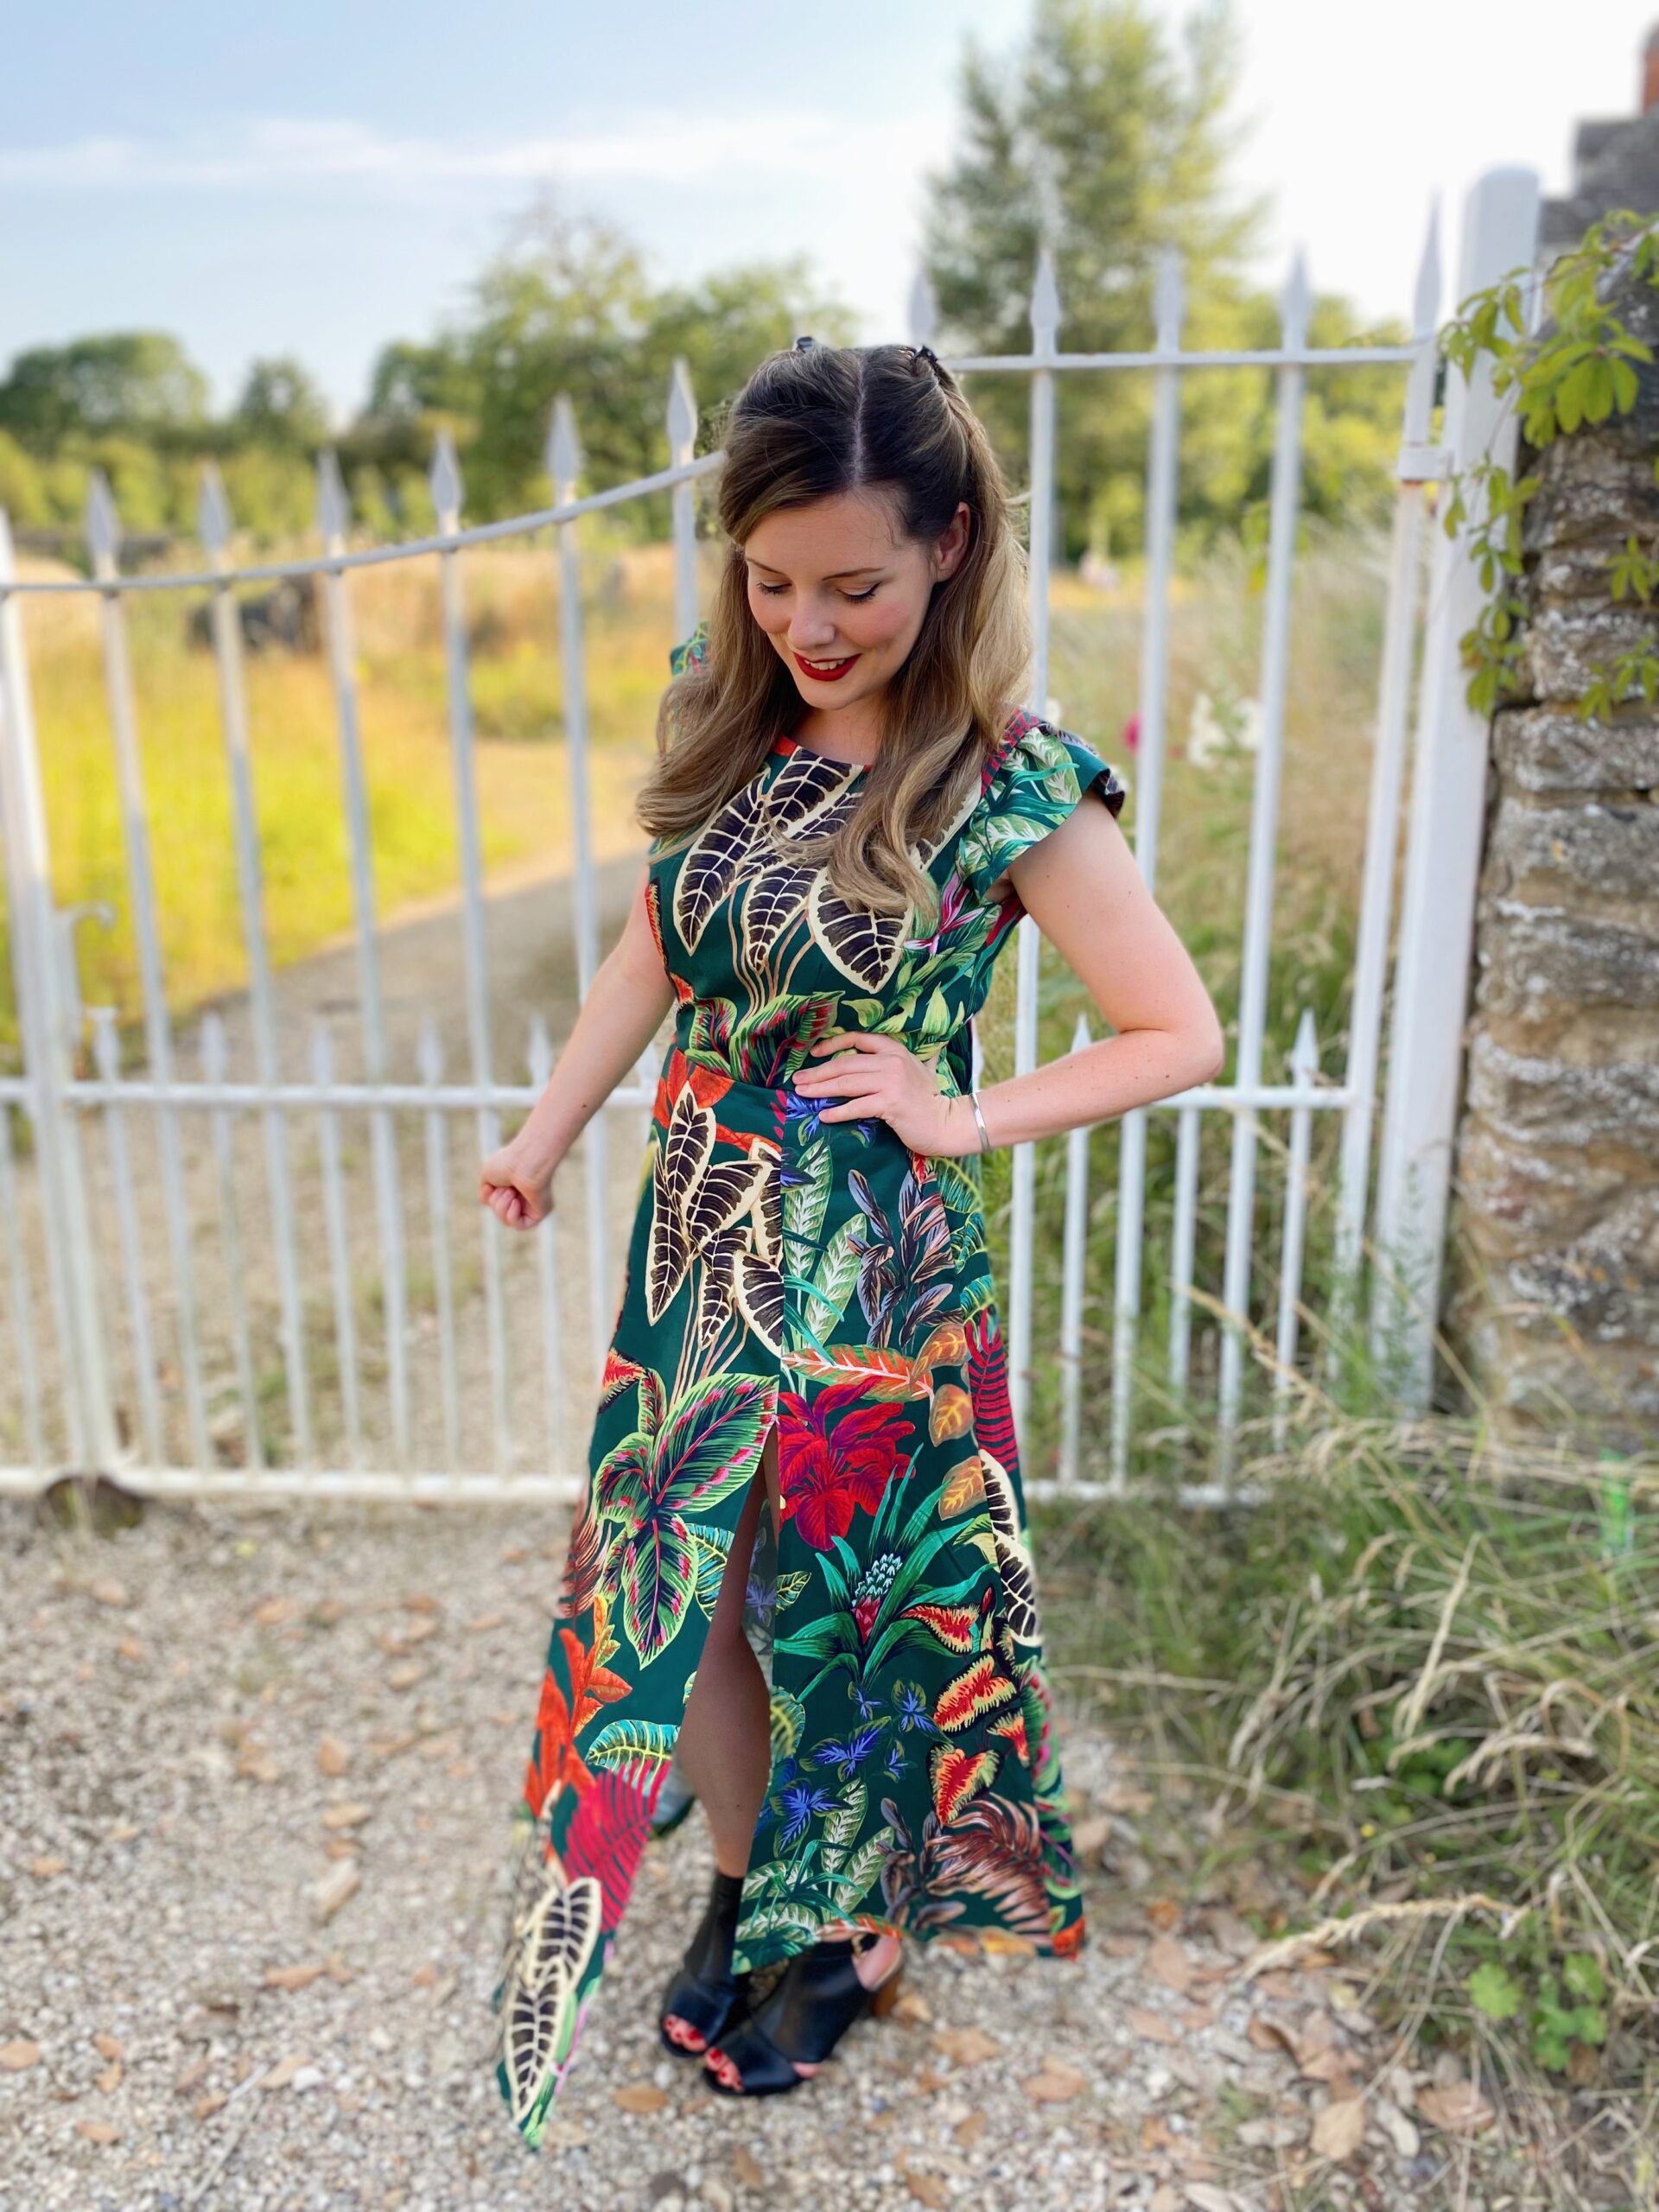
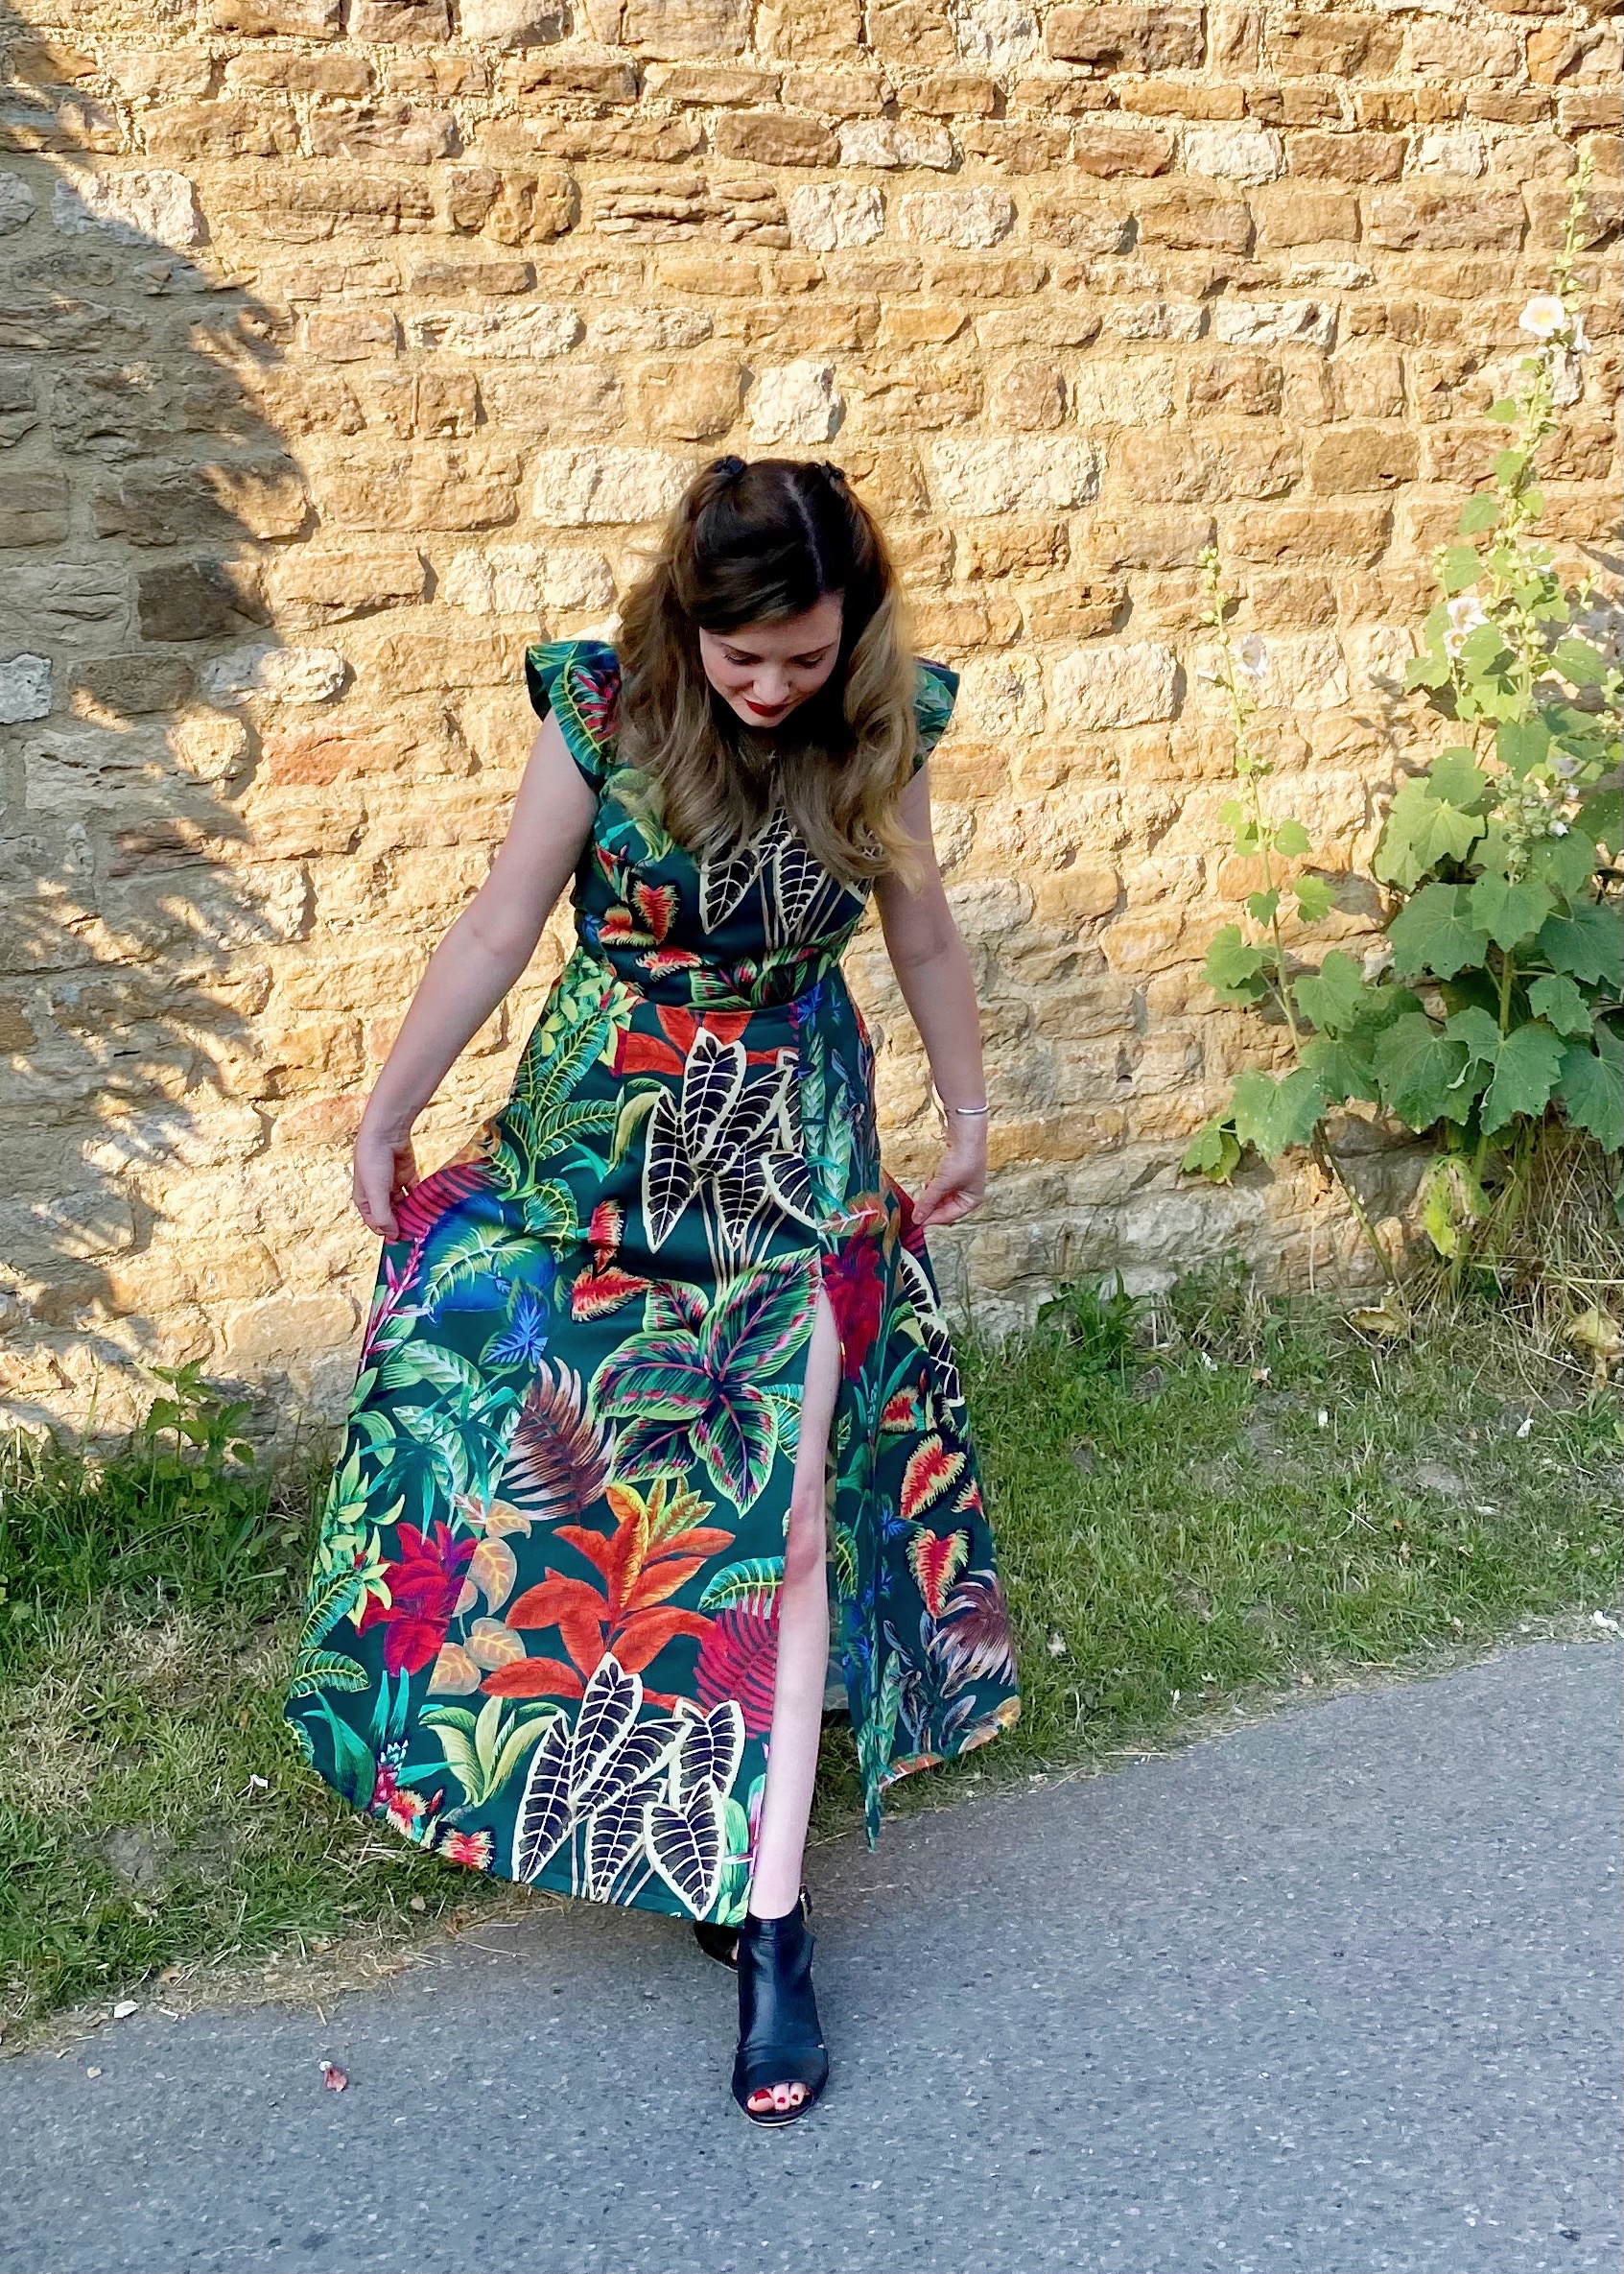
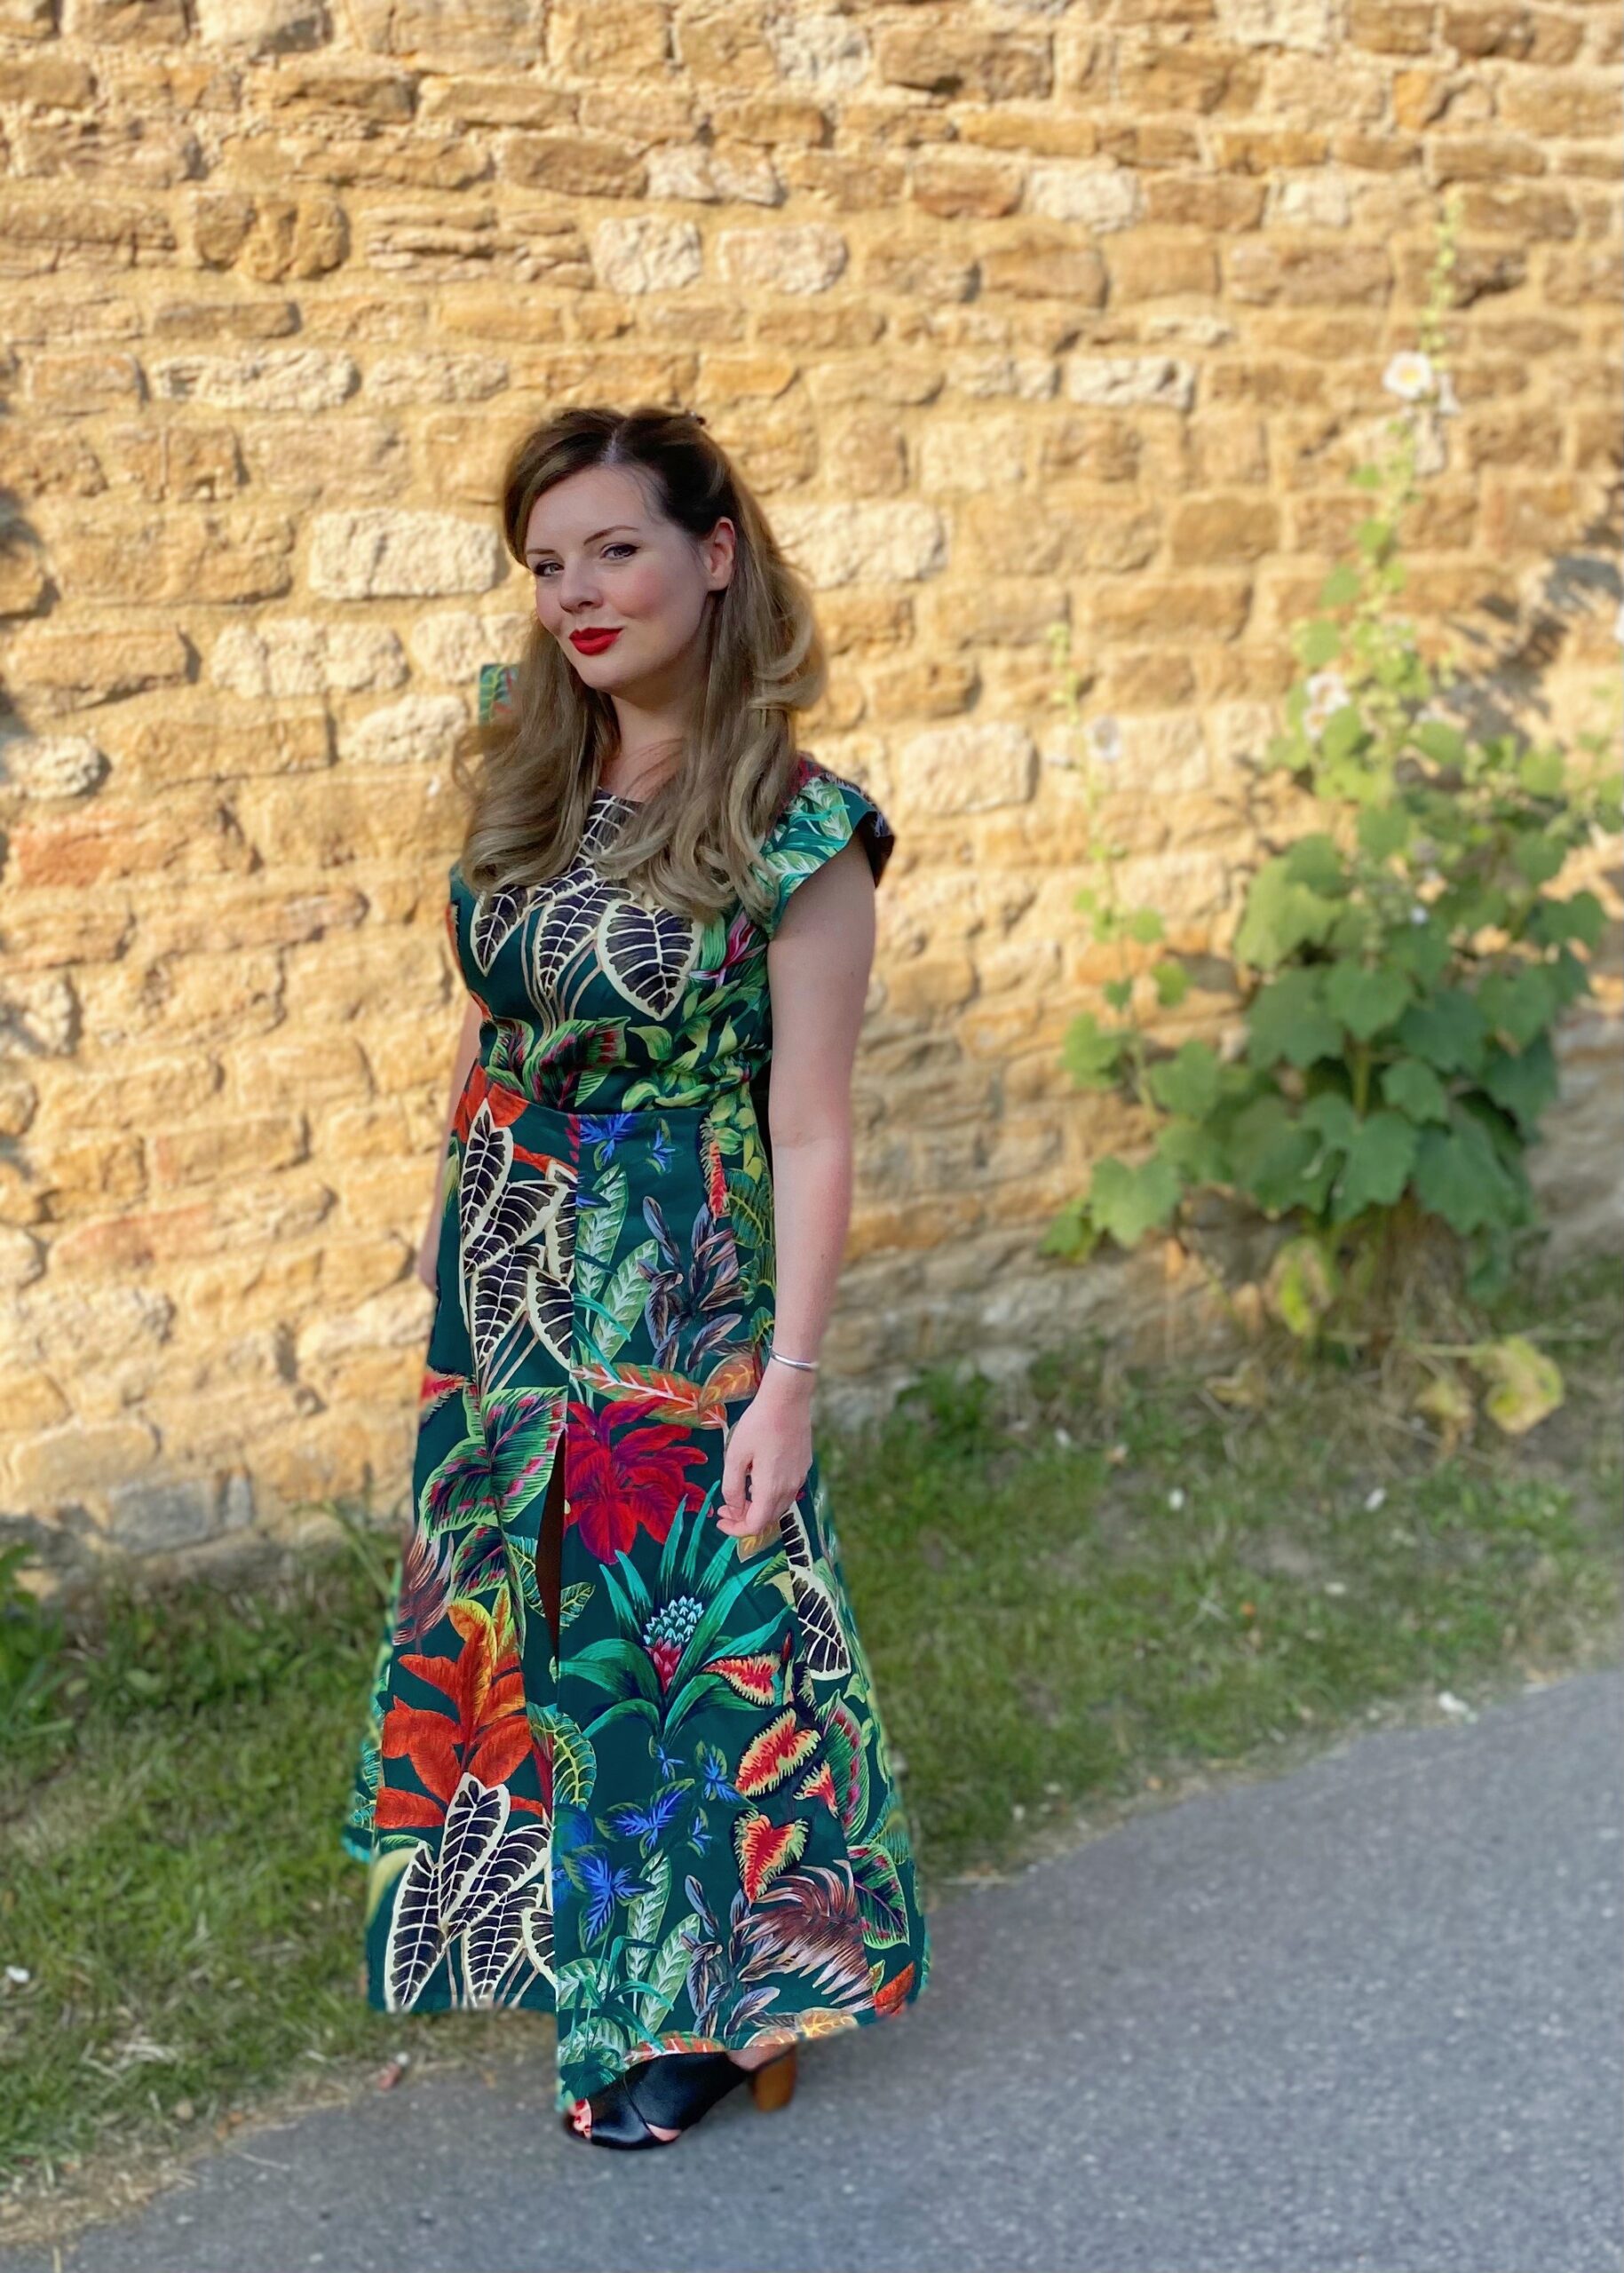
This cotton sateen immediately caught my eye when it landed on the Minerva website and it is even more beautiful in real life! The background is a deep forest green and it is printed with large, lush tropical leaves and plants in vibrant colours; the vertical design of the plants is one-way, so make sure you factor this in when deciding pattern placement. There is the option to have the same print on a white background, which also looks very striking. The structure of this sateen is such a departure from my last Minerva Make — I was wafting around in the lightest, floatiest silk! — it is instead extremely sturdy and crisp, with a very subtle sheen. It is also worth noting this sateen is 100% cotton and not blended with any lycra fibres. The gathering for the sleeve ruffles was quite tricky due to the fabric’s body, but the structure did make pressing, cutting and pinning a breeze though!
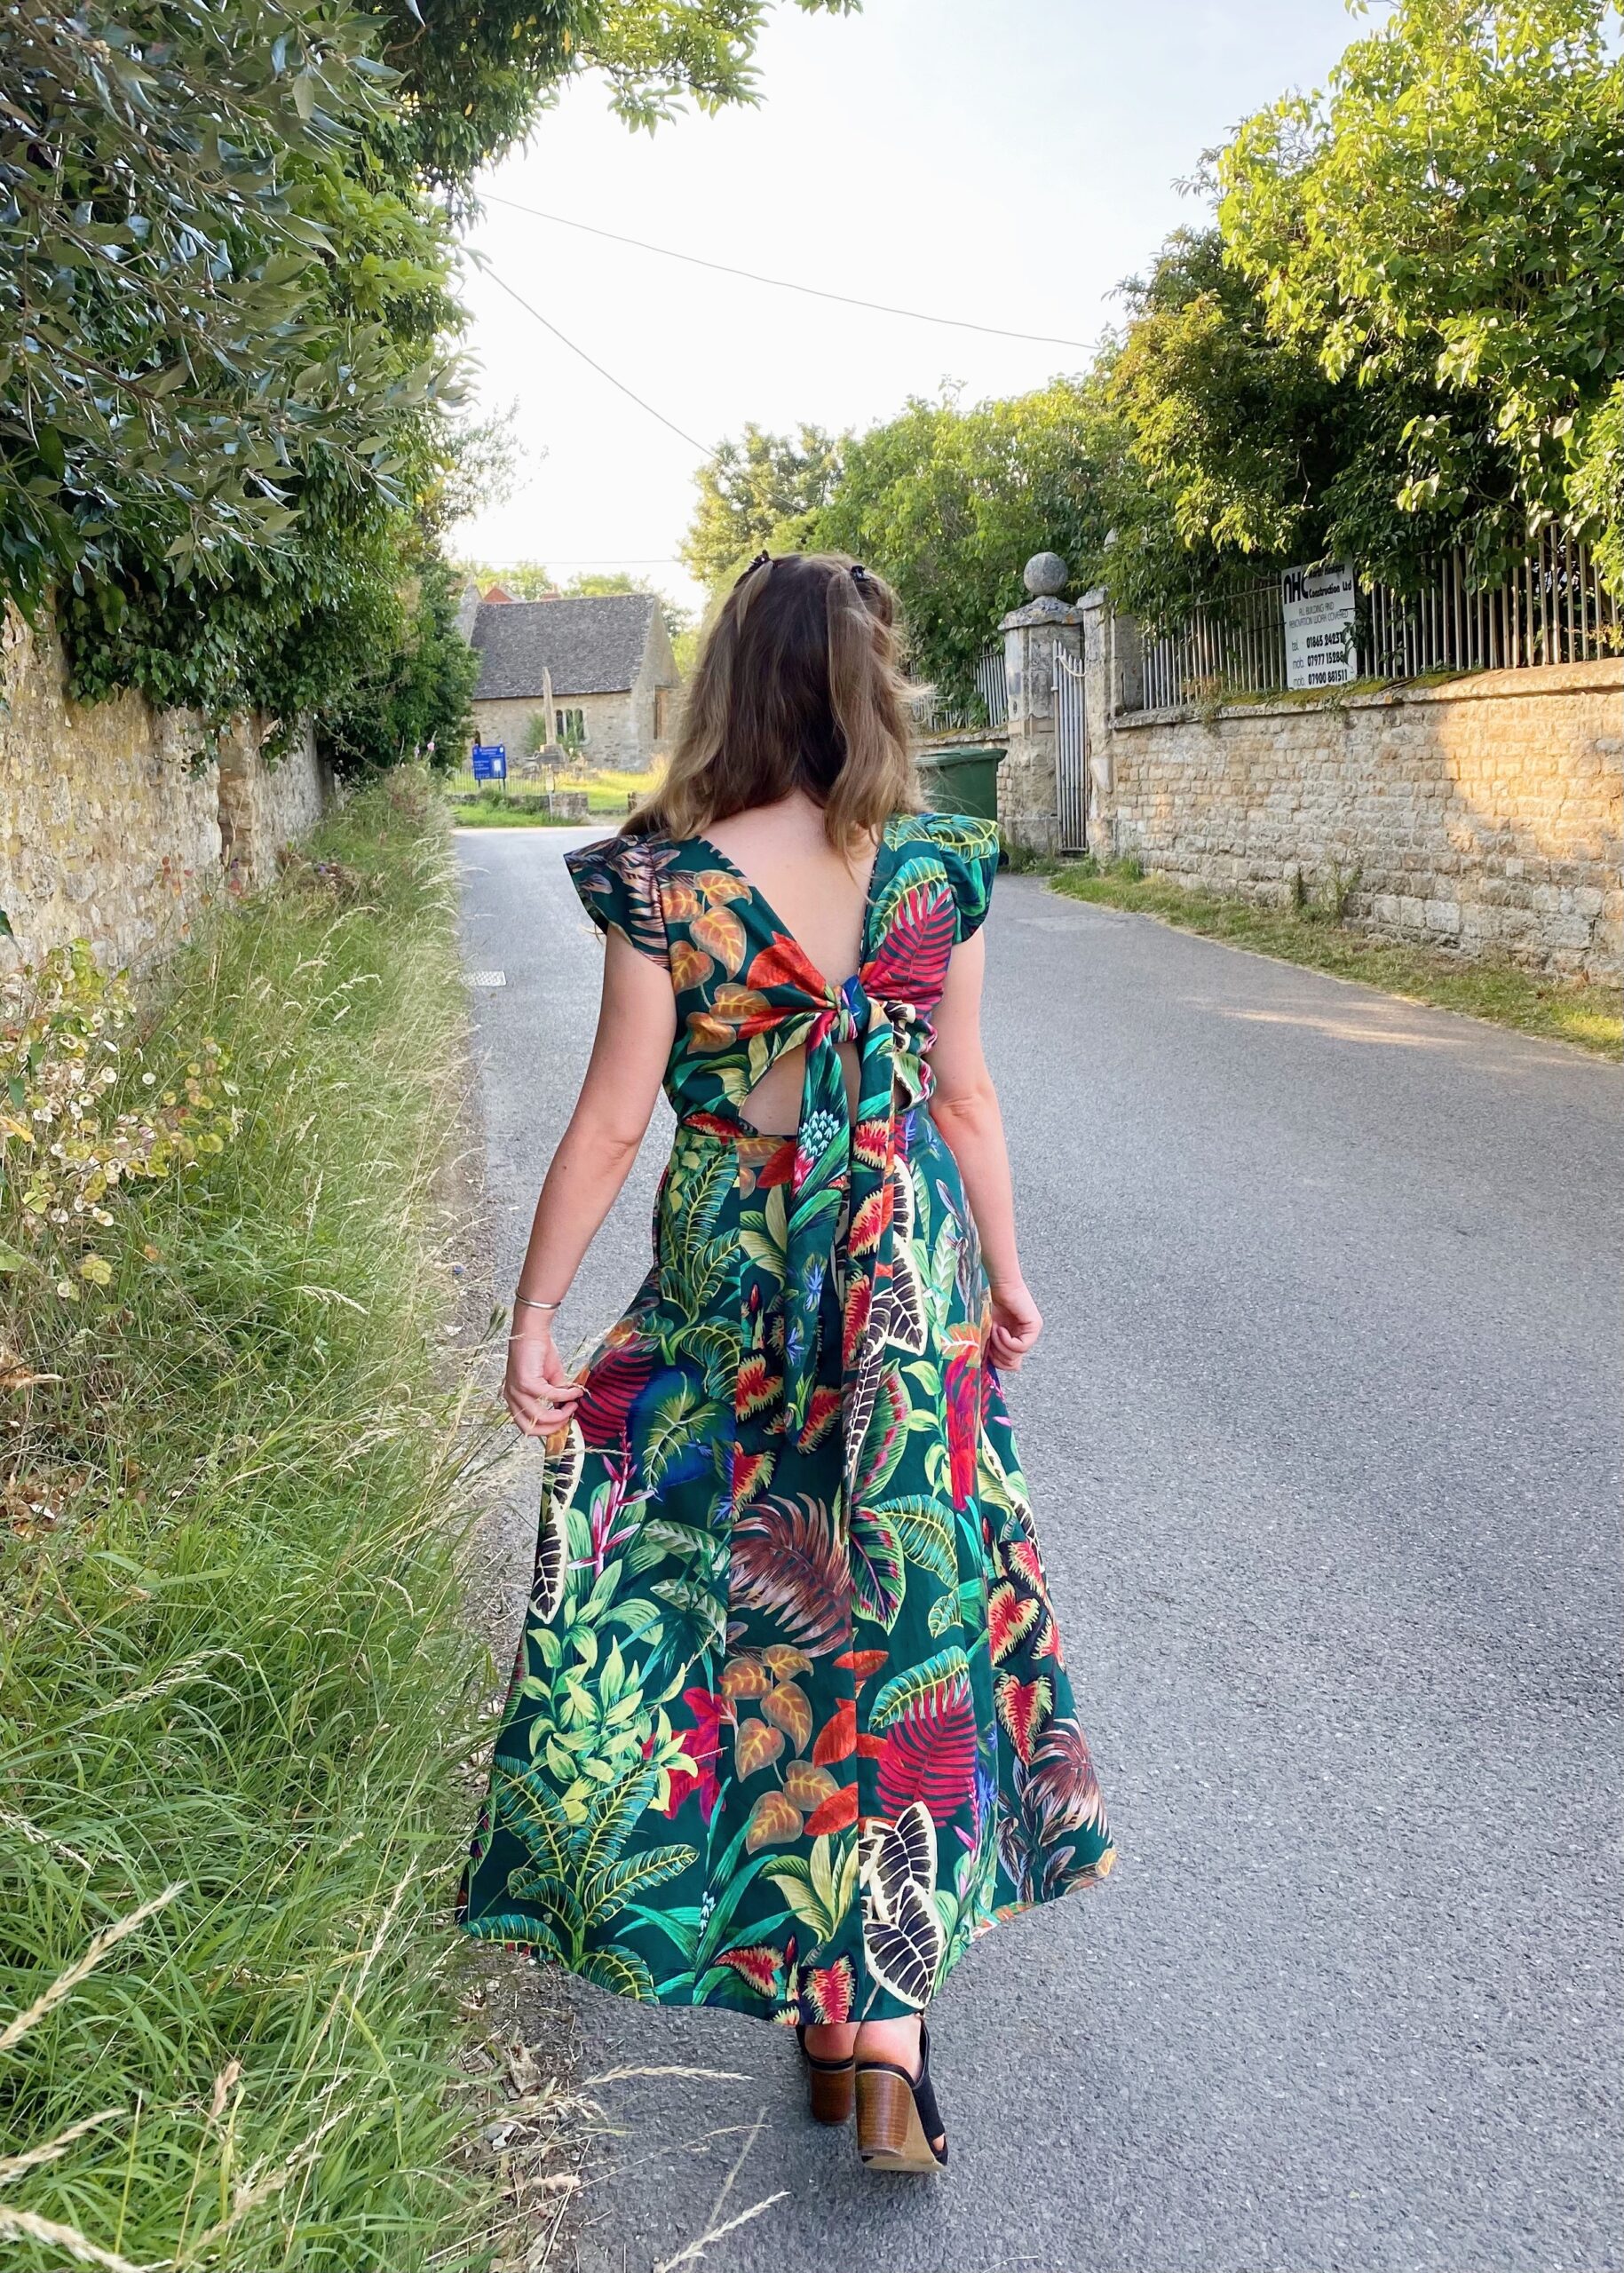
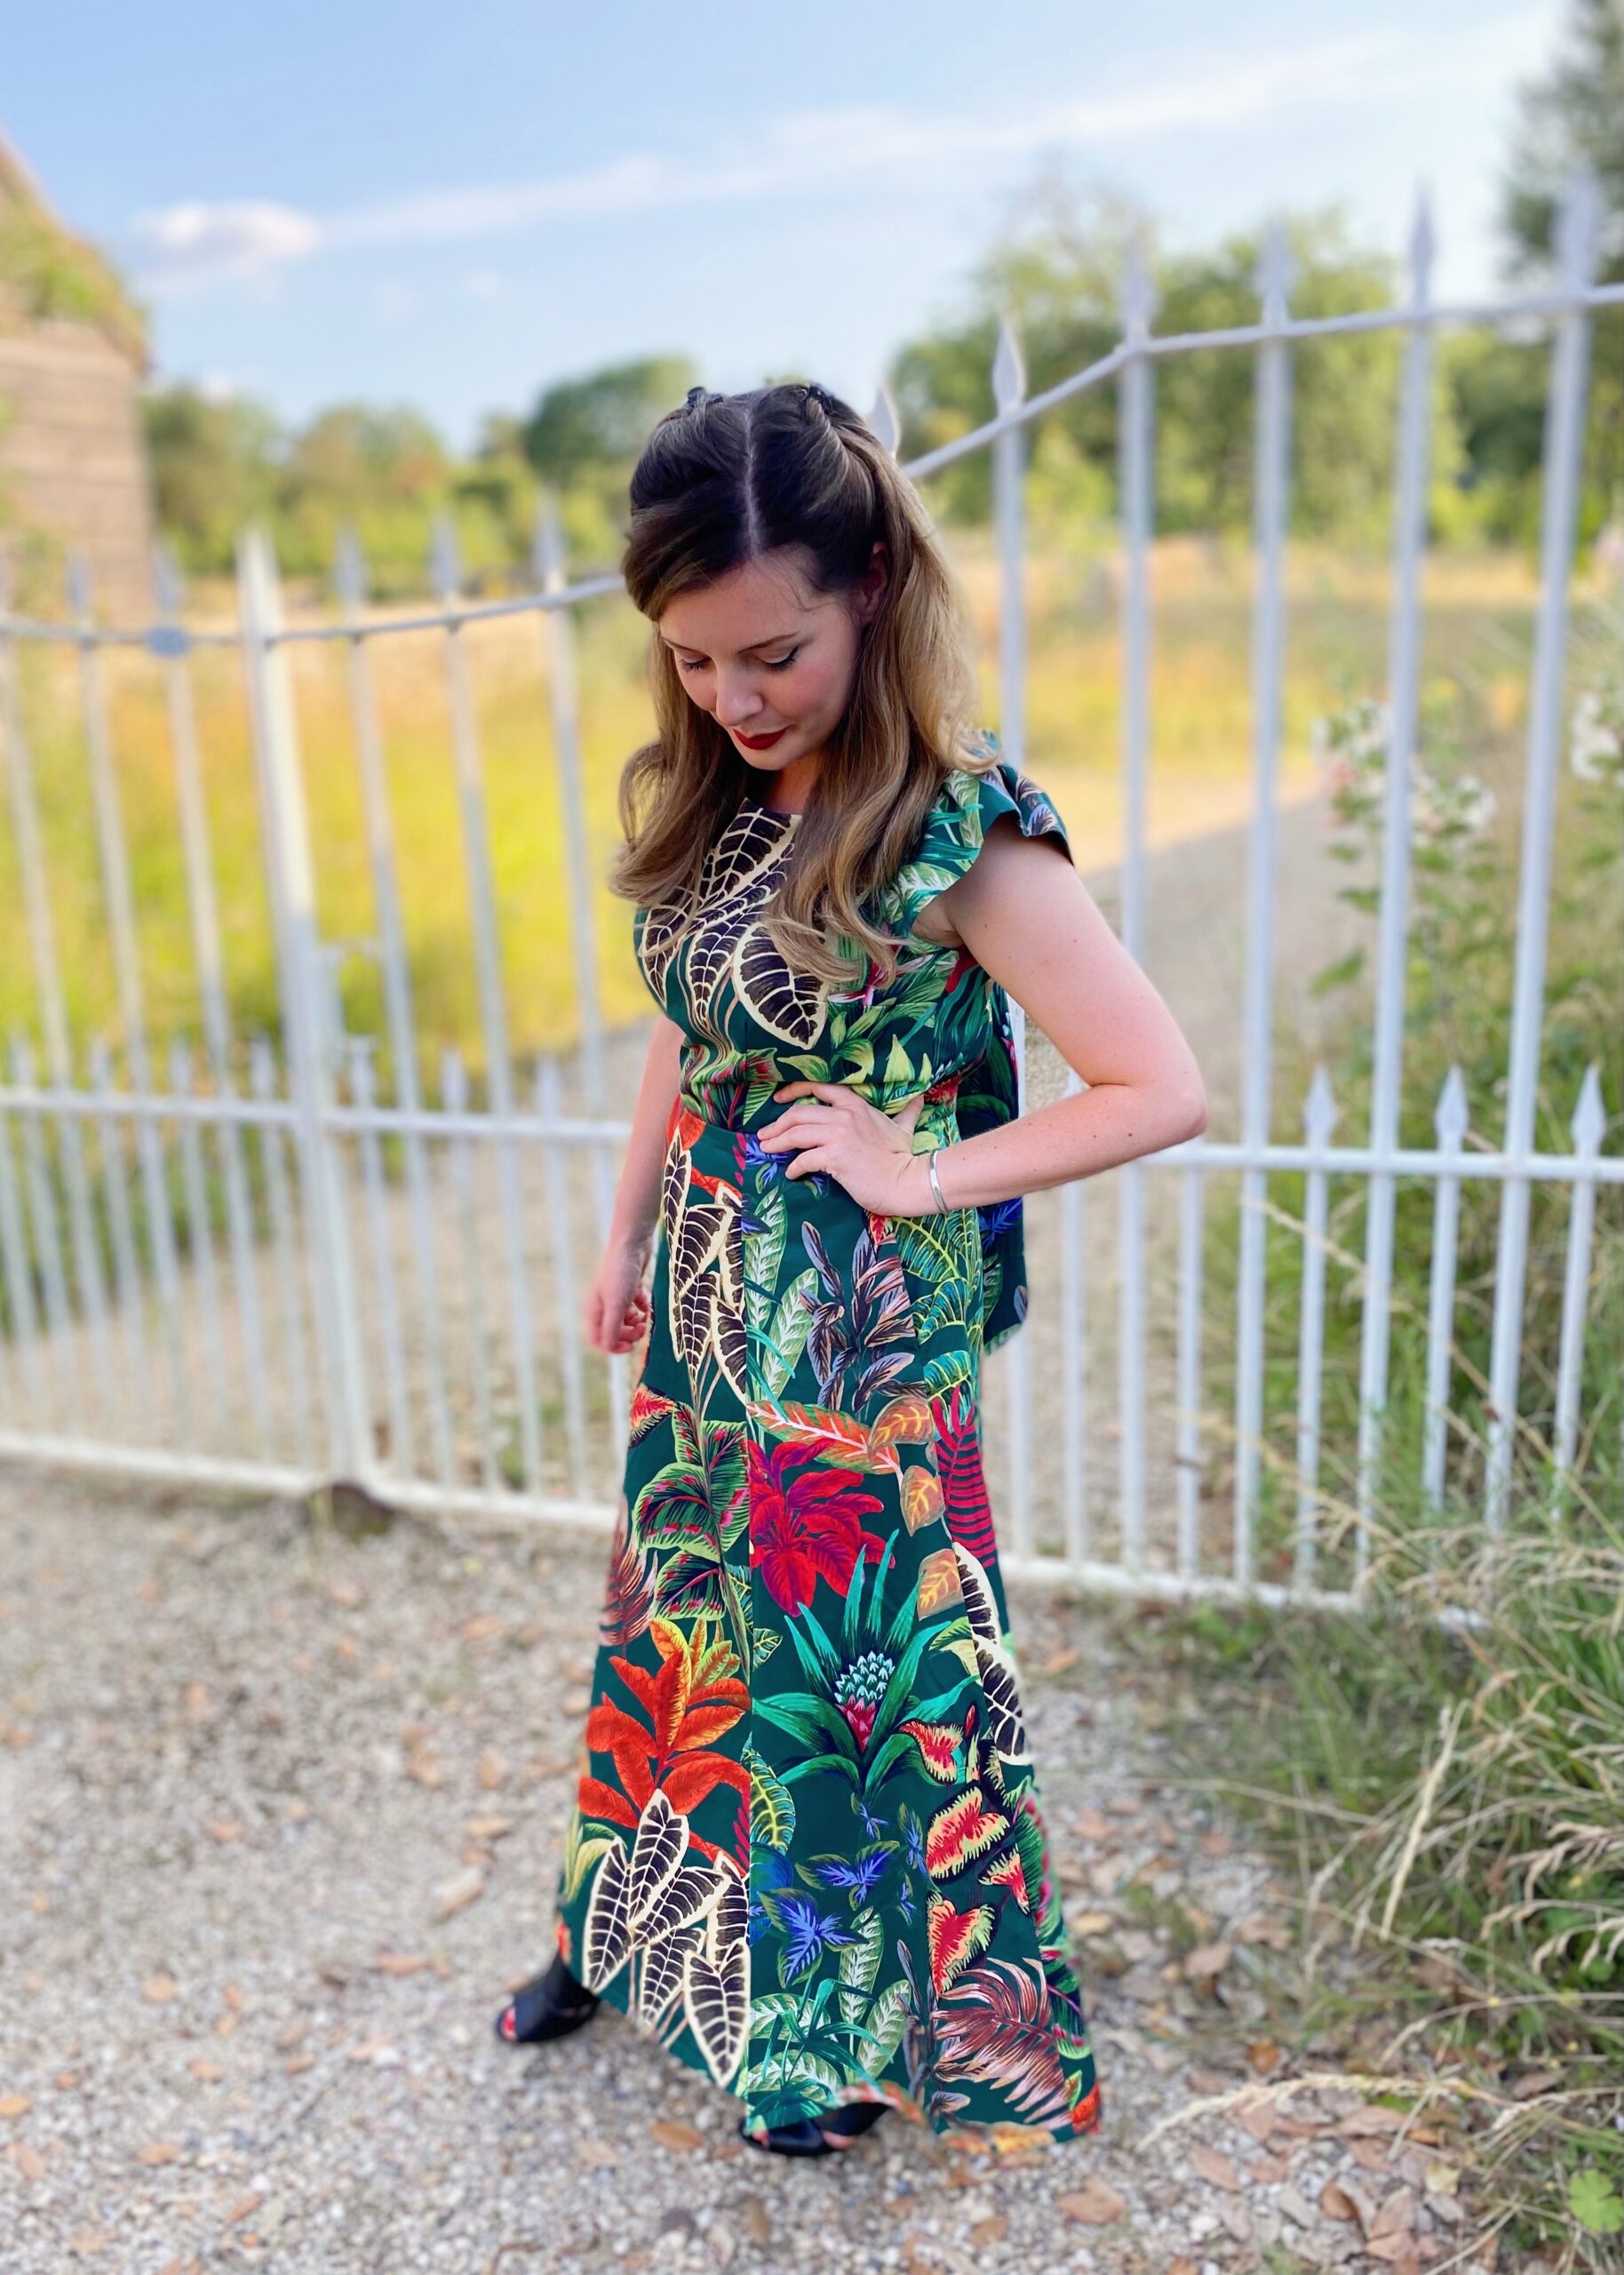
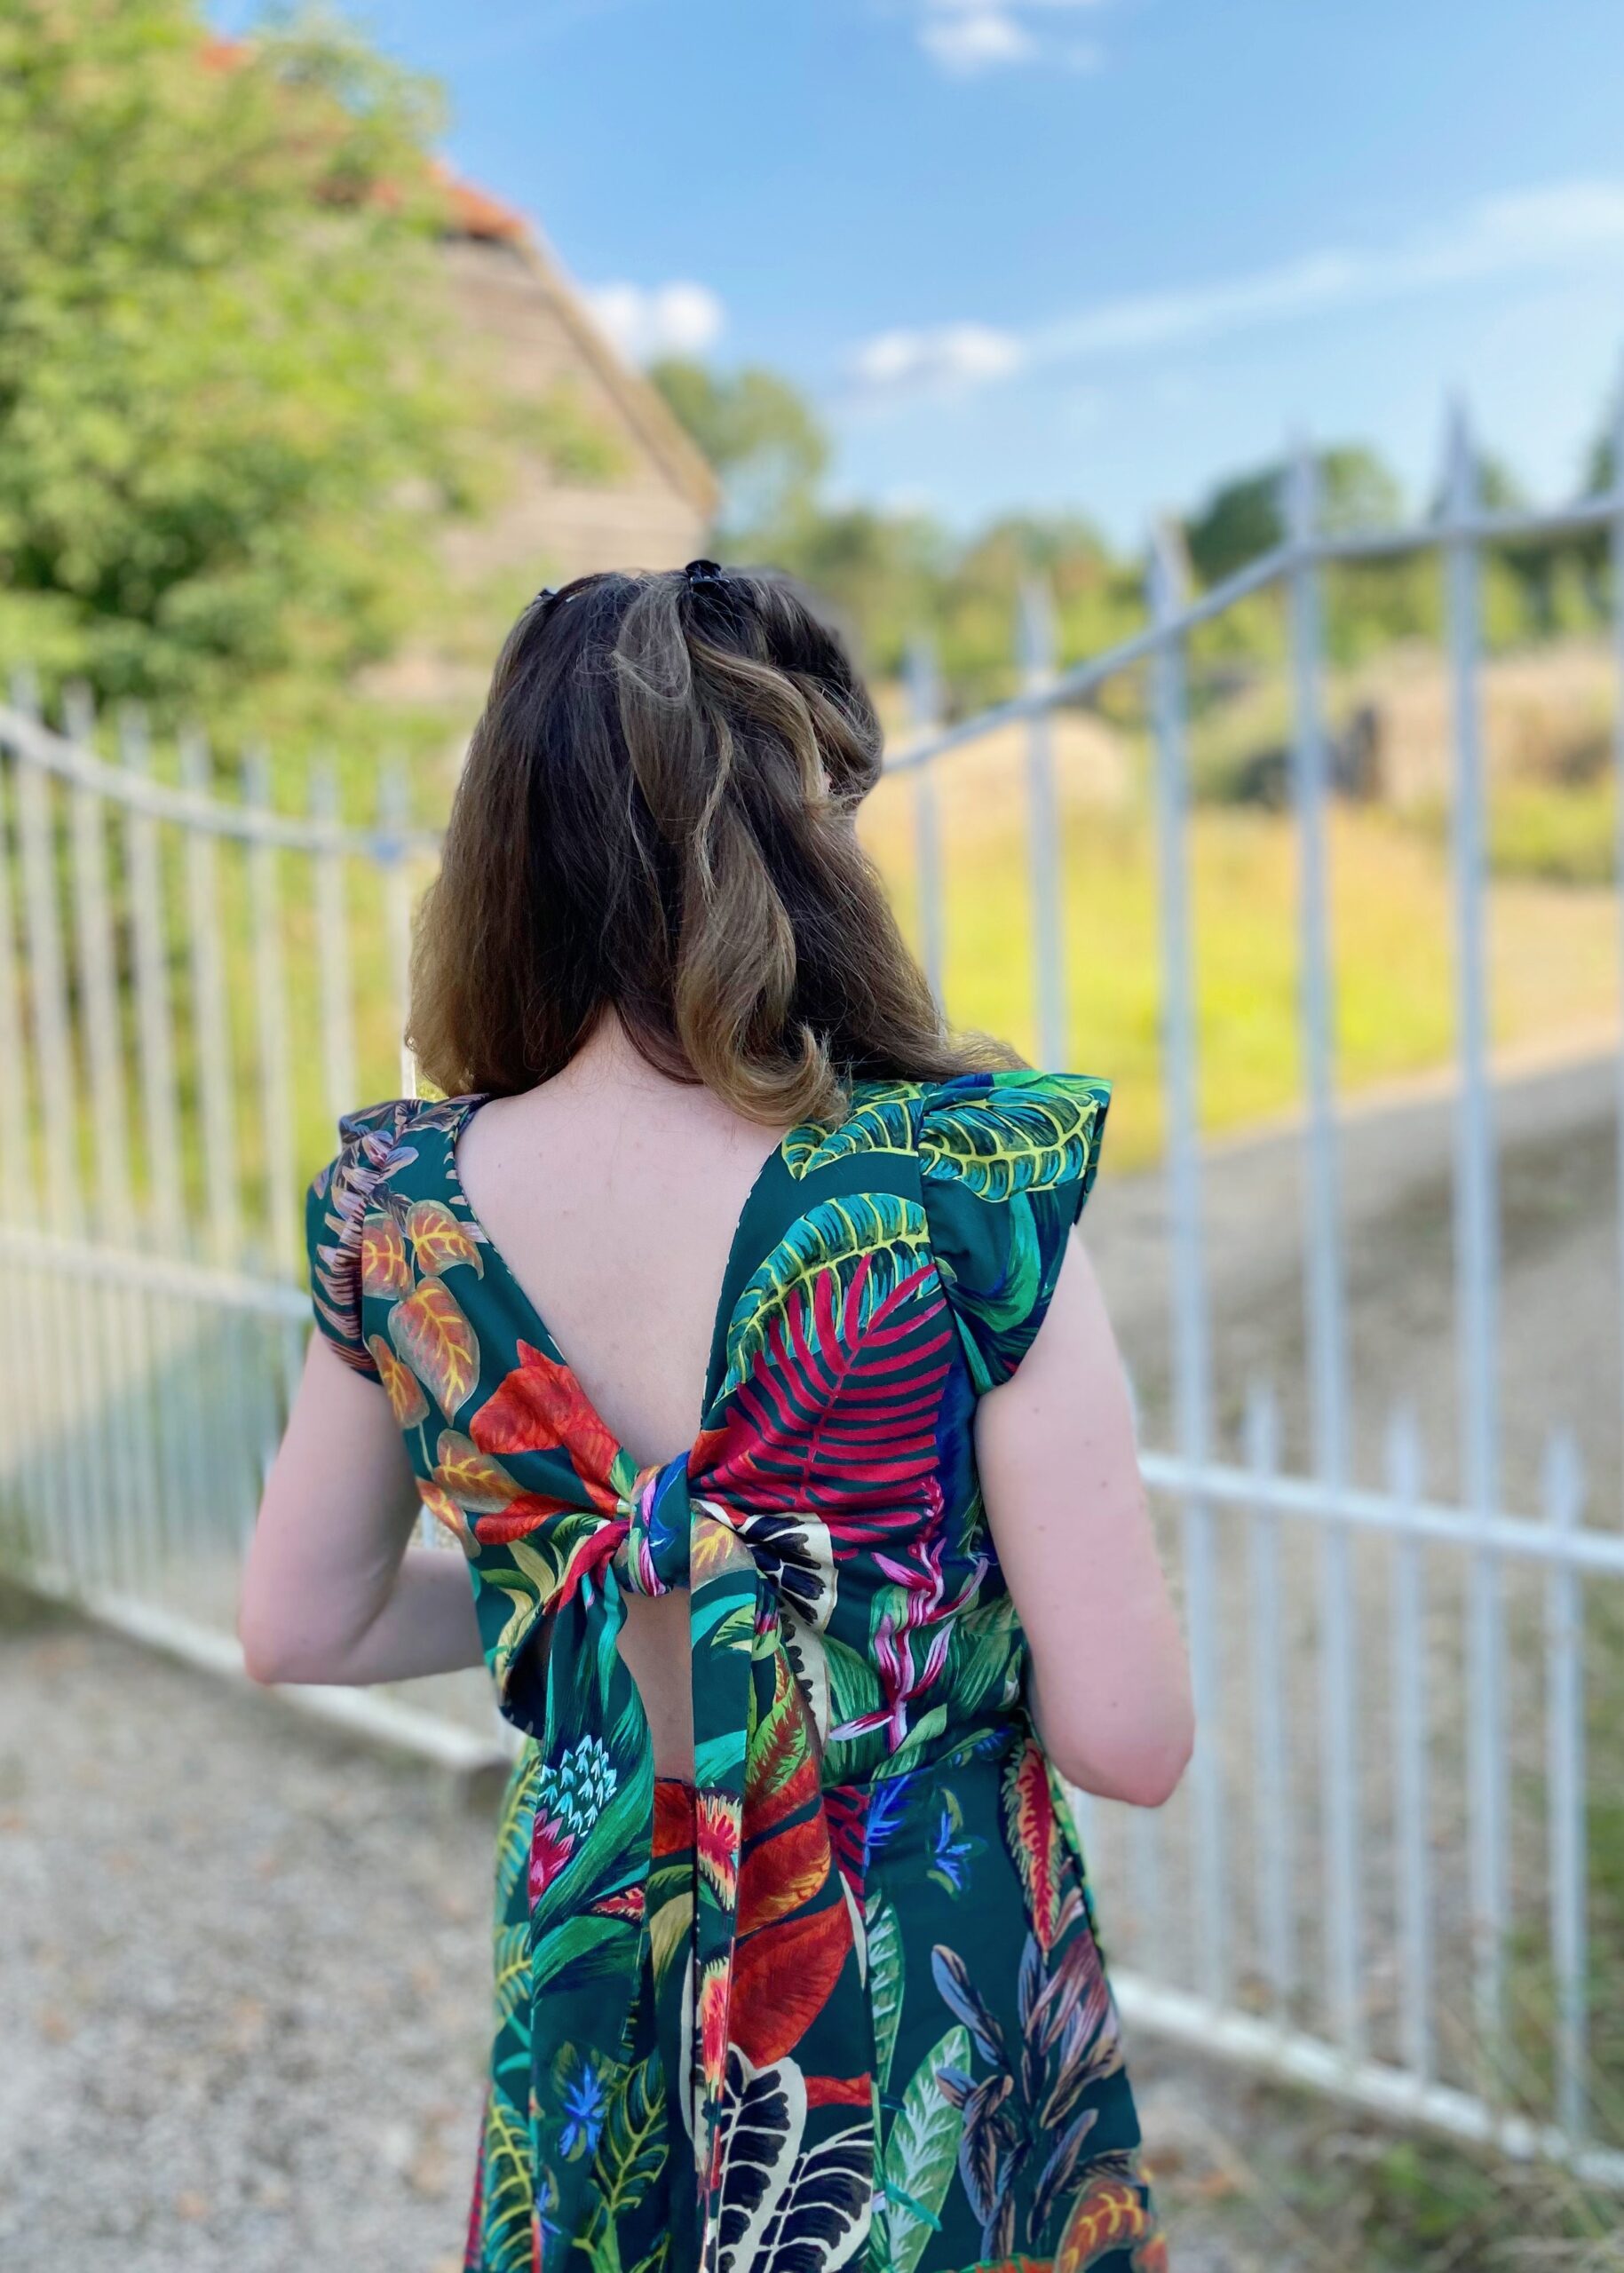
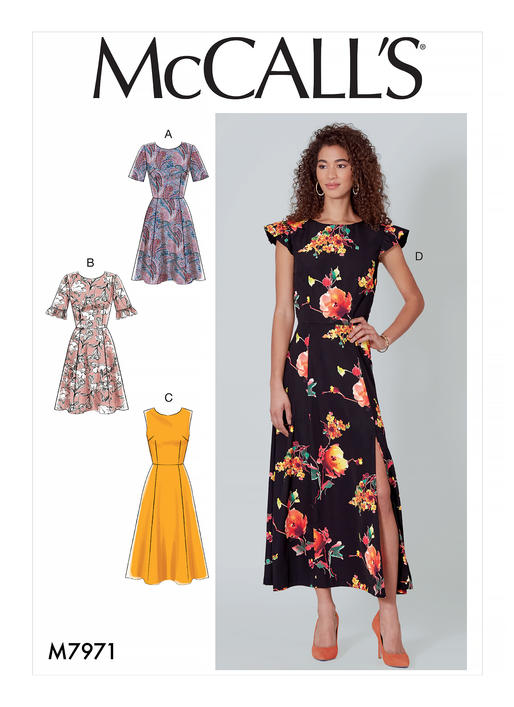
As this fabric doesn’t have much drape, I was looking for quite a structured dress pattern and picked out McCalls 7971. This dress has a classic, fitted bodice with a jewel neckline, a panelled skirt with length variations, and different sleeve options. I went for View D, which has a longer-length midi skirt and a ruffled shoulder detail — I was so drawn to the a thigh-high split! Plus, it has pockets, which is automatically the quickest way to my heart 😊 The original design has an open back with hook and eyes as the closure, but many other sewists have commented that the back bodice doesn’t lay flush against the body… so I promptly hacked to make a tie-back! All I did was draft a new bodice back piece with a large sash integrated, which helps conceal my bra strap. I must admit, I am pretty happy with the final look and it has felt cool on the really hot days we have had recently.
I also lowered and widened the neckline by 1″, as jewel necklines aren’t my favourite, and I raised the height of the split — I just eyeballed it when pinning and basted it in place to make sure I wasn’t going to end up with a serious wardrobe malfunction! At the top of the slit, I reduced the stitch length and backstitched multiple times to really make sure it was reinforced. Apart from these hacks, I didn’t make any alterations to the fit; I cut a size 12 and used the D-cup bodice piece, and found I had plenty of ease.
Both the construction and instructions for this dress were fairly straightforward, with a few minor quibbles. I understitched my pockets — this wasn’t included as a step in the instructions, but I do it on autopilot now — and fully lined the bodice, but I am not super thrilled with the finishing. Only the back waistband is finished with a facing at the zip and the lining isn’t slipstitched in place, so I instead had to serge the lining of the front bodice with the skirt. Perhaps next time I will draft a facing for the front bodice waistband too. I would also use a lightweight fabric for the lining next time, as the seams are quite thick in places, and I would also pinch out some of the excess ease at the lower back to reduce some of the gaping.

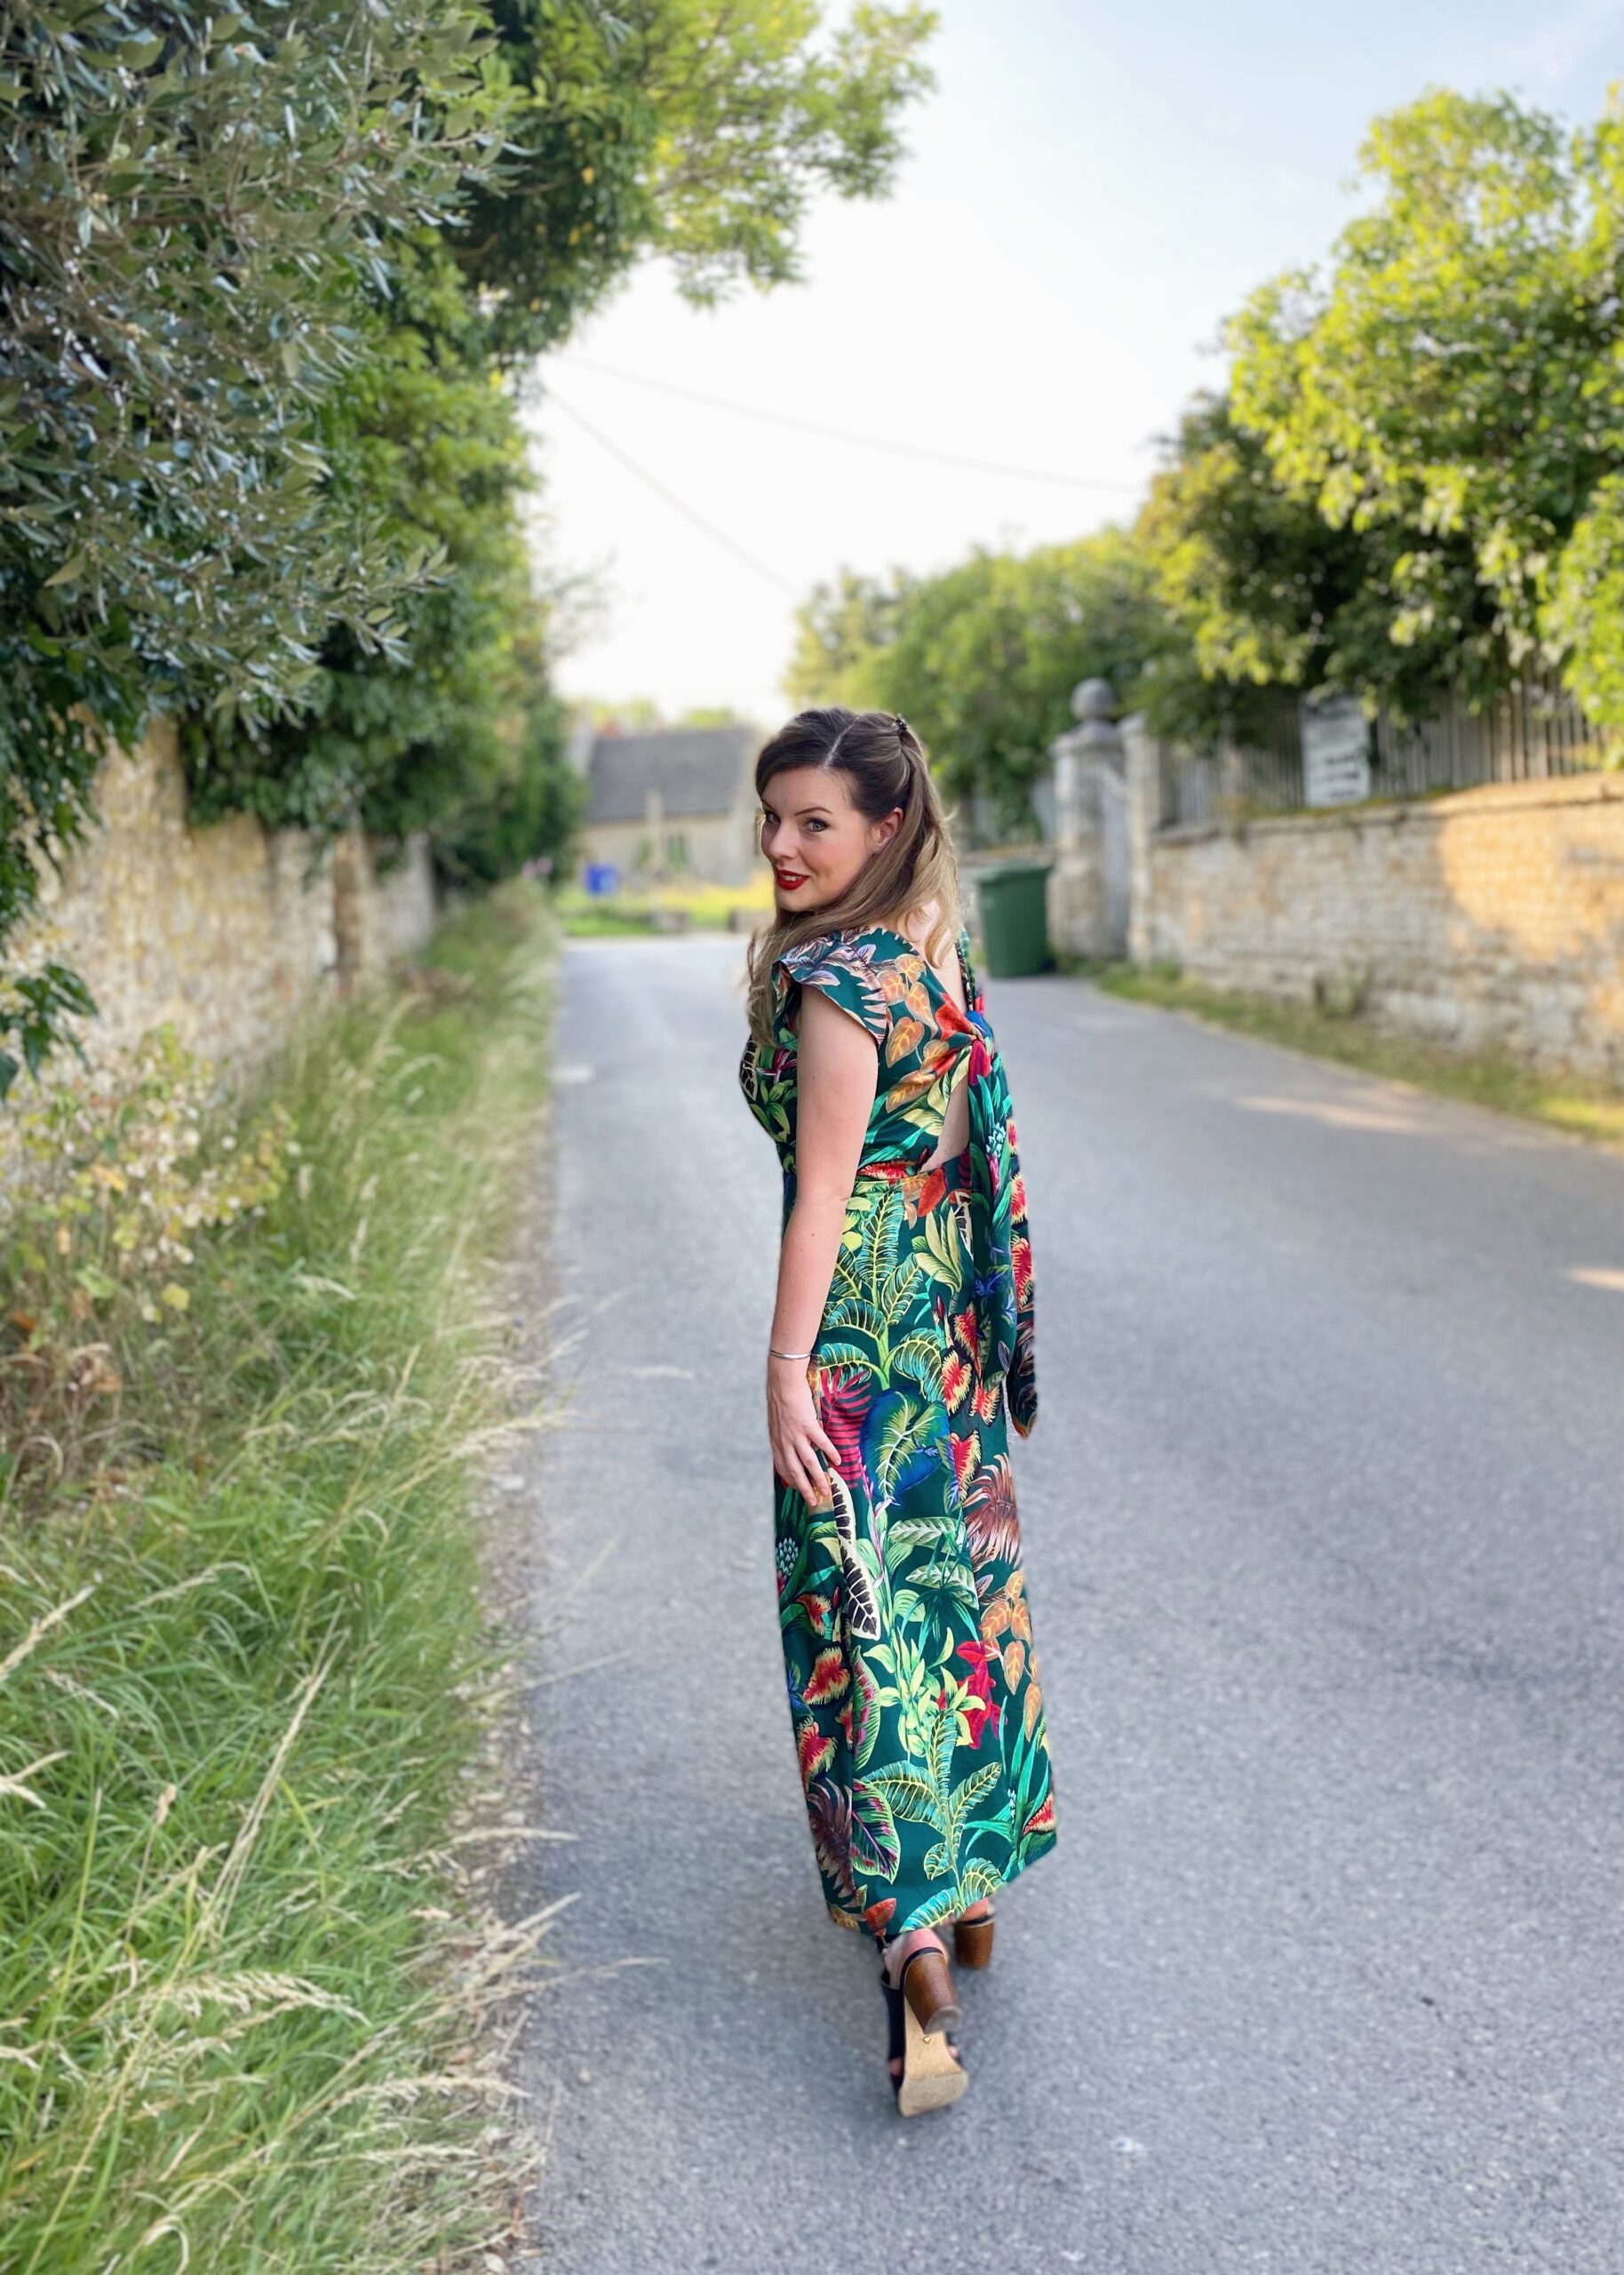
Overall though, this dress is so much fun to wear; it is flirty and bold, dressy without being too dressy, and super comfortable. I would love to make another version of this dress — I am thinking of sizing down and trying a rose-gold sequin knit for ultimate disco vibes!